

Brakes are the unsung heroes of every journey—quiet and reliable, yet crucial for your safety on the road. Over time, brake pads wear down, silently losing their grip until that moment when stopping feels uncertain. But you don’t need to wait for a warning light or a costly mechanic’s visit to know when it’s time for a change. Checking your brake pads yourself is simpler than you might think. With just a few basic tools and a little know-how, you can peek behind the wheels and ensure your brakes are ready to perform when it matters most. Let’s explore how to take this empowering step toward safer driving, starting right at home.
Table of Contents
- Understanding the Importance of Regular Brake Pad Inspections
- Gathering the Essential Tools for a Safe and Effective Check
- Step-by-Step Guide to Removing the Wheel and Exposing the Brake Pads
- Identifying Key Signs of Wear and Damage on Brake Pads
- Evaluating Brake Pad Thickness and When Replacement Is Necessary
- Tips for Reassembling and Testing Your Brakes After Inspection
- Q&A
- In Conclusion
Understanding the Importance of Regular Brake Pad Inspections
Brakes are one of the most vital components of your vehicle’s safety system, and keeping them in top shape requires vigilant attention. Over time, brake pads wear down due to friction, which can significantly impact stopping power and increase the risk of accidents. Regular inspections help you catch early signs of wear and tear, allowing you to replace pads before they become dangerously thin. Ignoring this crucial maintenance step can lead to costly repairs and compromised braking performance.
When checking your brake pads, look for these key indicators:
- Thickness: Most brake pads start at about 12 mm and should be replaced once they reach 3 mm or less.
- Uneven Wear: Inspect for irregular pad surfaces, which might signal a problem with the caliper or brake alignment.
- Noises: Squealing or grinding sounds are often a sign that the pads are worn and need immediate attention.
- Vibration: A pulsating brake pedal can suggest warped rotors often caused by worn pads.
| Pad Thickness | Status |
|---|---|
| 12 mm | New |
| 6-3 mm | Monitor Closely |
| Less than 3 mm | Replace Immediately |
Gathering the Essential Tools for a Safe and Effective Check
Before diving under the wheels, assembling the right gear is crucial to ensure a smooth, safe, and precise brake pad inspection. Start with a sturdy jack and a pair of jack stands to securely lift and support your vehicle, keeping safety front and center. A lug wrench is essential for loosening and removing the wheel bolts effortlessly. Don’t forget a flashlight or a headlamp; proper illumination reveals the condition of brake components hidden deep within the wheel assembly. Lastly, grab your gloves to protect your hands from dirt and sharp edges.
Aside from the basic tools, having a few extras can enhance your inspection experience. A digital caliper is perfect for measuring brake pad thickness with accuracy, while a crevice tool or flathead screwdriver helps pry off stubborn wheel covers or calipers. Organize these tools neatly, so every step flows without interruption. Here’s a quick resource table to guide your tool kit preparation:
| Tool | Purpose |
|---|---|
| Hydraulic Jack & Jack Stands | Lift and securely support vehicle |
| Lug Wrench | Remove wheel bolts |
| Flashlight/Headlamp | Illuminate brake components |
| Gloves | Protect hands from dirt and injury |
| Digital Caliper (Optional) | Accurate pad thickness measurement |
| Flathead Screwdriver/Crevice Tool | Assist in removing components |
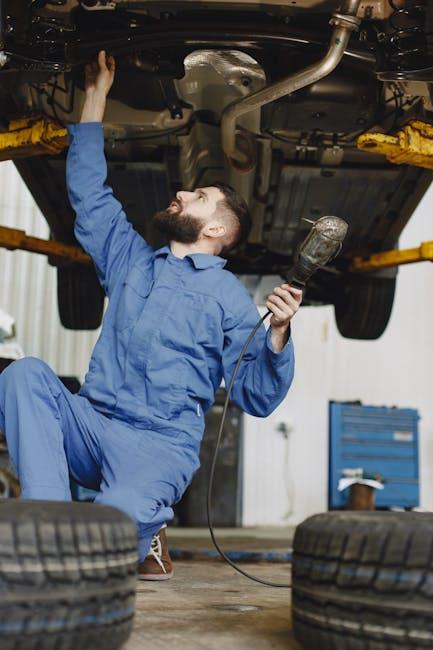
Step-by-Step Guide to Removing the Wheel and Exposing the Brake Pads
Begin by parking your vehicle on a flat, stable surface and engaging the parking brake to ensure safety. Use a jack to lift the car and secure it with jack stands for added stability. Before loosening any nuts, clean the wheel hub area lightly to remove dirt and grime. Next, use a lug wrench to loosen the wheel bolts, turning them counterclockwise. Once the bolts are loose, carefully remove the wheel to reveal the brake assembly beneath.
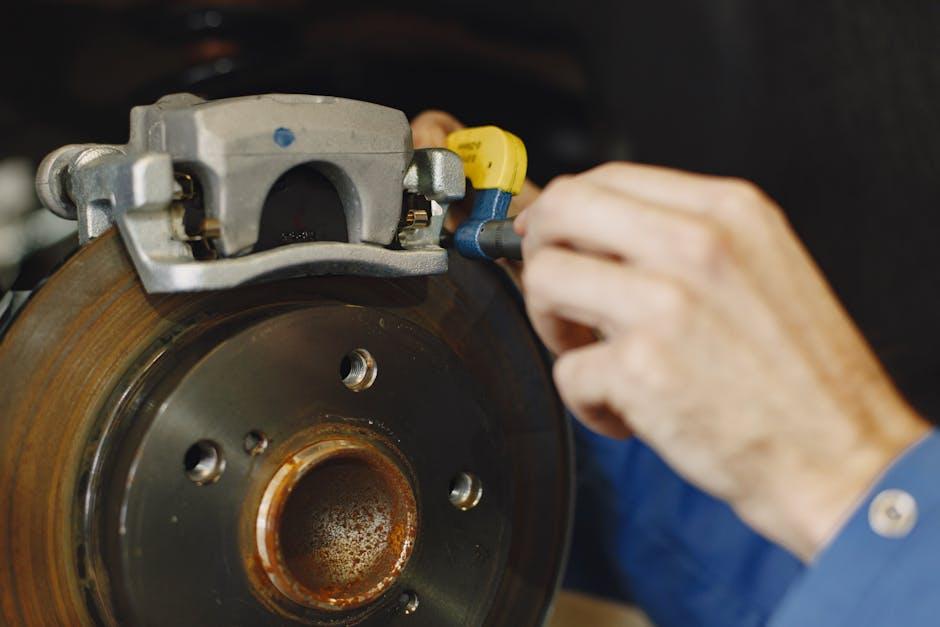
With the wheel removed, focus on identifying the brake caliper and pads. In most cars, the brake pads sit on either side of the brake rotor, cushioned by the caliper mechanism. Look out for these key components:
- Brake Rotor: The large, circular metal disc connected to the wheel hub.
- Brake Caliper: The clamp-like component holding the brake pads in place.
- Brake Pads: The friction material that presses against the rotor to slow down the vehicle.
| Tool | Purpose |
|---|---|
| Jack & Jack Stands | Lift and stabilize the vehicle |
| Lug Wrench | Loosen and remove wheel bolts |
| Wire Brush | Clean brake assembly surfaces |

Identifying Key Signs of Wear and Damage on Brake Pads
When inspecting your brake pads, one of the first indicators of wear is the thickness of the pad material. Most new brake pads start with about 8-12 millimeters of friction material, and once this wears down to under 3 millimeters, it’s a clear sign they need replacing. You may notice uneven wear patterns, which can point to issues like a stuck caliper or misaligned components. Visual signs such as cracks, glazing (a shiny, glass-like surface), or chunks missing from the pad surface should never be ignored as they compromise braking efficiency and safety.
- Squeaking or squealing: Often caused by a built-in wear indicator; a warning sound that pads are thinning out.
- Deep grooves or scoring: These can happen if metal parts contact the rotor, indicating extreme wear.
- Vibration when braking: This can suggest uneven pad wear or damage to the brake disc.
| Brake Pad Thickness | Condition | Recommended Action |
|---|---|---|
| 8-12 mm | New or good condition | No immediate action needed |
| 3-7 mm | Moderate wear | Plan replacement soon |
| < 3 mm | Severe wear | Replace immediately |

Evaluating Brake Pad Thickness and When Replacement Is Necessary
When inspecting your brake pads, the primary focus should be on the remaining thickness of the friction material. Most new brake pads start with about 10 to 12 millimeters of thickness. As a general guideline, if the pad material is worn down to 3 millimeters or less, it’s time to consider replacing them. To check, remove the wheel and look through the caliper to spot the pad thickness. You can also use a brake pad gauge tool for a more precise measurement. Remember, some pads have built-in wear indicators—small metal tabs that produce a squealing sound when the pad has worn down to a critical level.
Here are key signs to help you decide if replacement is necessary:
- Visual wear: Pads appear very thin or unevenly worn.
- Squealing noises: Audible metal contact when braking.
- Reduced braking response: Increased stopping distances or a softer brake pedal.
- Vibrations: Pulsing sensation during braking.
| Thickness (mm) | Condition | Action Needed |
|---|---|---|
| Above 6 | Good | Keep monitoring |
| 3 – 6 | Moderate wear | Plan replacement soon |
| Below 3 | Critical wear | Replace immediately |

Tips for Reassembling and Testing Your Brakes After Inspection
Once your brake pads have been inspected and, if necessary, replaced, ensuring everything is put back together correctly is key to maintaining optimal performance and safety. Start by carefully aligning the brake caliper and making sure the pads sit snugly in their slots without forcing any components. Double-check the tightness of all bolts using a torque wrench, referencing your vehicle’s specifications to avoid over- or under-tightening. Don’t rush; a secure fit prevents uneven wear and potential brake failure down the line.
Before you hit the road, perform a thorough testing routine to confirm your brakes are functioning flawlessly. Pump the brake pedal slowly to rebuild hydraulic pressure and observe for firmness—any sponginess might indicate air in the lines needing bleeding. Also, test in a safe environment at low speeds. Below is a simple checklist to guide your post-assembly testing:
- Pedal response feels firm and consistent
- No unusual noises during braking
- Brake warning lights are off
- Vehicle stops smoothly without pulling to one side
| Test Step | What to Look For | Action if Not Met |
|---|---|---|
| Pedal Feel | Firm, not spongy | Bleed the brake system |
| Braking Noise | Quiet or natural wear sounds | Inspect for debris or incorrect pad fit |
| Vehicle Pulling | Straight line stopping | Check caliper alignment and pad wear |
Q&A
Q&A: How to Check Brake Pads Yourself
Q1: Why should I check my brake pads regularly?
A1: Your brake pads are the unsung heroes of road safety, gripping the rotors to slow you down. Worn-out pads can lead to longer stopping distances and costly repairs, so regular checks help ensure your brakes are reliable and your journey safe.
Q2: What tools do I need to check my brake pads at home?
A2: Most of the time, all you need is a flashlight, a jack with a lug wrench, and possibly a flathead screwdriver. Some vehicles allow you to see the pads through the wheel spokes without removing anything—making the check quick and simple.
Q3: How do I safely inspect my brake pads?
A3: First, park on a flat surface and engage the parking brake. If needed, loosen the lug nuts, jack up the car, and remove the wheel. Shine your flashlight through the caliper to spot the brake pads. If they look thin—less than about ¼ inch—it’s time to replace them.
Q4: What signs indicate my brake pads need replacement?
A4: Besides visual thinning, listen for squealing or grinding noises during braking. Your brake pedal might also feel soft or require more effort. These cues often suggest your brake pads have worn down to a safety-critical limit.
Q5: Can I replace brake pads myself after checking them?
A5: If you’re mechanically confident and have the right tools, replacing brake pads can be a rewarding DIY job. However, brakes are crucial for safety—if you’re unsure, it’s wise to consult a professional mechanic.
Q6: How often should I check my brake pads?
A6: Aim to inspect your brake pads every 6,000 miles or at least twice a year. Frequent checks are especially important if you drive in stop-and-go traffic or hilly areas where brakes wear faster.
Q7: Is there a difference between checking front and rear brake pads?
A7: Yes. Front brake pads generally wear out faster due to more stopping power being applied to the front wheels. Checking both front and rear pads separately ensures all braking components maintain their integrity.
Q8: What if I can’t see the brake pads through the wheels?
A8: No worries! Removing the wheel reveals the brake caliper and pads clearly. Take care during removal and reinstallation, following your vehicle’s manual for guidance to stay safe.
Q9: Does checking brake pads yourself save money?
A9: Absolutely! Early detection of wear can prevent damage to rotors and calipers, avoiding expensive repairs. Plus, you invest a bit of time instead of paying for inspection fees.
Q10: Can worn brake pads damage other parts of my braking system?
A10: Yes. When pads wear down completely, metal contacts the rotor, causing grooves and reducing braking efficiency. This can lead to rotor replacement and more extensive brake work.
Checking brake pads doesn’t have to be a mystery reserved for mechanics. With a little know-how, you can keep your brakes in top shape and make every stop safe and sound.
In Conclusion
Taking the time to check your brake pads yourself is a small effort that can lead to big rewards—ensuring your safety and saving you money down the road. With a keen eye and a bit of patience, you can stay informed about your vehicle’s health and avoid unexpected stops that are less than smooth. So next time you reach for your tools, remember: a confident driver knows when to trust their instincts—and their hands. Happy inspecting, and drive safe!