

When the summer heat presses in and your car’s air conditioning starts to falter, the culprit is often a sneaky leak hiding within the system. Identifying these leaks early can save you from a sweaty, uncomfortable drive and costly repairs down the road. But how do you find something that’s invisible to the naked eye? In this article, we’ll guide you through practical steps and clever techniques to uncover those elusive leaks in your car’s AC, helping you keep your cool no matter how high the mercury rises.
Table of Contents
- Signs Your Car AC Might Be Leaking Refrigerant
- Common Sources of AC Leaks in Vehicles
- Tools and Materials for Detecting AC Leaks
- Step-by-Step Guide to Locating an AC Leak
- How to Use UV Dye and Leak Detectors Effectively
- When to Seek Professional Help for AC Leak Repairs
- Q&A
- Key Takeaways
Signs Your Car AC Might Be Leaking Refrigerant
When your car’s AC suddenly starts blowing warm air or doesn’t cool as effectively as before, it’s often a clear indication that there might be a problem with the refrigerant. One of the first hints is a noticeable drop in cooling performance despite the system running as usual. Additionally, if you detect an unusual, sweet chemical smell inside the cabin, it could be a sign that refrigerant is escaping into the air. Moisture collecting around AC components or visible oily residue on hoses and connections are subtle but telling clues of a potential leak.
Keep an eye out for these common symptoms that might mean a refrigerant leak is brewing under the hood:
- Reduced cooling power: AC struggles to maintain cold air output.
- Hissing sounds: Soft noises near AC lines or compressor can signal a leak.
- Frost buildup: Ice forming on refrigerant lines, especially when the AC is on.
- Increased humidity: The cabin feels more muggy or damp.
- Unusual smells: Sweet or chemical odors inside the vehicle.
Common Sources of AC Leaks in Vehicles
Leaking refrigerant is a common issue that reduces the efficiency of your car’s air conditioning system, often stemming from worn or damaged components. Hoses and O-rings can deteriorate over time due to heat and vibration, compromising their ability to maintain a sealed system. The condenser, usually positioned at the front of the vehicle, is exposed to road debris and corrosion, making it a frequent culprit of punctures or cracks. Additionally, seals around the AC compressor and evaporator core can fail, leading to subtle leaks hidden deep within the system that are harder to detect but equally damaging.
Here’s a quick rundown of the typical weak points prone to leakages:
- Low-pressure service port: A place where refrigerant is added; the cap or valve can degrade.
- High-pressure service port: Similar vulnerabilities as the low-pressure side but under higher stress.
- Expansion valve or orifice tube: Prone to clogging or seal degradation.
- AC lines and fittings: Experience wear and tear from engine heat and movement.
| Component | Common Leak Cause | Leak Indicator |
|---|---|---|
| Condenser | Corrosion/Puncture from debris | Oil stains on front grille |
| Compressor Seals | Wear over time | Hissing noise when AC is on |
| Hoses & O-rings | Cracks and aging | Visible refrigerant oil at connections |

Tools and Materials for Detecting AC Leaks
Before you embark on your leak detection journey, assembling the right gear is crucial. Detecting leaks in a car’s AC system requires precision instruments and materials that make the process straightforward and effective. Among the essentials are UV leak detection kits, which come with fluorescent dye and a UV light to illuminate even the tiniest escapes of refrigerant. Additionally, a reliable electronic leak detector can sense refrigerant gas and pinpoint leaks invisible to the naked eye. Don’t forget handy tools like a set of manifold gauges to monitor pressure levels and a good pair of gloves to keep your hands safe from chemicals.
- UV leak detection kit (dye + UV flashlight)
- Electronic leak detector
- Manifold gauge set
- Safety gloves & goggles
- Soap solution spray (for bubble testing)
- Flashlight for inspection in dim areas
To give you a clearer overview, here is a quick reference table outlining the tools, their primary use, and why they’re indispensable:
| Tool/Material | Purpose | Why Essential |
|---|---|---|
| UV Leak Detection Kit | Reveals leaks through glowing dye | Makes invisible leaks visible |
| Electronic Leak Detector | Detects refrigerant gas presence | Pinpoints leaks quickly |
| Manifold Gauge Set | Measures pressure in AC lines | Helps diagnose leak location |
| Soap Solution Spray | Creates bubbles on leak sites | Simple visual leak confirmation |
Step-by-Step Guide to Locating an AC Leak
Begin by visually inspecting the most common culprit areas where leaks tend to appear. Grab a flashlight and carefully examine around the AC compressor, hoses, and condenser for any signs of oily residue or dye if you’ve added UV tracer. Pay close attention to the connections and joints, as these are vulnerable points where refrigerant may escape. It’s also helpful to check the evaporator case inside the vehicle’s dashboard, although accessing it might require some dismantling. As you inspect, keep an eye out for cracks, wear, or corrosion on metal surfaces — subtle clues that pinpoint a leak’s location.
Once your visual inspection is complete, perform a functional test using either a UV leak detector or a soapy water solution. For the DIY-friendly soapy water, mix detergent with water and spray it liberally on suspected areas while the AC is running. Bubbles will form at the leak sites, making spotting easy and straightforward. If you’re opting for a UV dye, remember to follow the manufacturer’s instructions on injection and allow the system to circulate. Wearing UV glasses, scan the system components to identify brightly glowing spots. Pair this with a pressure gauge check for abnormalities in system pressure, which might also indicate leaks or further underlying issues.

How to Use UV Dye and Leak Detectors Effectively
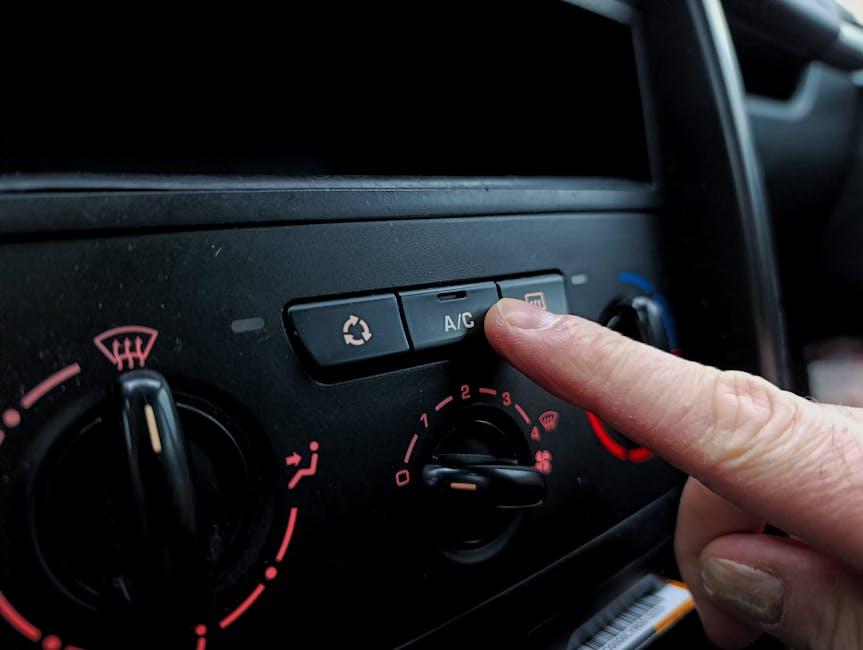
Before starting, make sure your car’s AC system is fully charged and cooled down. Injecting UV dye into the system is straightforward but requires patience to ensure the dye circulates evenly throughout the refrigerant lines. Use an AC dye injector connected to the low-pressure service port, then run the AC for about 10-15 minutes to distribute the dye. This helps the dye travel through the entire system, highlighting any areas where leaking occurs under UV light. Always wear protective gloves and goggles during this process to avoid any contact with refrigerants or dye.
When scanning for leaks, a UV flashlight is your best ally. Turn off all indoor and outdoor lights and carefully inspect the refrigerant lines, compressor, hoses, and evaporator coil. Look for bright green or yellow glowing spots, which indicate escaping refrigerant mixed with dye. To maximize effectiveness:
- Use a high-intensity UV light to enhance visibility in dim areas.
- Inspect connectors and seals thoroughly as these are common weak points.
- Reapply dye if the leak isn’t immediately visible, especially for slow leaks.
| Step | Tip for Accuracy |
|---|---|
| Injecting Dye | Attach securely and avoid overfilling |
| Circulating System | Run AC to move dye thoroughly |
| UV Inspection | Perform in a dark environment |
| Recheck | Repeat after initial scan if no leaks found |

When to Seek Professional Help for AC Leak Repairs
Detecting a leak in your car’s AC system can sometimes feel straightforward, but there are moments when the complexity of the issue demands the expertise of a professional technician. If you notice persistent symptoms such as inconsistent cooling, a hissing sound coming from under the hood, or an unpleasant chemical smell, it’s a clear sign the problem might be beyond a simple DIY fix. Attempting to patch a refrigerant leak without the right tools can not only result in incomplete repairs but also potentially worsen the condition of your system.
Knowing when to put down the tools and seek expert assistance saves both time and money in the long run. Consider reaching out to a certified AC repair service if you encounter any of the following:
- Repeated drops in refrigerant levels despite topping up
- Visible oil stains or wet spots near AC components
- Difficulty locating the source of the leak with standard methods
- Unusual noises accompanied by decreased cooling efficiency
| Symptom | Recommended Action |
|---|---|
| Continuous refrigerant loss | Professional leak detection and seal repair |
| AC compressor not engaging | Diagnostic inspection and electrical system check |
| Unexplained refrigeration odors | Full system evaluation and refrigerant recharge |
Q&A
Q&A: How to Find Leaks in Your Car AC
Q1: Why is it important to find leaks in my car’s AC system?
A1: Leaks in your car’s AC can cause refrigerant to escape, leading to reduced cooling efficiency, increased energy consumption, and potential damage to the compressor. Identifying leaks early helps maintain comfort, saves money on repairs, and protects the environment from harmful refrigerants.
Q2: What are common signs that my car’s AC might have a leak?
A2: If your AC blows warm air, takes longer to cool the cabin, or you notice an oily residue around AC components, these could signal a leak. Additionally, hissing sounds when the AC is off or a sudden drop in refrigerant pressure are red flags.
Q3: Can I find AC leaks myself, or should I see a professional?
A3: Basic inspections can be done at home, such as checking hoses and connections for visible damage or residue. However, specialized tools like UV dye kits or electronic leak detectors often yield more accurate results. For thorough diagnosis and repair, a professional is recommended.
Q4: What tools or methods can help detect leaks in a car AC system?
A4: Common methods include adding UV dye to the refrigerant and using a UV light to spot leaks, using electronic leak detectors that sense refrigerant gases, and applying soapy water to AC lines to look for bubbling. Each method varies in complexity and accuracy.
Q5: Where are AC leaks most likely to occur?
A5: Leaks commonly happen at hose connections, compressor seals, condenser and evaporator coils, and valves. These points experience stress, vibrations, and temperature changes, increasing the chance of wear and tear.
Q6: Is it safe to drive my car if there’s a leak in the AC system?
A6: While your car remains drivable, operating an AC with a refrigerant leak can reduce cooling efficiency and potentially damage AC components over time. It’s best to address leaks promptly to ensure comfort and avoid costly repairs.
Q7: How often should I check for AC leaks?
A7: It’s a good practice to inspect your AC system annually or at the first sign of reduced cooling performance. Regular maintenance helps catch small leaks before they become bigger problems.
Q8: What can cause leaks in a car’s AC system?
A8: Causes include aging seals and hoses, physical damage from road debris, corrosion, improper installation, or previous repairs that weren’t sealed correctly. Environmental factors like extreme heat also accelerate wear.
Q9: Can adding more refrigerant fix an AC leak?
A9: Adding refrigerant without fixing the leak is a temporary measure that won’t solve the root problem. The refrigerant will continue to escape, and your AC will eventually lose cooling power again. Leak repair is necessary for long-term performance.
Q10: What should I do if I find a leak in my car’s AC?
A10: Small leaks might be temporarily sealed with specialized products, but professional diagnosis and repair are usually required to ensure the system functions properly. A mechanic can identify the leak source, repair or replace components, and recharge the system with the correct refrigerant.
Key Takeaways
Finding leaks in your car’s AC system might seem daunting at first, but with a little patience and the right approach, it’s entirely manageable. By understanding the signs of a leak, using the proper detection methods, and addressing issues promptly, you can keep your cool on every drive—and save yourself from costly repairs down the road. Remember, a well-maintained AC is more than a comfort; it’s a key part of your vehicle’s health. So take these tips, roll up your sleeves, and let your car breathe easy once again.