

In the world of car care, maintaining your engine is more than just a routine task—it’s a journey into the heart of your vehicle’s performance. Whether you’re a seasoned gearhead or a weekend warrior with a wrench in hand, a DIY engine maintenance checklist can be your trusted guide, helping you navigate the essential steps to keep your engine running smoothly and efficiently. This article will walk you through the key tasks and tips to empower you to take control of your engine’s health, ensuring longevity and reliability on the road ahead. Buckle up, and let’s dive into the satisfying world of hands-on engine care.
Table of Contents
- Essential Tools and Supplies for Effective Engine Maintenance
- Spotting Early Signs of Wear and Tear to Prevent Costly Repairs
- Step-by-Step Guide to Checking and Changing Engine Oil
- How to Inspect and Replace Belts and Hoses Like a Pro
- Tips for Maintaining Your Cooling System to Avoid Overheating
- Ensuring Spark Plug Health for Optimal Engine Performance
- Q&A
- To Conclude

Essential Tools and Supplies for Effective Engine Maintenance
Having the right tools and supplies at hand transforms routine engine care from a daunting task into a streamlined process. Essential items include a robust set of wrenches, screwdrivers, and pliers designed for automotive use—these foundational tools allow you to remove, adjust, and tighten components with precision. Additionally, a reliable torque wrench is invaluable for ensuring bolts are secured to manufacturer specifications, preventing both overtightening and potential damage. Don’t forget a quality oil catch pan and funnel; these make fluid changes cleaner and more efficient, minimizing spills and waste.
Beyond hand tools, stock your workspace with cleaning and maintenance supplies that extend your engine’s longevity. A set of grease, penetrating oils, and degreasers simplify the removal of grime and corrosion. To keep track of fluid levels and potential leaks, disposable gloves and absorbent shop towels are a must-have. For quick reference, here’s a practical checklist of must-have items:
| Tool/Supply | Purpose |
|---|---|
| Socket Set | Fastening and loosening bolts |
| Torque Wrench | Precise bolt tightening |
| Oil Catch Pan | Collecting used fluids |
| Penetrating Oil | Loosening rusted parts |
| Shop Towels | Cleaning spills and wiping parts |
| Grease Gun | Lubricating moving components |

Spotting Early Signs of Wear and Tear to Prevent Costly Repairs
Recognizing subtle changes in your engine’s performance can save you from hefty repair bills down the road. Pay close attention to unusual noises such as ticking or knocking, which might indicate components starting to wear out. Also, monitor for decreased fuel efficiency, rough idling, or difficulty starting the engine—these are red flags that signal parts may be aging or failing. Regularly check the condition of belts and hoses, as cracks or frays are early indicators of impending issues.
Incorporate these essential checks into your routine to catch problems before they escalate:
- Fluid leaks: Look beneath your vehicle for any fresh puddles or stains.
- Unusual vibrations: Feeling the engine shake excessively during operation is a sign to investigate further.
- Smoke color: Watch the exhaust; black, blue, or white smoke can hint at different engine troubles.
- Dashboard warning lights: Never ignore them—even if the symptoms seem minor.
| Symptom | Possible Cause | Suggested Action |
|---|---|---|
| Ticking noise | Valve train wear | Check valve clearance and oil level |
| Reduced power | Clogged air filter | Replace or clean air filter |
| Leaks under engine | Worn gaskets or seals | Inspect and replace seals |
| Check engine light | Various sensor issues | Perform diagnostics |

Step-by-Step Guide to Checking and Changing Engine Oil
Begin by parking your vehicle on a level surface and letting the engine cool down for at least 10 minutes. Open the hood and locate the dipstick—usually marked with a bright handle for easy identification. Pull out the dipstick, wipe it clean with a lint-free cloth, then reinsert it fully before pulling it out again to check the oil level. The oil should fall between the minimum and maximum marks on the dipstick. Also, note the oil’s color and consistency; it should be a clear amber and free from gritty particles.
If it’s time to change the oil, prepare the necessary tools: a wrench, oil drain pan, new oil filter, fresh engine oil, and gloves. Place the drain pan beneath the oil drain plug and carefully remove the plug to let the old oil fully drain out. Replace the drain plug securely, then remove the old oil filter and install the new one, making sure to lubricate the rubber seal with fresh oil first. Finally, fill the engine with the appropriate amount and type of new oil as specified by your vehicle’s manual. Use the table below to match common oil types to engine requirements:
| Oil Grade | Viscosity | Ideal Engine Type |
|---|---|---|
| 5W-30 | Multi-grade | Gasoline & Modern Engines |
| 10W-40 | Multi-grade | Older Engines & High Mileage |
| 0W-20 | Low Temp Start | Hybrid & Newer Models |
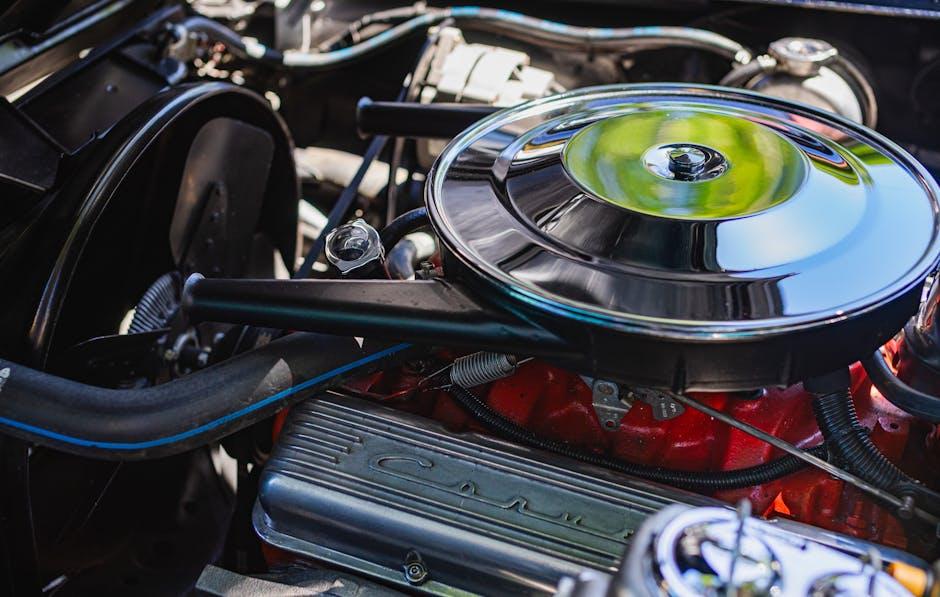
How to Inspect and Replace Belts and Hoses Like a Pro
Begin your inspection by visually scanning each belt and hose for obvious signs of wear or damage. Look for cracks, fraying, glazing, or missing chunks on belts, and check hoses for bulges, soft spots, or leaks. Give the belts a quick twist — they should be firm but not brittle or overly loose. For hoses, gently squeeze along their length; they should feel firm without any brittleness or excessive softness, which can indicate deterioration. Remember, early detection of imperfections can save you from unexpected breakdowns down the road.
When it’s time to replace, ensure you have the correct parts to match your vehicle’s make and model. Use these handy tips as a checklist during replacement:
- Disconnect the battery for safety.
- Loosen bolts or clamps carefully to avoid damage.
- Note the routing of belts before removal, using photos for reference.
- Replace old parts with OEM or high-quality aftermarket components.
- Double-check tension and secure all clamps tightly.
| Component | Signs of Wear | Recommended Replacement Interval |
|---|---|---|
| Serpentine Belt | Cracks, squealing noise, loss of tension | 60,000 to 90,000 miles |
| Radiator Hose | Bulging, leaks, softness | 4 to 5 years or as needed |
| Timing Belt | Cracks, missing teeth | 60,000 to 100,000 miles |
Tips for Maintaining Your Cooling System to Avoid Overheating
Keeping your engine cool is essential for preventing costly repairs and ensuring your vehicle runs smoothly. Start by regularly checking the coolant level—this fluid needs to be topped off with the correct mixture for your vehicle’s specifications. Also, keep an eye out for leaks under the car, as even a small drip can lead to overheating. Inspect the radiator cap for damage or wear, since a faulty cap can cause pressure loss within the cooling system, reducing its efficiency.
Pro tip: Don’t forget to flush your radiator periodically. Over time, sediment and rust can build up, clogging the system and causing higher engine temperatures. While you’re at it, visually inspect the cooling fans; they should spin freely and activate at the right temperatures. Lastly, replace worn or cracked hoses promptly to avoid sudden bursts or leaks that could leave you stranded.
| Maintenance Task | Frequency | Key Benefit |
|---|---|---|
| Coolant Level Check | Monthly | Prevents overheating |
| Radiator Flush | Every 2 Years | Maintains flow efficiency |
| Hose Inspection | Every 6 Months | Avoids leaks |
| Cooling Fan Test | Seasonally | Ensures proper airflow |
Ensuring Spark Plug Health for Optimal Engine Performance
Maintaining spark plugs in peak condition is crucial for your engine’s smooth operation and fuel efficiency. Over time, spark plugs can wear out or accumulate deposits, leading to misfires, rough idling, or decreased acceleration. Regular inspection involves checking the electrode for wear, the insulator for cracks, and signs of carbon buildup. Cleaning or replacing spark plugs when necessary will ensure your engine receives a consistent and strong spark for combustion.
When servicing spark plugs, consider these essential checks to guarantee optimal performance:
- Gap measurement: Ensure the spark plug gap matches the manufacturer’s specifications for proper ignition.
- Visual inspection: Look for signs of excessive oil, soot, or corrosion that indicate engine issues.
- Torque settings: Use the correct torque when installing spark plugs to prevent damage or poor sealing.
| Condition | Potential Cause | Recommended Action |
|---|---|---|
| Black soot | Rich air-fuel mixture | Adjust fuel system; clean spark plugs |
| Worn electrodes | Normal wear or outdated plugs | Replace spark plugs |
| Cracked insulator | Over-tightening or physical damage | Replace immediately to avoid misfires |
Q&A
Q&A: DIY Engine Maintenance Checklist
Q1: Why should I perform engine maintenance myself?
A1: Taking the DIY route empowers you to understand your vehicle better, save money on labor costs, and catch potential issues early before they become costly repairs. Plus, it’s a rewarding hands-on experience that deepens your connection with your car.
Q2: What essential tools do I need for DIY engine maintenance?
A2: At minimum, a set of wrenches and sockets, screwdrivers, pliers, a torque wrench, and a good flashlight are key. Don’t forget safety gear like gloves and eye protection. A basic OBD-II scanner can also help diagnose issues efficiently.
Q3: How often should I follow the engine maintenance checklist?
A3: Routine checks like oil levels and fluid inspections should be monthly, while more thorough maintenance such as oil changes, filter replacements, and belt inspections are typically every 3,000 to 7,500 miles, depending on your vehicle and driving habits.
Q4: What are the must-check items on a DIY engine maintenance checklist?
A4: Always include checking and topping off engine oil, coolant, brake fluid, and transmission fluid. Inspect belts and hoses for cracks or wear, replace the air and fuel filters, examine the battery, and make sure spark plugs and wires are in good shape.
Q5: How do I know if there’s an engine problem I can’t fix myself?
A5: If you encounter unusual noises, persistent warning lights, poor engine performance, or fluid leaks that don’t improve after simple fixes, it’s wise to consult a professional mechanic. Some repairs require specialized tools and expertise to avoid damage or safety hazards.
Q6: Can I use any type of oil or filter for my engine?
A6: It’s crucial to follow your vehicle manufacturer’s recommendations. Using the specified oil grade and approved filters ensures optimal engine performance and longevity. Deviating from these specs can cause abrasion, poor lubrication, or even engine damage.
Q7: What’s a simple tip for keeping my engine running smoothly?
A7: Regularly clean the engine bay to prevent dirt buildup, which can trap heat or cause corrosion. Also, keep an eye on your driving habits—smooth acceleration and avoiding short trips help in maintaining engine health.
Q8: Is DIY engine maintenance suitable for beginners?
A8: Absolutely, as long as you start with basic tasks and follow detailed guides or tutorials. Many novice DIYers find it helpful to watch video demonstrations or seek advice from experienced enthusiasts online to build confidence gradually.
To Conclude
As you wrap up your DIY engine maintenance journey, remember that a well-tuned engine is the heartbeat of any vehicle’s performance. With this checklist in hand, you’re not just preserving your engine—you’re mastering a craft that saves time, money, and surprises down the road. Keep this guide close, maintain a steady routine, and let each turn of the wrench bring you one step closer to confident, smooth driving. After all, the road ahead is always better when your engine is cared for, not just repaired.
4 Comments
**herpafend official**
Herpafend is a natural wellness formula developed for individuals experiencing symptoms related to the herpes simplex virus. It is designed to help reduce the intensity and frequency of flare-ups while supporting the bodys immune defenses.
**prodentim reviews**
ProDentim is a distinctive oral-care formula that pairs targeted probiotics with plant-based ingredients to encourage strong teeth, comfortable gums, and reliably fresh breath
**mounja boost official**
MounjaBoost is a next-generation, plant-based supplement created to support metabolic activity, encourage natural fat utilization, and elevate daily energywithout extreme dieting or exhausting workout routines.
**boostaro reviews**
Boostaro is a purpose-built wellness formula created for men who want to strengthen vitality, confidence, and everyday performance.