

Suspension noise can be more than just an irritating soundtrack to your daily drive—it’s often the subtle signal of underlying issues that, if ignored, might lead to costly repairs or compromised safety. But diagnosing the exact cause of those creaks, clunks, or rattles isn’t always straightforward. From worn-out bushings to loose shocks, the world beneath your wheels is a complex ballet of parts working in harmony. In this article, we’ll take you through a clear, step-by-step approach to identifying the origins of suspension noise, empowering you to pinpoint problems quickly and confidently, whether you’re a seasoned mechanic or a curious car owner.
Table of Contents
- Understanding the Sources of Suspension Noise
- Identifying Common Suspension Noise Patterns
- Tools and Techniques for Accurate Noise Diagnosis
- Step-by-Step Inspection of Suspension Components
- Interpreting Noise Signals to Pinpoint Issues
- Preventive Measures and When to Seek Professional Help
- Q&A
- The Way Forward

Understanding the Sources of Suspension Noise
Suspension noise often signals that your vehicle’s ride quality and safety are compromised. These sounds typically emerge from worn or damaged components within the suspension system, such as bushings, shocks, struts, and ball joints. For instance, rubber bushings can dry out and crack over time, leading to creaking or squeaking noises. Similarly, failing shocks and struts may produce clunking or rattling sounds when driving over bumps, indicating a loss of proper damping functions. Recognizing these telltale noises is the first step toward pinpointing the root cause and taking timely action.
Aside from mechanical parts, external factors such as debris caught in the suspension components can also generate odd sounds. Below is a quick guide to common noise types and their likely sources:
- Squeaking: Worn bushings or dry joints
- Clunking: Loose or damaged ball joints and control arms
- Rattling: Loose shocks or struts
- Knocking: Broken coil springs or mounting hardware issues
| Noise Type | Possible Cause | Recommended Check |
|---|---|---|
| Squeak | Dry bushings | Inspect and lubricate |
| Clunk | Loose ball joints | Check for play and tighten |
| Rattle | Faulty shocks | Test shock absorber |

Identifying Common Suspension Noise Patterns
Suspension noises can manifest in a variety of ways, each hinting at different underlying issues. Recognizing the sound type—whether it’s a clunking, squeaking, or knocking noise—can significantly narrow down potential problems. For instance, clunking sounds often indicate loose or worn-out bushings or ball joints, while squeaking noises tend to be related to dry or aging suspension components like struts or coil springs. By understanding these auditory clues, you gain a valuable diagnostic tool that can save time and prevent unnecessary part replacements.
It’s also helpful to observe when the noise occurs, as timing reveals critical context. Noises that appear during turning might point to issues in the sway bar or control arms, whereas sounds that emerge over bumps could signal problems with shock absorbers or mounts. The following table outlines common noise patterns and their usual causes:
| Noise Type | When It Occurs | Possible Cause |
|---|---|---|
| Clunking | Over bumps | Worn bushings |
| Squeaking | During turns | Dry ball joints |
| Knocking | Acceleration or braking | Loose strut mounts |
| Creaking | Constant while driving | Worn springs |
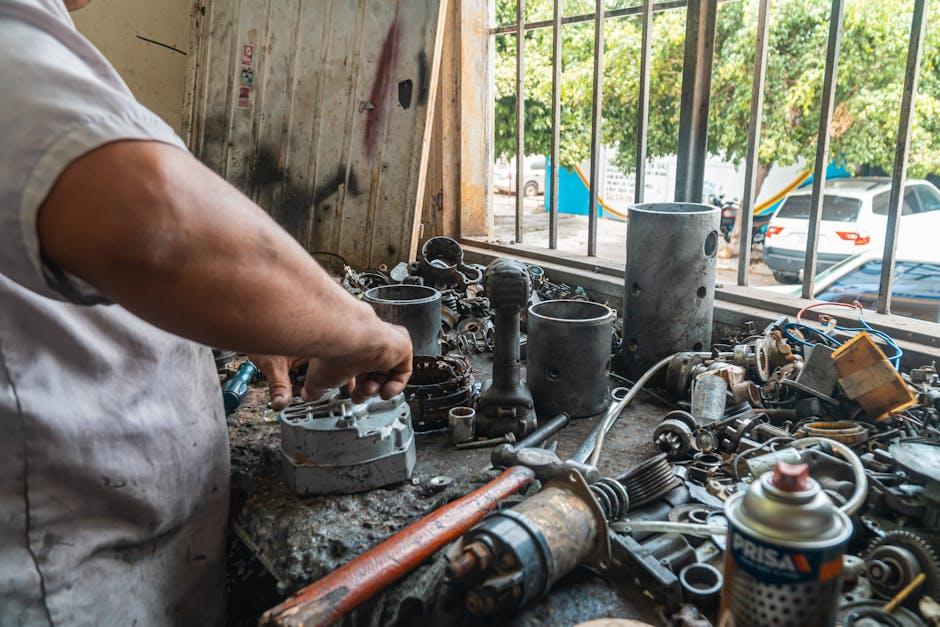
Tools and Techniques for Accurate Noise Diagnosis
Diagnosing suspension noise accurately requires a combination of specialized tools and keen observational techniques. Start with a chassis ear – a microphone system that amplifies internal noises while driving, helping isolate the exact location of the sound. Pair this with a stethoscope tool to examine suspect suspension components at rest, as subtle creaks often reveal worn bushings or ball joints. Additionally, visual inspection tools such as a bright LED flashlight and mirror on an extendable arm reveal hidden cracks or leaks, giving clues to the noise source beyond just sound.
When assessing the suspension system, several core methods prove invaluable: gently bouncing the vehicle to simulate the noise under load, checking for play with pry bars, and rotating wheel bearings by hand to detect grinding or roughness. Use the following checklist to ensure a thorough examination:
- Check bushings and control arms for wear or cracking
- Inspect shock absorbers for leaks or unusual resistance
- Feel for looseness in ball joints and tie rods
- Listen carefully for clicking, knocking, or squeaking sounds while driving
- Test spring tension for breaks or deformation
| Tool | Purpose | Benefit |
|---|---|---|
| Chassis Ear | Noise Localization | Pinpoints exact noise source |
| Stethoscope | Component Isolation | Amplifies internal sounds |
| Flashlight & Mirror | Visual Inspection | Reveals hidden damage |
| Pry Bar | Play Testing | Detects looseness |
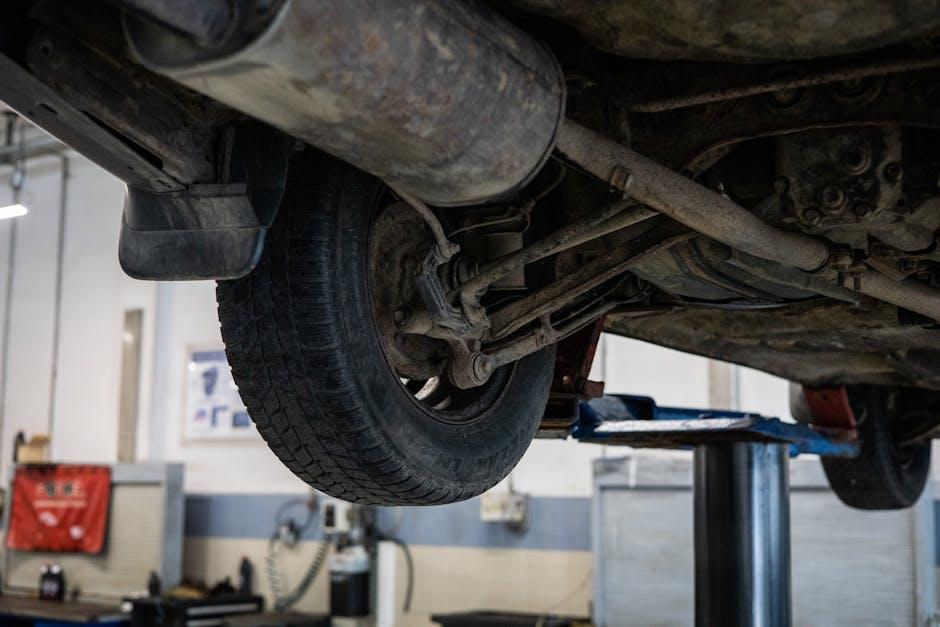
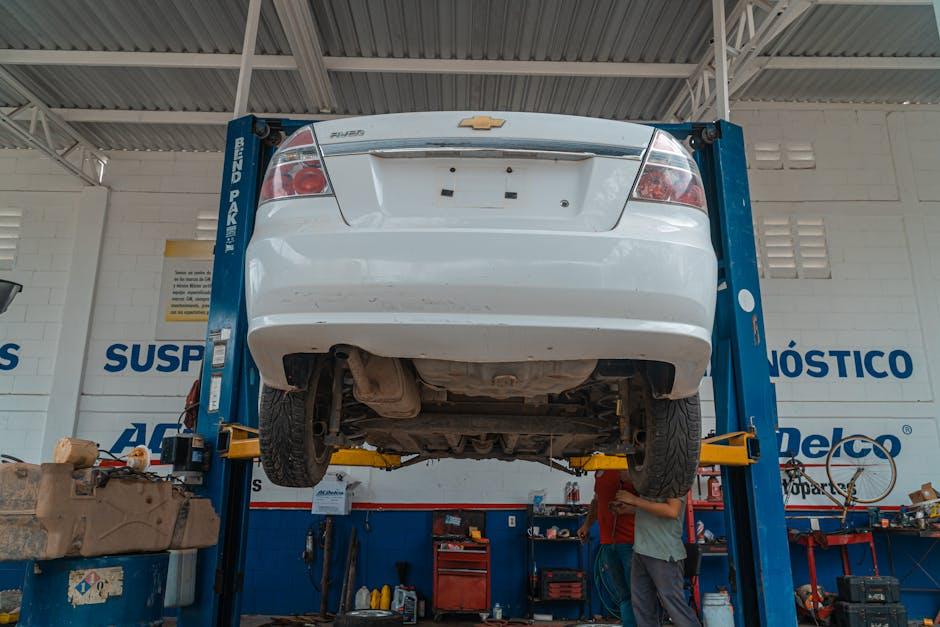
Step-by-Step Inspection of Suspension Components
Begin your investigation by visually examining each major suspension component for obvious signs of wear or damage. Use a flashlight to check for:
- Leaking shocks or struts – oily residue signals a loss of damping fluid;
- Cracked or torn bushings – aged rubber parts can cause clunks and squeaks;
- Loose ball joints and tie rods – excessive play may generate knocking noises;
- Worn or broken springs – these can affect ride height and stability.
Once the visual inspection is complete, perform a hands-on test. With the vehicle securely lifted, shake or push on each component systematically to detect unusual movement or sounds. Pay close attention to areas where metal contacts rubber or other metal parts; this is often where noise originates. Maintaining a checklist during this stage can help differentiate components needing immediate replacement versus those requiring further diagnostics.
| Component | Common Noise | Inspection Tip |
|---|---|---|
| Shock Absorber | Thud or rattle | Check for leaks and tight mounts |
| Control Arm Bushing | Squeak or clunk | Look for cracks or deterioration |
| Ball Joint | Knocking | Test for excessive lateral play |
Interpreting Noise Signals to Pinpoint Issues
Understanding the specific characteristics of the sounds your suspension makes can dramatically narrow down the potential causes. For instance, a clunking noise often points to worn ball joints or tie rods, while a creaking sound during slow turns typically suggests dry or damaged bushings. Pay close attention to when the noise occurs—whether it’s during acceleration, braking, or going over bumps—to better determine which component is under stress.
To help you classify the types of suspension noises, use the guide below to isolate the symptoms and their likely faults:
| Sound Type | When It Occurs | Possible Cause |
|---|---|---|
| Clunking | Over bumps or potholes | Loose or damaged sway bar links |
| Squeaking | Slow turns or slow speed movement | Worn out bushings or lack of lubrication |
| Grinding | Braking or wheel rotation | Damaged strut bearings or wheel bearings |
- Record the noise: Use a smartphone to capture the sound for comparison during the inspection.
- Test under varying conditions: Check if the noise changes when shifting weight or changing speed.
- Inspect visually: Look for signs of wear like cracked bushings or leaking shocks.

Preventive Measures and When to Seek Professional Help
To minimize the risk of suspension noise and extend the lifespan of your vehicle’s components, regular upkeep is essential. Simple actions like checking tire pressure monthly, rotating tires every 5,000 to 7,000 miles, and lubricating suspension joints can make a significant difference. Additionally, avoiding potholes and rough roads whenever possible helps prevent premature wear on shock absorbers and bushings. Utilizing a high-quality suspension cleaner and inspecting rubber components for cracks or deterioration also reduce noise buildup before it becomes a major issue.
Knowing when to consult a professional can save you time and money in the long run. Consider contacting a mechanic if you notice persistent clunks, squeaks, or rattles that don’t diminish after basic maintenance. Warning signs such as uneven tire wear, a vehicle pulling to one side, or bouncing excessively over bumps indicate deeper suspension problems. When in doubt, here’s a quick reference table to understand the urgency:
| Symptom | Immediate Action | Suggested Timeline |
|---|---|---|
| Constant clunking noise | Seek professional diagnosis | Within 1 week |
| Minor squeaks during turns | Monitor and lubricate joints | Within 1 month |
| Uneven tire wear | Schedule alignment and inspection | Within 2 weeks |
| Excessive bouncing | Immediate mechanic visit | As soon as possible |
Q&A
Q&A: How to Diagnose Suspension Noise
Q1: What are the most common signs that suspension noise indicates a problem?
A1: Suspension noise often reveals itself through creaks, clunks, rattles, or squeaks when driving over bumps or turning. Unusual sounds combined with symptoms like uneven tire wear, shaky steering, or poor handling typically point to issues within the suspension system.
Q2: Where does suspension noise usually come from?
A2: Noise can originate from various suspension components such as worn bushings, damaged struts or shocks, loose ball joints, failing control arms, or broken springs. Identifying the exact source requires careful inspection and listening.
Q3: How can I pinpoint the location of the noise?
A3: Start by driving slowly over different surfaces to replicate the sound. Then, safely lift the vehicle and perform a hands-on check: wiggle control arms, inspect bushings, and press on shocks to listen for any knocks or squeaks. Using a mechanic’s stethoscope or a length of hose helps isolate sounds.
Q4: Are there simple tests to distinguish suspension noise from other sources like tires or brakes?
A4: Yes. Suspension noise often changes with steering input or speed, while tire noise usually varies with road texture and brake noise appears during braking. Testing involves driving with and without braking, steering left and right, and observing when the noise occurs.
Q5: When should I consult a professional about suspension noise?
A5: If the noise is persistent, worsens over time, or is accompanied by handling issues, it’s best to seek a professional diagnosis. Suspension problems affect vehicle safety, so timely expert attention is crucial.
Q6: Can I prevent suspension noise before it starts?
A6: Regular maintenance like timely replacement of worn components, keeping tires properly inflated, and avoiding rough terrain helps prevent suspension noise and prolongs system life.
Q7: What tools or equipment are helpful for diagnosing suspension noise?
A7: Besides a jack and stands for safe vehicle lifting, tools like a pry bar, rubber mallet, mechanic’s stethoscope, flashlight, and sometimes an assistant for road testing make diagnosis more accurate and efficient.
This Q&A offers a structured approach to understanding and diagnosing suspension noise, combining practical tips with safety reminders to empower both DIY enthusiasts and concerned drivers.
The Way Forward
Diagnosing suspension noise may seem like a subtle art, but with a keen ear and a methodical approach, it becomes a manageable and even satisfying task. By understanding the signs and systematically isolating the source, you can ensure a smoother, safer ride and extend the life of your vehicle’s suspension system. Remember, noise is your suspension’s way of asking for attention—listen carefully, and you’ll drive away with confidence and peace of mind.
2 Comments
8wulu6
8wulu6