Imagine pressing the brake pedal and feeling nothing but a soft, spongy resistance—or worse, the pedal sinking all the way to the floor. It’s a nerve-wracking experience that signals a crucial problem: air trapped in your car’s brake lines. Bleeding your car brakes properly is an essential maintenance task that ensures your vehicle responds exactly when you need it to, providing the safety and control every driver relies on. In this article, we’ll guide you through the step-by-step process of bleeding your brakes efficiently, helping you restore firm pedal pressure and peace of mind behind the wheel. Whether you’re a seasoned DIYer or a cautious beginner, understanding the technique can make all the difference in your braking performance.
Table of Contents
- Preparing Your Vehicle for a Safe and Effective Brake Bleeding Session
- Essential Tools and Materials to Gather Before You Begin
- Step-by-Step Guide to Removing Air from Brake Lines
- Common Mistakes to Avoid When Bleeding Brakes
- Tips for Ensuring Consistent Brake Fluid Quality and Levels
- Final Checks to Confirm Your Brakes Are Functioning Perfectly
- Q&A
- Insights and Conclusions
Preparing Your Vehicle for a Safe and Effective Brake Bleeding Session
Before diving into the brake bleeding process, it’s crucial to ensure your vehicle is in optimal condition to avoid any complications. Start by securely parking your car on a flat surface and engaging the parking brake. This prevents any unwanted movement that could be hazardous during the procedure. Next, lift the vehicle using a reliable jack and support it with sturdy jack stands to access the brake components easily and safely. Never rely solely on the jack as it may fail or slip.
Prepare your tools and materials carefully to streamline the session. Gather a clear catch container, fresh brake fluid that matches your car’s specification, a turkey baster or syringe, and a wrench set for loosening bleed screws. To keep your workspace clean and prevent fluid damage, lay down absorbent mats or rags around the wheels and brake lines. Remember, brake fluid is corrosive and can harm painted surfaces, so wearing gloves and eye protection is also recommended.
- Ensure the car is on a level surface with the parking brake engaged
- Use jack stands for stable vehicle lifting
- Have fresh brake fluid of the correct type ready
- Protect surrounding areas from fluid spills
- Wear gloves and safety glasses to protect yourself
| Tool/Material | Purpose | Tip |
|---|---|---|
| Jack and Jack Stands | Lift and secure the vehicle safely | Use stands rated for your car’s weight |
| Brake Fluid | Replace old fluid during bleeding | Choose DOT rating as per manufacturer guide |
| Clear Catch Container | Collect expelled brake fluid for inspection | Transparent containers show air bubbles clearly |
Essential Tools and Materials to Gather Before You Begin
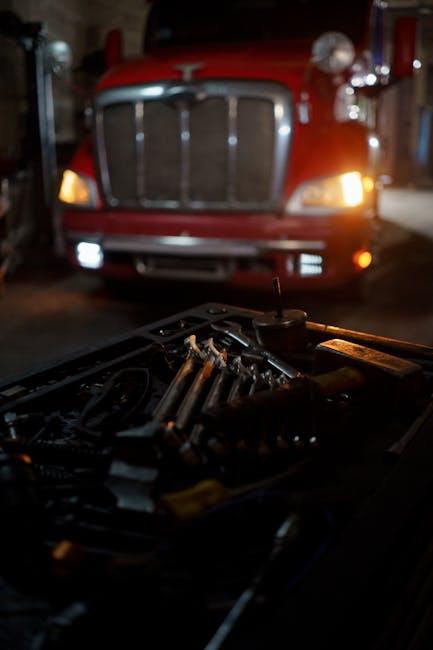
Before diving into the brake bleeding process, it’s crucial to assemble everything you’ll need to ensure a smooth and efficient job. Having the right tools handy not only speeds up the procedure but also minimizes the risk of errors. At minimum, prepare a quality brake fluid that matches your vehicle’s specification, a clear plastic hose, a container to catch old fluid, and a wrench or brake bleeder key to open the bleeder valves. Don’t forget safety gear like gloves and eye protection to shield yourself from potentially harmful brake fluid.
In addition to the physical tools, organizing your workspace is just as important. A well-lit, clean area with the car securely elevated using jack stands adds comfort and safety during this maintenance task. Below is a quick reference table highlighting essentials and their purpose to help you check off your supplies before you start:
| Tool/Material | Purpose |
|---|---|
| Brake Fluid | Replenishes and purges old fluid |
| Clear Plastic Hose | Directs fluid from bleeder vent into container |
| Catch Container | Holds expelled brake fluid safely |
| Wrench/Bleeder Key | Opens bleeder valves |
| Gloves & Eye Protection | Ensures user safety |
| Jack Stands | Secures vehicle off the ground |

Step-by-Step Guide to Removing Air from Brake Lines
Begin by ensuring your vehicle is securely parked and the ignition is off. Locate the brake bleeder valves near each wheel hub, then use a wrench to slightly loosen the valve on the farthest wheel from the master cylinder. Attach a clear hose to the valve, submerging the other end in a container partially filled with brake fluid to prevent air from re-entering the system. Have an assistant gently pump the brake pedal several times before holding it down. As the pedal is held, open the bleeder valve slowly to release trapped air and brake fluid, then close the valve before the pedal is released to maintain pressure within the system. Repeat this process until you see a steady stream of clear fluid with no bubbles.
Work your way systematically from the farthest wheel to the closest, following this sequence to ensure efficient air removal:
- Right rear wheel
- Left rear wheel
- Right front wheel
- Left front wheel
Throughout the process, keep an eye on the brake fluid reservoir, topping it up with the same type of fluid as necessary to avoid air entry. Once all lines are bled, test the brake pedal for firmness; it should feel solid with no sponginess, confirming that all air has been effectively removed.
| Tool | Purpose |
|---|---|
| Brake Bleeder Wrench | Loosen and tighten bleeder valves without damage |
| Clear Vinyl Tubing | Channel brake fluid and visualize air bubbles |
| Catch Container | Collect expelled fluid safely |
| Brake Fluid | Replenish fluid during bleeding |
Common Mistakes to Avoid When Bleeding Brakes
One of the biggest pitfalls when bleeding brakes is not ensuring a proper fluid level in the master cylinder. Allowing the reservoir to run dry invites air back into the system, undoing all your hard work and potentially causing a spongy brake pedal. Remember, it’s essential to top off the brake fluid consistently throughout the process. Additionally, rushing through the procedure often leads to incomplete air removal, which compromises braking efficiency and safety.
Another common oversight is incorrectly sequencing the brake bleeders. Each vehicle has a specific bleeding order, usually starting with the wheel farthest from the master cylinder and moving closer. Ignoring this sequence can trap air pockets, leading to inconsistent brake feel. Also, using improper tools or failing to create a tight seal during bleeding can allow contaminants or air to enter the system, so always double-check your connections and hardware before beginning.
- Never allow brake fluid to drip on painted surfaces—it damages the finish.
- Always use fresh, manufacturer-recommended brake fluid.
- Avoid reusing old brake fluid; contamination affects performance.
- Keep a clean workspace to prevent dirt from entering the brake system.
| Mistake | Consequence |
|---|---|
| Low fluid level | Air pockets, spongy brakes |
| Wrong bleeding order | Incomplete bleeding, poor brake response |
| Poor seal on bleeder | Air re-entry, system contamination |
| Rushing the process | Missed air bubbles, unsafe brakes |
Tips for Ensuring Consistent Brake Fluid Quality and Levels
Maintaining the integrity of your brake fluid is crucial for safe and responsive braking. Regularly check the fluid reservoir for any discoloration or cloudiness, which often indicates contamination or moisture buildup. Be sure to use the brake fluid specified by your vehicle manufacturer; mixing different types can cause chemical reactions that degrade braking performance. Additionally, store your spare brake fluid in a cool, dry place with the cap tightly sealed to prevent moisture absorption. This simple care routine preserves the fluid’s boiling point and prevents corrosion within the brake system.
Monitoring fluid levels is equally important. As brake pads wear down, the fluid level naturally drops, so frequent inspection can preempt potential issues such as air pockets forming in the lines. Use the following handy checklist to keep track:
- Inspect fluid color: Clear or slightly amber fluids are ideal.
- Check reservoir level: Stay between the “min” and “max” lines.
- Perform periodic bleeding: Removes trapped air and moisture.
- Replace fluid: Follow manufacturer’s recommended interval, typically every 2 years.
| Common Brake Fluid Types | Boiling Point (°C) | Use Case |
|---|---|---|
| DOT 3 | 205 | Standard passenger cars |
| DOT 4 | 230 | Performance and modern vehicles |
| DOT 5 | 260 | High-performance/military, silicone-based |

Final Checks to Confirm Your Brakes Are Functioning Perfectly
Ensuring your brakes respond flawlessly after bleeding involves a carefully performed set of final verifications. Start by gently pressing the brake pedal multiple times to feel for a consistent, firm pressure—any sponginess or sinking sensation means air could still be present in the lines. Next, inspect around each wheel for any fresh brake fluid leaks, as tight seals and properly tightened bleeder screws are crucial to maintain hydraulic pressure. Equally important is the visual inspection of brake fluid levels in the master cylinder reservoir to confirm it’s within recommended limits.
Before hitting the road, double-check these vital factors:
- Pedal travel: Should be smooth with minimal free play.
- Brake fluid color: Clear or slightly amber; dark fluid suggests the need for replacement.
- Warning lights: No illuminated brake or ABS indicators on the dashboard.
- Test drive: Conduct a cautious low-speed brake test to assess response and stopping power.
| Check | Expected Result | Action if Failed |
|---|---|---|
| Brake Pedal Feel | Consistent, firm resistance | Repeat bleeding process or check for leaks |
| Brake Fluid Level | Within recommended marks | Top up with correct fluid type |
| Warning Lights | None illuminated | Diagnose ECU or sensor issues |
Q&A
Q&A: How to Bleed Car Brakes Properly
Q1: Why is bleeding car brakes important?
A1: Bleeding car brakes removes air bubbles trapped in the brake lines. Since air compresses under pressure, it can cause a spongy brake pedal and reduce braking efficiency, compromising safety on the road.
Q2: When should I bleed my brakes?
A2: Bleeding is typically necessary after replacing brake components like calipers, brake lines, or master cylinders, or if you notice a soft or inconsistent brake pedal. Regular brake fluid changes every couple of years also call for bleeding.
Q3: What tools do I need to bleed brakes properly?
A3: You’ll need a brake bleeder wrench or the appropriate socket, clear plastic tubing, a container for old fluid, fresh brake fluid matching your vehicle’s specification, a helper (optional but recommended), and safety gloves and glasses.
Q4: What’s the step-by-step process to bleed brakes?
A4:
- Prepare: Park on level ground, secure the vehicle with wheel chocks, and pop the hood to access the brake fluid reservoir.
- Check fluid: Top off the brake fluid reservoir so it doesn’t run dry during bleeding.
- Locate bleeder valves: Identify bleeder screws on your brake calipers or wheel cylinders—usually at the back of each wheel assembly.
- Start farthest wheel: Begin with the brake farthest from the master cylinder (often the right rear wheel). Attach the clear tubing to the bleeder valve, submerge the other end in a container partly filled with fluid.
- Pump and hold: Have your helper press and hold the brake pedal down. Open the bleeder valve to let fluid and air escape, then close the valve before your helper releases the pedal.
- Repeat: Keep pumping, opening, and closing until only clear fluid flows without bubbles.
- Move closer wheels: Repeat the process for the other wheels, moving closer to the master cylinder.
- Final check: Keep the reservoir topped; once done, ensure the cap is securely back on. Test the brake pedal for firmness before taking the car on the road.
Q5: Can I bleed brakes by myself?
A5: Yes! While a helper makes the process easier, you can use a one-person vacuum or pressure brake bleeder tool. These devices allow you to manage fluid flow and air expulsion solo.
Q6: What mistakes should I avoid when bleeding brakes?
A6: Avoid letting the brake fluid reservoir run dry, which sucks air back into the system. Don’t reuse old brake fluid or mix types (DOT 3, DOT 4, DOT 5), and never reuse contaminated fluid. Also, be careful not to overtighten bleeder screws, which could strip threads.
Q7: How do I dispose of old brake fluid?
A7: Brake fluid is toxic and should never be poured down drains. Collect it in a sealed container and take it to a hazardous waste disposal facility or an automotive store that accepts used fluids.
Q8: How do I know if bleeding was successful?
A8: A firm, non-spongy brake pedal that responds immediately is a telltale sign. If the pedal feels soft or sinks to the floor, there may still be air in the system or another brake issue needing attention.
Q9: Can I bleed brakes in any order?
A9: Generally, it’s best to start with the wheel farthest from the master cylinder and move closer (commonly right rear, left rear, right front, left front). This ensures air is pushed out efficiently.
Q10: What if bleeding doesn’t fix the brake problem?
A10: Persistent issues may indicate deeper problems like leaks, worn brake lines, or a faulty master cylinder. In such cases, consult a professional mechanic to diagnose and repair safely.
Bleeding brakes may seem like a daunting task, but with patience and the right technique, you can ensure your brake system is responsive and safe—keeping you confidently in control behind the wheel.
Insights and Conclusions
Mastering the art of bleeding your car brakes isn’t just about maintaining safety—it’s about understanding the heartbeat of your vehicle’s performance. With the right tools, a bit of patience, and careful attention to detail, you can restore your brakes to their full potential and gain confidence every time you hit the road. Remember, bleeding brakes properly is both a science and a craft; approach the task methodically, and your car will thank you with smoother, more responsive stops. So next time your pedal feels spongy or unsteady, you’ll know exactly how to bring your braking system back to life—one careful pump at a time.

2 Comments
skv9s3
skv9s3