

Beneath the hood of every vehicle lies a complex symphony of metal, fluid, and machinery—working tirelessly to power your journey. Over time, this intricate engine environment can become cloaked in grime, dirt, and oil residue, quietly threatening performance and longevity. Whether you’re a seasoned gearhead or a casual car owner, maintaining a clean engine isn’t just about aesthetics; it’s a vital step in preserving your vehicle’s health. In this article, we’ll explore the best engine cleaning tips to help you safely and effectively restore that polished shine and ensure your engine continues to run smoothly for miles to come.
Table of Contents
- Choosing the Right Engine Cleaner for Your Vehicle
- Preparing Your Engine Bay for a Safe Cleaning
- Step-by-Step Guide to Effective Engine Degreasing
- Essential Tools and Materials for Engine Detailing
- Protecting Sensitive Components During the Cleaning Process
- Finishing Touches for a Spotless Engine Appearance
- Q&A
- Insights and Conclusions

Choosing the Right Engine Cleaner for Your Vehicle
When selecting an engine cleaner, it’s essential to consider the type of grime your vehicle accumulates and the material composition of your engine parts. Some cleaners are designed specifically for heavy grease and oil build-up, while others cater to light dirt or dust. Always check the label for compatibility with metal, rubber, and plastic components to avoid degradation or damage. Additionally, opting for a biodegradable or environmentally friendly formula ensures you’re not just protecting your engine but also minimizing your ecological footprint.
- Gel-based cleaners: Ideal for targeted application and longer dwell time on stubborn residues.
- Aerosol sprays: Perfect for quick, even coverage over larger engine surfaces.
- Foam cleaners: Expands on contact, reaching crevices and hard-to-access areas.
To further assist in choosing the right formulation, consider the following quick-reference table, which compares essential features of popular engine cleaning products:
| Cleaner Type | Best For | Eco-Friendly | Application Method |
|---|---|---|---|
| Gel | Heavy Grease | Moderate | Brush or Spray |
| Spray | Light Dirt | Low | Aerosol Spray |
| Foam | Crevices | High | Foam Dispenser |
Preparing Your Engine Bay for a Safe Cleaning
Before diving into the cleaning process, it’s essential to ensure your engine bay is ready for some TLC. Start by disconnecting the battery terminals to prevent any electrical mishaps — battery acid and water don’t mix well. Next, cover sensitive components like the alternator, exposed wiring, air intake, and fuse box using plastic bags or cling film to shield them from moisture. This simple step minimizes the risk of water damage and keeps your electronics safe during washing.
Once your engine bay is protected, give it a quick once-over to remove any loose debris with a soft brush or compressed air. This will make the cleaning more effective and prevent dirt from grinding into delicate parts. Establish a warm, shaded working area to ensure the engine bay dries promptly without leaving water spots or rusting components. Here’s a handy checklist to keep in mind:
- Disconnect battery terminals
- Cover sensitive electrical parts
- Remove loose dirt and debris
- Work in a shaded, ventilated area
- Gather all cleaning supplies beforehand

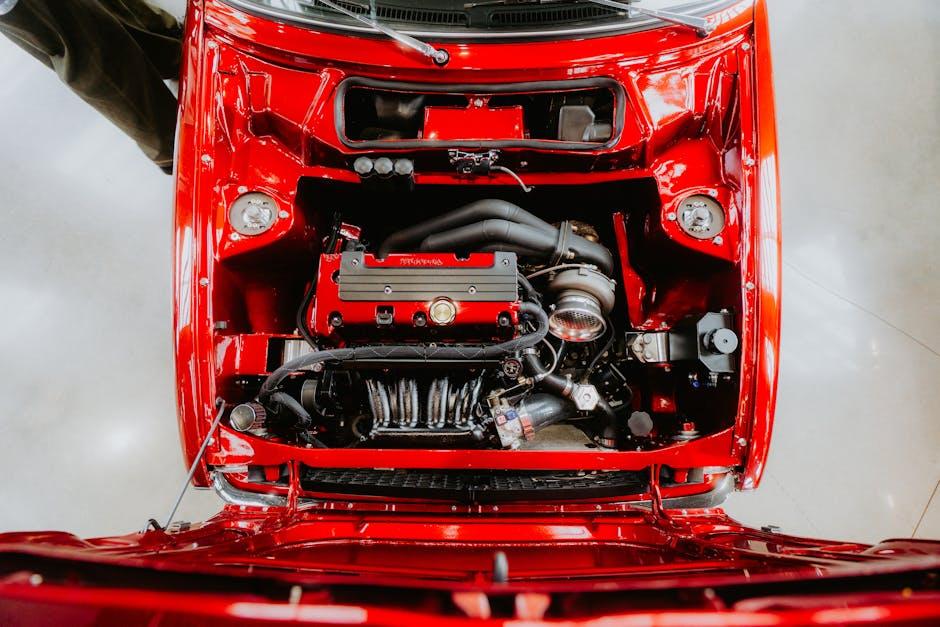
Step-by-Step Guide to Effective Engine Degreasing
Begin by ensuring the engine is cool to the touch—working on a hot engine can cause burns and damage components. Next, cover sensitive parts like the battery, air intakes, and electrical connections with plastic bags or cling wrap to prevent water intrusion. It’s crucial to start with a dry brush to loosen surface grime, focusing on areas with thick grease buildup. Use a stiff-bristle brush for stubborn patches, but avoid aggressive scrubbing that could harm hoses or wiring.
Once the surface dirt is loosened, apply a high-quality engine degreaser evenly, making sure to target greasy hot spots. Let it sit for 10 to 15 minutes to break down the oils deeply embedded in crevices. Use a garden hose with gentle water pressure or a spray bottle for rinsing to avoid flooding delicate parts. For a clearer picture:
| Step | Key Tip |
|---|---|
| Preparation | Cool engine & cover sensitive parts |
| Loosen Dirt | Dry brush before degreaser |
| Apply Degreaser | Even coverage, wait 10-15 mins |
| Rinse | Gentle water spray, avoid flooding |
Finally, dry the engine surface with microfiber towels and consider using compressed air to expel moisture from hidden areas. This minimizes rust risk and readies your engine for a fresh shine. For maintenance, repeat the process every few months or after particularly dirty road conditions to keep your engine looking pristine and performing optimally.
Essential Tools and Materials for Engine Detailing
Every successful engine detailing session begins with gathering the right set of tools and materials. Equipping yourself properly not only ensures a thorough clean but also protects sensitive engine components. Some essentials include engine degreasers formulated to break down grime without damaging rubber or plastic parts, soft-bristle brushes for delicate scrubbing, and a collection of microfiber towels to gently wipe surfaces without scratching. Additionally, a high-quality hose or pressure washer with adjustable settings helps rinse off loosened dirt with precision control to avoid oversaturating electrical elements.
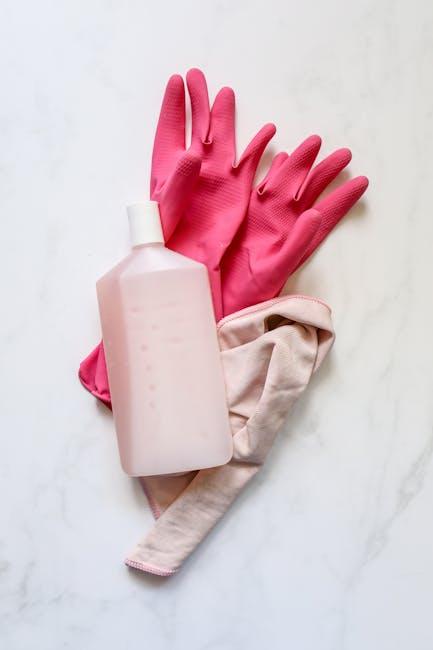
Investing in protective gear increases both safety and effectiveness. Wearing gloves guards your skin from harsh chemicals, while safety goggles shield your eyes from splashes. If you want to take your engine detailing to the next level, consider these handy tools:
- Plastic covers and cling films – to shield electrical parts and air intakes
- Compressed air canister or air blower – for removing dust from hard-to-reach spots
- Foam applicator pads – for an even spread of degreasers or protectants
| Tool/Material | Purpose | Tip |
|---|---|---|
| Engine Degreaser | Breaks down oil and grease | Choose biodegradable formulas |
| Microfiber Towels | Surface wiping and drying | Use different towels for cleaning and drying |
| Soft-Bristle Brush | Gentle scrubbing | Perfect for tight corners and delicate parts |

Protecting Sensitive Components During the Cleaning Process
When cleaning your engine, it’s crucial to safeguard delicate parts that could easily suffer damage from water, chemicals, or high pressure. Components such as the alternator, exposed wiring, sensors, and the air intake system require extra attention. To avoid mishaps, cover these sensitive areas with plastic bags or waterproof tape before beginning the cleaning process. This simple precaution creates an effective barrier against moisture ingress, which can lead to short circuits or corrosion.
Additionally, avoid using harsh cleaners indiscriminately. Opt for gentle, engine-safe degreasers that break down grime without degrading rubber hoses or painted surfaces. Below is a quick overview of protection tips to keep in mind:
- Cover sensitive electrical parts: Use plastic wraps or foil.
- Use low-pressure water: Prevents water from being forced into tight seals.
- Choose pH-balanced cleaners: Safe for various engine materials.
- Avoid soaking the engine: Target grime spots instead of flooding the whole area.
Finishing Touches for a Spotless Engine Appearance
To elevate the clean look of your engine bay, focus on the details that bring everything together with a polished finish. After rinsing and drying, apply a high-quality engine dressing to restore that deep black shine to hoses and plastic components. Avoid silicone-based products for a natural look and longer-lasting effect. Use a microfiber cloth to evenly spread the dressing, ensuring no residue pools in crevices.
Don’t overlook the smaller metal parts—polishing them adds a professional touch that catches the eye. A dab of metal polish on bolts, clamps, and visible screws will brighten the entire engine bay. Additionally, consider these quick final steps:
- Cover exposed electricals: Use plastic wrap or aluminum foil to shield them during cleaning and remove afterward.
- Deodorize: A mild air freshener designed for cars can neutralize any lingering chemical smells.
- Check fluid caps: Wipe around them to remove any drips or smudges for a crisp finish.
| Finishing Task | Recommended Product | Estimated Time |
|---|---|---|
| Engine Dressing | Water-based Spray | 5 min |
| Metal Polishing | Aluminum Polish | 7 min |
| Electrical Protection | Plastic Wrap | 2 min |
Q&A
Q&A: Best Engine Cleaning Tips
Q1: Why is cleaning my engine important?
A1: A clean engine not only looks great but also runs cooler and can help you spot leaks or worn parts early. Dirt and grime can act as insulation, trapping heat, which may reduce engine efficiency and lifespan.
Q2: How often should I clean my engine?
A2: Typically, cleaning your engine every 6 to 12 months is sufficient, but it depends on your driving conditions. If you often drive on muddy roads or in dusty environments, more frequent cleaning might be necessary.
Q3: What’s the best time to clean my engine?
A3: Always wait until the engine is cool before cleaning. A hot engine can cause cleaners to evaporate too quickly or, worse, cause burns or damage delicate components.
Q4: Should I use a pressure washer to clean my engine?
A4: Pressure washers can be effective but must be used carefully. High pressure can drive water into sensitive electrical parts. Use a gentle spray setting and keep the nozzle at least a foot away from the engine.
Q5: What cleaning products are safe for engines?
A5: Use engine degreasers specifically formulated for automotive use. Avoid harsh chemicals like bleach or ammonia. Always check the product’s instructions and test on a small area if unsure.
Q6: How do I protect electrical connections during cleaning?
A6: Cover sensitive components such as the alternator, battery terminals, and exposed wiring with plastic bags or cling film. This prevents water from causing shorts or corrosion.
Q7: Can I clean the engine myself or should I hire a professional?
A7: DIY engine cleaning is doable with proper preparation and care. However, if you’re uncertain or uncomfortable around engine parts, a professional service can ensure a safe, thorough clean.
Q8: Are there any tips to maintain engine cleanliness longer?
A8: Regularly checking for leaks and promptly fixing them stops grease buildup. Also, washing the engine bay gently during routine car washes can help maintain cleanliness.
Q9: What should I avoid when cleaning the engine?
A9: Avoid flooding electrical components with water, using abrasive brushes that can damage hoses or wires, and high-pressure sprays aimed directly at delicate parts.
Q10: How can I tell if the engine cleaning made a difference?
A10: Besides a visibly cleaner engine bay, you might notice improved engine performance or cooler operating temperatures. It’s also easier to spot potential problems like leaks or worn belts during inspections.
Insights and Conclusions
As engine grime and buildup quietly chip away at performance, a thoughtful cleaning routine becomes more than just maintenance—it’s a way to extend the heart of your vehicle’s life. By combining the right tools, gentle techniques, and a touch of care, you can keep your engine running smoothly and looking sharp beneath the hood. Remember, a clean engine isn’t just about aesthetics; it’s about ensuring every journey starts with power and confidence. So gear up, follow these tips, and let your engine breathe easy, mile after mile.
674 Comments
https://shorturl.fm/EmJml
https://shorturl.fm/euOo2
https://shorturl.fm/whZVF
https://shorturl.fm/w55lM
https://shorturl.fm/nqItr
https://shorturl.fm/yyIrt
https://shorturl.fm/G74cN
https://shorturl.fm/roCfh
https://shorturl.fm/J76CC
https://shorturl.fm/mayr7
https://shorturl.fm/picTP
https://shorturl.fm/4MkXa
https://shorturl.fm/A3Vjt
https://shorturl.fm/kPIbB
https://shorturl.fm/VsCr8
https://shorturl.fm/8UBeO
https://shorturl.fm/ktXIX
https://shorturl.fm/db7lq
https://shorturl.fm/kVhlV
https://shorturl.fm/lxizg
https://shorturl.fm/PY3dz
https://shorturl.fm/I7a07
https://shorturl.fm/coVOi
https://shorturl.fm/tq53G
https://shorturl.fm/a41eU
https://shorturl.fm/yeF8U
husrdj
https://shorturl.fm/Qn0jo
https://shorturl.fm/DasLb
https://shorturl.fm/9hwVD
https://shorturl.fm/sf6DU
https://shorturl.fm/y48d2
https://shorturl.fm/YIL4b
https://shorturl.fm/IXUlj
https://shorturl.fm/iuw1O
https://shorturl.fm/GiKTn
https://shorturl.fm/kvMep
https://shorturl.fm/Wuf8M
https://shorturl.fm/7HvwL
https://shorturl.fm/OuSLl
o8hwra
https://shorturl.fm/uJPje
https://shorturl.fm/KU5HK
https://shorturl.fm/7g4mY
https://shorturl.fm/j505Y
https://shorturl.fm/mCxyU
https://shorturl.fm/jbyu3
https://shorturl.fm/oXMUS
80kdxp
https://shorturl.fm/DWokn
https://shorturl.fm/gbPs0
fl4fxk
https://shorturl.fm/Vrzca
https://shorturl.fm/jbHfL
https://shorturl.fm/YTQ0Y
https://shorturl.fm/eTGGK
https://shorturl.fm/xW3II
https://shorturl.fm/p9kb8
https://shorturl.fm/XISL7
https://shorturl.fm/IKz77
https://shorturl.fm/pMqWR
https://shorturl.fm/HH5ID
8jtu4i
https://shorturl.fm/3S9zs
https://shorturl.fm/iOl7S
https://shorturl.fm/YNyKw
https://shorturl.fm/5eEj1
https://shorturl.fm/fl1qO
https://shorturl.fm/5fYGb
https://shorturl.fm/2rj7j
https://shorturl.fm/fA8Oa
https://shorturl.fm/ApOmp
https://shorturl.fm/zMzCS
https://shorturl.fm/mAjqC
https://shorturl.fm/jKd0W
https://shorturl.fm/EQAkc
https://shorturl.fm/zZHPJ
https://shorturl.fm/01i1g
https://shorturl.fm/Ai66A
https://shorturl.fm/8YBfB
https://shorturl.fm/IkUCT
https://shorturl.fm/INoMk
ro3ezt
https://shorturl.fm/YB3JK
https://shorturl.fm/UP6Xo
https://shorturl.fm/rRLQR
erkwab
https://shorturl.fm/3879K
https://shorturl.fm/PifK2
https://shorturl.fm/t1q2g
https://t.me/s/Online_1_xbet/48
https://shorturl.fm/DcP6J
https://shorturl.fm/5omoK
https://t.me/s/Online_1_xbet/3047
https://t.me/s/rating_online/4
https://shorturl.fm/ggrDG
https://t.me/s/rating_online/3
https://t.me/s/rating_online/5
https://t.me/s/rating_online/7
https://t.me/rating_online
https://t.me/s/rating_online/9
https://t.me/rating_online/9
https://shorturl.fm/W4B7N
https://t.me/Online_1_xbet/2252
https://t.me/Online_1_xbet/2686
https://t.me/Online_1_xbet/3064
ulmd14
https://t.me/Online_1_xbet/1902
https://t.me/Online_1_xbet/2025
https://t.me/Online_1_xbet/3176
https://t.me/Online_1_xbet/2984
https://t.me/Online_1_xbet/3318
https://shorturl.fm/9Rd1F
https://t.me/Official_1xbet_1xbet/s/275
https://t.me/Official_1xbet_1xbet/s/106
https://t.me/Official_1xbet_1xbet/s/53
https://t.me/Official_1xbet_1xbet/s/256
https://t.me/Official_1xbet_1xbet/s/298
https://t.me/Official_1xbet_1xbet/s/172
https://t.me/Official_1xbet_1xbet/s/1181
https://t.me/Official_1xbet_1xbet/s/235
https://t.me/Official_1xbet_1xbet/s/299
https://t.me/Official_1xbet_1xbet/s/287
https://t.me/Official_1xbet_1xbet/s/174
https://t.me/Official_1xbet_1xbet/s/606
https://t.me/Official_1xbet_1xbet/s/366
https://t.me/Official_1xbet_1xbet/s/75
https://t.me/Official_1xbet_1xbet/s/901
https://t.me/Official_1xbet_1xbet/s/1260
https://t.me/Official_1xbet_1xbet/s/582
https://t.me/Official_1xbet_1xbet/s/1151
https://t.me/Official_1xbet_1xbet/s/277
https://t.me/Official_1xbet_1xbet/s/920
https://t.me/Official_1xbet_1xbet/s/708
https://t.me/Official_1xbet_1xbet/s/1346
https://t.me/Official_1xbet_1xbet/s/730
https://t.me/Official_1xbet_1xbet/s/1013
https://t.me/Official_1xbet_1xbet/s/1050
https://t.me/Official_1xbet_1xbet/s/1079
https://t.me/Official_1xbet_1xbet/s/1125
https://t.me/Official_1xbet_1xbet/s/435
https://t.me/Official_1xbet_1xbet/s/712
https://t.me/Official_1xbet_1xbet/s/685
https://t.me/Official_1xbet_1xbet/s/1075
https://t.me/Official_1xbet_1xbet/s/1433
https://t.me/Official_1xbet_1xbet/s/311
https://t.me/Official_1xbet_1xbet/s/1198
https://t.me/Official_1xbet_1xbet/s/1542
https://t.me/Official_1xbet_1xbet/s/1089
https://t.me/Official_1xbet_1xbet/s/819
https://t.me/Official_1xbet_1xbet/s/252
https://t.me/Official_1xbet_1xbet/s/778
https://t.me/Official_1xbet_1xbet/s/987
https://t.me/Official_1xbet_1xbet/s/762
https://t.me/Official_1xbet_1xbet/s/742
https://t.me/Official_1xbet_1xbet/s/777
https://t.me/Official_1xbet_1xbet/s/1497
https://t.me/Official_1xbet_1xbet/s/1435
https://t.me/Official_1xbet_1xbet/s/1060
https://t.me/Official_1xbet_1xbet/s/624
https://t.me/Official_1xbet_1xbet/1822
https://t.me/Official_1xbet_1xbet/1786
https://t.me/Official_1xbet_1xbet/1730
https://t.me/Official_1xbet_1xbet/1685
https://t.me/s/Official_1xbet_1xbet/1613
https://t.me/Official_1xbet_1xbet/1819
https://t.me/Official_1xbet_1xbet/1601
https://t.me/Official_1xbet_1xbet/1741
https://shorturl.fm/RvagP
https://t.me/s/Official_1xbet_1xbet/1604
https://t.me/Official_1xbet_1xbet/1618
https://t.me/Official_1xbet_1xbet/1630
https://t.me/Official_1xbet_1xbet/1835
https://t.me/s/Official_1xbet_1xbet/1600
https://t.me/Official_1xbet_1xbet/1839
https://t.me/Official_1xbet_1xbet/1748
https://t.me/s/Official_1xbet_1xbet/1638
https://t.me/s/Official_1xbet_1xbet/1824
https://t.me/s/Official_1xbet_1xbet/1821
https://t.me/s/Official_1xbet_1xbet/1696
https://shorturl.fm/HtyRW
https://t.me/Official_1xbet_1xbet/1809
https://t.me/Official_1xbet_1xbet/1700
https://t.me/s/Official_1xbet_1xbet/1735
https://t.me/Official_1xbet_1xbet/1818
https://t.me/s/Official_1xbet_1xbet/1717
https://t.me/Official_1xbet_1xbet/1715
https://t.me/Official_1xbet_1xbet/1761
https://t.me/Official_1xbet_1xbet/1769
https://t.me/Official_1xbet_1xbet/1851
https://t.me/Official_1xbet_1xbet/1726
https://t.me/s/Official_1xbet_1xbet/1640
https://t.me/Official_1xbet_1xbet/1612
https://shorturl.fm/mMfyI
https://t.me/Official_1xbet_1xbet/1791
https://t.me/s/Official_1xbet_1xbet/1851
https://t.me/s/Official_1xbet_1xbet/1818
https://t.me/Official_1xbet_1xbet/1682
https://t.me/s/Official_1xbet_1xbet/1698
https://shorturl.fm/sDw2s
https://t.me/Official_1xbet_1xbet/1827
https://t.me/Official_1xbet_1xbet/1664
https://t.me/Official_1xbet_1xbet/1840
https://t.me/s/Official_1xbet_1xbet/1816
https://t.me/Official_1xbet_1xbet/1607
https://t.me/s/Official_1xbet_1xbet/1746
https://t.me/Official_1xbet_1xbet/1643
https://t.me/s/Official_1xbet_1xbet/1725
https://t.me/Official_1xbet_1xbet/1811
https://t.me/Official_1xbet_1xbet/1716
https://t.me/Official_1xbet_1xbet/1667
https://t.me/s/Official_1xbet_1xbet/1780
https://t.me/Official_1xbet_1xbet/1623
https://t.me/Official_1xbet_1xbet/1732
https://t.me/s/Official_1xbet_1xbet/1662
https://t.me/s/Official_1xbet_1xbet/1678
https://t.me/s/Official_1xbet_1xbet/1769
https://t.me/Official_1xbet_1xbet/1833
https://t.me/Official_1xbet_1xbet/1675
https://t.me/Official_1xbet_1xbet/1610
https://t.me/Official_1xbet_1xbet/1633
https://t.me/s/Official_1xbet_1xbet/1776
https://t.me/Official_1xbet_1xbet/1678
https://t.me/Official_1xbet_1xbet/1756
https://t.me/s/Official_1xbet_1xbet/1783
https://t.me/Official_1xbet_1xbet/1614
https://t.me/Official_1xbet_1xbet/1692
https://t.me/s/Official_1xbet_1xbet/1825
https://t.me/s/Official_1xbet_1xbet/1658
https://t.me/Official_1xbet_1xbet/1755
https://t.me/s/topslotov
https://shorturl.fm/0fsFv
b98vne
https://t.me/s/official_1win_aviator
https://shorturl.fm/5TvKA
https://shorturl.fm/prDMA
https://t.me/reiting_top10_casino/7
https://t.me/reiting_top10_casino/2
https://t.me/s/reiting_top10_casino
https://t.me/reiting_top10_casino/9
https://t.me/reiting_top10_casino/6
https://t.me/s/reiting_top10_casino/4
https://t.me/s/reiting_top10_casino/2
https://t.me/s/reiting_top10_casino/7
https://t.me/s/reiting_top10_casino/6
https://shorturl.fm/xBn2I
https://t.me/reiting_top10_casino/5
https://t.me/s/reiting_top10_casino/10
https://t.me/reiting_top10_casino
https://t.me/s/reiting_top10_casino/9
https://t.me/reiting_top10_casino/10
https://t.me/reiting_top10_casino/8
https://shorturl.fm/k23Pw
https://shorturl.fm/hf2wb
https://shorturl.fm/WWSjn
https://shorturl.fm/tss25
https://t.me/reiting_top10_casino/3
https://t.me/reiting_top10_casino/4
https://shorturl.fm/PjKTx
https://shorturl.fm/fe5kr
https://t.me/s/Gaming_1xbet
https://t.me/s/PlayCasino_1win
https://t.me/s/PlayCasino_1win
https://t.me/s/PlayCasino_1xbet
https://shorturl.fm/ZFthv
https://t.me/s/PlayCasino_1xbet
https://shorturl.fm/yYwlU
https://shorturl.fm/S1LgU
https://shorturl.fm/cghUl
https://shorturl.fm/mIqGi
https://t.me/s/ofitsialniy_1win/33/evith
https://t.me/s/Official_beefcasino
https://t.me/s/ofitsialniy_1win
https://t.me/s/iw_1xbet
snf4kb
https://shorturl.fm/upFTI
https://t.me/s/bs_1xbet/38
https://t.me/bs_1xbet/22
https://t.me/s/bs_1xbet/35
https://t.me/bs_1xbet/45
https://t.me/s/bs_1xbet/16
https://t.me/s/bs_1xbet/47
https://t.me/bs_1xbet/46
https://t.me/s/bs_1xbet/4
https://t.me/s/bs_1xbet/6
https://t.me/bs_1xbet/33
https://t.me/bs_1xbet/32
https://t.me/bs_1xbet/15
https://t.me/bs_1xbet/8
https://t.me/s/bs_1xbet/41
https://t.me/s/bs_1xbet/44
https://t.me/s/bs_1xbet/21
https://t.me/bs_1xbet/36
https://t.me/s/bs_1xbet/20
https://t.me/s/bs_1xbet/12
https://t.me/bs_1xbet/44
https://t.me/bs_1xbet/2
https://t.me/s/bs_1xbet/48
https://t.me/bs_1xbet/24
https://t.me/s/bs_1xbet/43
https://t.me/s/bs_1xbet/40
https://t.me/s/bs_1xbet/26
https://t.me/s/bs_1xbet/37
https://t.me/bs_1xbet/29
https://t.me/s/bs_1xbet/9
https://t.me/bs_1xbet/31
https://t.me/s/bs_1xbet/47
https://t.me/bs_1xbet/13
https://t.me/bs_1xbet/48
https://t.me/bs_1xbet/7
https://t.me/bs_1xbet/31
https://t.me/s/bs_1xbet/16
https://t.me/s/bs_1xbet/35
https://t.me/s/bs_1xbet/2
https://t.me/s/bs_1xbet/6
https://t.me/bs_1xbet/10
https://t.me/bs_1xbet/45
https://shorturl.fm/pOnQP
https://shorturl.fm/EmltC
https://t.me/jw_1xbet/508
https://t.me/s/jw_1xbet/553
https://t.me/s/jw_1xbet/455
https://shorturl.fm/WnwLM
https://t.me/s/jw_1xbet/451
https://t.me/s/jw_1xbet/178
https://t.me/s/jw_1xbet/848
https://shorturl.fm/Me6at
https://t.me/bs_1Win/321
https://t.me/s/bs_1Win/429
https://t.me/s/bs_1Win/1240
https://t.me/s/bs_1Win/532
https://t.me/bs_1Win/400
https://t.me/bs_1Win/645
https://t.me/s/bs_1Win/438
https://t.me/s/bs_1Win/505
https://t.me/s/bs_1Win/1099
https://t.me/bs_1Win/703
https://t.me/bs_1Win/1070
https://t.me/bs_1Win/1293
https://t.me/s/Official_mellstroy_casino/25
https://t.me/s/Official_mellstroy_casino/26
https://t.me/s/Beefcasino_rus/12
https://t.me/s/Official_mellstroy_casino/31
https://t.me/s/Official_mellstroy_casino/13
https://t.me/Official_mellstroy_casino/11
https://t.me/Official_mellstroy_casino/58
https://t.me/s/Official_mellstroy_casino/17
https://t.me/s/Official_mellstroy_casino/41
https://t.me/s/Official_mellstroy_casino/14
https://t.me/Official_mellstroy_casino/42
https://shorturl.fm/2OGTd
https://shorturl.fm/r3FZT
https://shorturl.fm/9jyM7
https://t.me/Best_promocode_rus/1236
https://t.me/s/Best_promocode_rus/2260
https://shorturl.fm/EaV9B
https://shorturl.fm/akuhh
https://shorturl.fm/ew9Hf
https://t.me/Beefcasino_rus/57
https://t.me/s/ud_Pinco/60
https://t.me/s/ud_Booi/51
https://t.me/s/ud_1xbet/52
https://shorturl.fm/QiFkh
https://t.me/s/ud_Vulkan/60
https://t.me/ud_MrBit/56
https://t.me/s/ud_Casino_X/56
https://t.me/s/ud_Izzi/58
https://t.me/ud_Fresh/52
https://t.me/ud_Kometa/44
https://t.me/s/ud_Leon/54
https://t.me/ud_Gama/55
https://t.me/s/ud_Leon/64
https://t.me/s/ud_Jet/63
https://t.me/s/ud_Gizbo/48
https://t.me/ud_GGBet/55
https://t.me/ud_1xSlots/55
https://shorturl.fm/9av30
https://t.me/s/ud_Vodka/44
https://t.me/Beefcasino_rus/59
https://t.me/s/ud_GGBet/61
https://t.me/s/ud_Pinco/59
https://t.me/ud_Vulkan/52
https://t.me/ud_1xbet/60
https://t.me/ud_1xbet/50
https://t.me/ud_Fresh/59
https://t.me/s/ud_Pin_Up/47
https://t.me/ud_Monro/53
https://t.me/s/ud_Riobet/49
https://t.me/s/ud_1Go/22
https://t.me/s/ud_Pokerdom/15
https://t.me/s/ud_Sol/25
https://t.me/s/uD_daddy
https://t.me/s/Official_mellstroy_casino
https://t.me/s/UD_LegzO
https://t.me/s/uD_stArda
https://t.me/s/UD_iRWIn
https://t.me/s/UD_ROX
https://shorturl.fm/its3Y
https://t.me/s/ud_poKERdoM
https://t.me/s/Ud_monRo
https://t.me/s/official_1win_aviator/38
https://t.me/s/UD_drIp
https://t.me/s/UD_BOoI
https://t.me/official_1win_aviator/87
https://shorturl.fm/1PCn9
https://t.me/s/ud_StaKe
https://t.me/s/tf_1win
https://t.me/s/kta_1win
https://t.me/s/tf_1win
https://t.me/s/ud_FRESh
https://t.me/s/official_1win_aviator/134
https://t.me/s/Ud_gAMa
https://t.me/s/ud_PLAYfortunA
https://t.me/s/ud_IRwiN
https://t.me/s/UD_BOoi
https://t.me/s/UD_DriP
https://t.me/s/ud_jeT
https://t.me/s/Ud_LEX
https://t.me/s/ud_riObet
https://shorturl.fm/FlafI
https://t.me/s/ud_lEon
https://t.me/s/Ud_CatCasINo
https://t.me/s/ud_gIZbo
https://t.me/s/UD_pokeRdOM
https://t.me/s/ud_MOstBeT
https://t.me/s/ke_Pinco
https://shorturl.fm/6iAXe
https://shorturl.fm/wD1t3
https://t.me/s/kef_Rox
https://t.me/s/official_1win_aviator/132
https://t.me/s/ke_Starda
https://t.me/s/ke_PlayFortuna
https://t.me/s/ke_Flagman
https://t.me/s/ke_Irwin
https://t.me/s/ke_GGBet
https://t.me/s/ke_Martin
https://t.me/s/ke_Drip
https://t.me/s/kef_R7
https://shorturl.fm/0bIne
https://t.me/s/ke_Stake
https://t.me/s/ke_1xbet
https://t.me/s/ke_Vulkan
https://t.me/s/ke_MostBet
https://t.me/s/ke_1xSlots
https://t.me/s/ke_mellstroy
https://t.me/s/ke_Daddy
https://t.me/s/ke_Pin_Up
https://t.me/s/kef_beef
https://t.me/s/ke_CatCasino
https://t.me/s/ke_Casino_X
https://t.me/s/ke_Izzi
https://t.me/s/ke_1Go
https://t.me/s/ke_Sol
https://t.me/s/ke_Jet
https://shorturl.fm/2f0pY
https://t.me/s/ke_Vodka
https://t.me/s/ke_JoyCasino
https://t.me/s/ke_Volna
https://t.me/s/official_1win_aviator/539
https://t.me/s/ke_Leon
https://t.me/s/official_1win_aviator/427
https://t.me/s/ke_kent
https://shorturl.fm/dc5Vs
https://t.me/s/ke_Kometa
https://t.me/s/ke_Fresh
https://t.me/s/ke_1Win
https://t.me/s/official_1win_aviator/179
https://shorturl.fm/SiI6h
https://shorturl.fm/8qggG
https://t.me/s/topcasino_v_rossii
https://t.me/s/top_kazino_z
https://t.me/a_Top_onlinecasino/10
https://t.me/s/a_Top_onlinecasino/6
https://t.me/a_Top_onlinecasino/11
https://t.me/a_Top_onlinecasino/4
https://t.me/a_Top_onlinecasino/19
https://shorturl.fm/odGFs
https://t.me/a_Top_onlinecasino/3
https://t.me/s/a_Top_onlinecasino/17
https://t.me/a_Top_onlinecasino/12
https://t.me/a_Top_onlinecasino/2
https://t.me/topcasino_rus/
https://shorturl.fm/RtdzX
https://shorturl.fm/q6gyZ
https://t.me/s/official_Stake_ed
https://t.me/s/official_Pokerdom_es
https://shorturl.fm/OiLbQ
https://t.me/s/official_Lex_es
https://t.me/s/official_DragonMoney_es
https://t.me/s/official_Vodka_ed
https://t.me/s/official_Drip_ed
https://t.me/s/official_CatCasino_ed
https://t.me/s/official_Sol_es
https://t.me/s/official_Legzo_es
https://t.me/s/official_1xSlots_ed
https://t.me/s/official_JoyCasino_ed
https://t.me/s/official_Rox_es
https://t.me/s/official_Riobet_ed
https://t.me/s/official_Stake_es
https://t.me/s/official_R7_ed
https://t.me/s/official_MrBit_ed
https://t.me/s/official_Kometa_ed
https://t.me/s/official_MostBet_es
https://t.me/s/official_Drip_es
https://shorturl.fm/0AqeB
https://t.me/s/official_Jet_es
https://shorturl.fm/IjymV
https://shorturl.fm/f8JZx
https://t.me/s/official_1xbet_es
https://t.me/s/official_1Go_es
https://shorturl.fm/ZrJOB
https://t.me/s/Pinco_egs/15
https://t.me/s/Lex_egs/3
https://t.me/s/iGaming_live/4558
https://t.me/s/MostBet_egs/17
https://t.me/Kometa_egs/19
https://t.me/s/Rox_egs/14
https://t.me/Flagman_egs/11
https://t.me/s/R7_egs/15
https://t.me/s/MostBet_egs/20
https://t.me/Daddy_egs/7
https://t.me/Lex_egs/12
https://t.me/Sol_egs/8
https://t.me/s/Izzi_egs/10
https://t.me/Vodka_egs/7
https://t.me/MrBit_egs/9
https://t.me/Fresh_egs/8
https://t.me/Pokerdom_egs/18
https://t.me/Starda_egs/6
https://t.me/Legzo_egs/16
https://t.me/s/PinUp_egs/7
https://t.me/Drip_egs/7
https://t.me/s/Jet_egs/19
https://t.me/s/Izzi_egs/4
https://t.me/va_1xbet/7
https://t.me/s/iGaming_live/4809
https://t.me/va_1xbet/15
https://t.me/s/va_1xbet/9
https://t.me/va_1xbet/14
https://t.me/va_1xbet/13
https://t.me/s/va_1xbet/14
https://t.me/va_1xbet/5
https://t.me/va_1xbet/24
https://t.me/s/va_1xbet/6
https://shorturl.fm/5CAiQ
https://t.me/s/va_1xbet/22
https://shorturl.fm/m4MsC
https://t.me/s/va_1xbet/11
https://t.me/s/va_1xbet
https://t.me/s/surgut_narashchivaniye_nogtey/9
https://t.me/s/surgut_narashchivaniye_nogtey/17
https://t.me/s/surgut_narashchivaniye_nogtey/8
https://t.me/s/ah_1xbet/5
https://t.me/s/ah_1xbet/13
https://t.me/s/ah_1xbet/16
https://t.me/ah_1xbet/22
https://t.me/s/ah_1xbet/18
https://t.me/s/ah_1xbet/12
https://t.me/s/ah_1xbet/3
https://t.me/ah_1xbet/16
https://t.me/s/ah_1xbet/10
https://t.me/ah_1xbet/17
https://t.me/s/ah_1xbet/21
https://t.me/s/ah_1xbet/22
https://t.me/ah_1xbet/8
https://shorturl.fm/x9yJo
https://t.me/s/ah_1xbet/19
https://t.me/s/Best_rating_casino
https://shorturl.fm/0GMYk
https://shorturl.fm/B4G5j
https://shorturl.fm/OTrB0
https://shorturl.fm/NIDyn
https://t.me/s/reyting_topcazino/18
https://shorturl.fm/dwlWz
https://t.me/topcasino_rus/
https://t.me/a_Topcasino/7
https://shorturl.fm/mjpis
https://t.me/top_ratingcasino/4
https://t.me/a_Topcasino/10
https://t.me/top_ratingcasino/8
https://shorturl.fm/FxSZa
https://shorturl.fm/i6rNc
https://t.me/a_Topcasino/6
https://t.me/top_ratingcasino/9
https://t.me/a_Topcasino/3
https://t.me/top_ratingcasino/3
https://telegra.ph/Top-kazino-11-14-2
https://t.me/s/kazino_bez_filtrov
https://t.me/kazino_bez_filtrov
https://t.me/da_1xbet/8
https://t.me/da_1xbet/15
https://t.me/da_1xbet/5
https://t.me/da_1xbet/2
https://t.me/da_1xbet/13
https://t.me/da_1xbet/9
https://t.me/Best_promocode_rus/2982
https://t.me/da_1xbet/3
https://t.me/da_1xbet/7
https://t.me/da_1xbet/14
https://t.me/da_1xbet/12
https://shorturl.fm/04tv5
https://t.me/rq_1xbet/873
https://shorturl.fm/K97Wm
https://t.me/rq_1xbet/1098
https://t.me/rq_1xbet/961
https://t.me/s/rq_1xbet/760
https://t.me/s/rq_1xbet/1161
https://t.me/s/rq_1xbet/596
https://t.me/s/rq_1xbet/1359
https://t.me/s/rq_1xbet/1110
https://t.me/Official_1xbet1/913
https://t.me/Official_1xbet1/453
https://t.me/Official_1xbet1/1107
https://t.me/Official_1xbet1/819
https://t.me/s/Official_1xbet1/730
https://t.me/s/Official_1xbet1/1403
https://t.me/Official_1xbet1/416
https://t.me/Official_1xbet1/1017
https://shorturl.fm/lnAds
https://shorturl.fm/f3KLJ
https://shorturl.fm/wBZwd
https://shorturl.fm/ZbJiS
https://shorturl.fm/j3pow
https://shorturl.fm/sNz05
https://shorturl.fm/1NAeC
https://shorturl.fm/NRxxp
https://shorturl.fm/Np7iW
https://shorturl.fm/vfrIN
https://shorturl.fm/ZBWYu
That’s a solid point about adapting strategy to different stack sizes! It reminds me of how bigbunny games blends tradition with innovation – a complete cultural gaming journey, really. Interesting stuff!
That’s a solid point about adapting strategy to different stack sizes! It reminds me of how bigbunny games blends tradition with innovation – a complete cultural gaming journey, really. Interesting stuff!
https://shorturl.fm/g5zwZ
https://shorturl.fm/Laeuz
https://shorturl.fm/iBBsA
https://shorturl.fm/LkegO
https://shorturl.fm/aLnog
https://shorturl.fm/Qws2Q
https://shorturl.fm/PozLi
https://shorturl.fm/jWRy1
https://shorturl.fm/rjn91
Glad to be one of many visitants on this awesome site :D.
I’ll right away seize your rss feed as I can’t in finding your email subscription hyperlink or e-newsletter service. Do you have any? Kindly allow me know so that I could subscribe. Thanks.
I am sure this post has touched all the internet people, its really really nice post on building up new web site.
Enter your invite code to earn your airdrop on Aster https://is.gd/ZceEI6
Special ability to earn $ASTER bonus https://is.gd/CGTnqR
Special ability to earn $ASTER bonus https://is.gd/CGTnqR
https://t.me/s/It_EzCaSH
This blog is definitely rather handy since I’m at the moment creating an internet floral website – although I am only starting out therefore it’s really fairly small, nothing like this site. Can link to a few of the posts here as they are quite. Thanks much. Zoey Olsen
Monetize your traffic with our affiliate program—sign up now!
https://t.me/s/ta_1win/266
https://t.me/s/Russia_Casino_1Win
Unlock exclusive rewards with every referral—apply to our affiliate program now!
I am sure this paragraph has touched all the internet viewers, its really really pleasant post on building up new website.
Greetings! Very helpful advice in this particular article! It’s the little changes which will make the greatest changes. Thanks a lot for sharing!
Hello https://is.gd/tvHMGJ
Greetings! Very helpful advice within this post! It’s the little changes that will make the most important changes. Thanks a lot for sharing!
AI Girls Video
9phmmj
Hello there! I just would like to give you a big thumbs up for the great info you’ve got here on this post. I will be returning to your site for more soon.
I will immediately take hold of your rss feed as I can not to find your email subscription hyperlink or newsletter service. Do you have any? Kindly let me understand so that I may subscribe. Thanks.
Ahaa, its nice discussion regarding this piece of writing at this place at this website, I have read all that, so now me also commenting at this place.
you are really a excellent webmaster. The website loading velocity is amazing. It seems that you are doing any distinctive trick. Furthermore, The contents are masterwork. you have done a magnificent process in this subject!
If you would like to get a good deal from this article then you have to apply such methods to your won weblog.
Invite your network, boost your income—sign up for our affiliate program now!
Hi, yeah this piece of writing is in fact nice and I have learned lot of things from it about blogging. thanks.
Join our affiliate program and watch your earnings skyrocket—sign up now!
Drive sales, collect commissions—join our affiliate team!
Start earning instantly—become our affiliate and earn on every sale!
Monetize your traffic with our affiliate program—sign up now!
**men balance**
MEN Balance Pro is a high-quality dietary supplement developed with research-informed support to help men maintain healthy prostate function.
Sign up and turn your connections into cash—join our affiliate program!
I will right away clutch your rss feed as I can not in finding your e-mail subscription link or e-newsletter service. Do you have any? Please let me understand so that I may subscribe. Thanks.
Refer friends, earn cash—sign up now!
Monetize your traffic with our affiliate program—sign up now!