

Beneath the hood of your car lies a world often overlooked—a complex maze of wires, hoses, and metal shimmering with potential. Keeping this vital engine bay clean is more than just a matter of aesthetics; it’s about preserving performance and spotting issues before they become costly problems. However, cleaning this intricate space requires care and precision to avoid damage. In this article, we’ll explore practical and safe techniques to refresh your engine bay, ensuring it runs smoothly while shining with renewed vitality.
Table of Contents
- Preparing Your Engine Bay for a Thorough Clean
- Choosing the Right Cleaning Products for Engine Components
- Protecting Sensitive Electrical Parts Before Washing
- Step-by-Step Guide to Safe Degreasing and Scrubbing
- Rinsing Techniques to Avoid Water Damage
- Proper Drying and Post-Cleaning Maintenance Tips
- Q&A
- In Retrospect
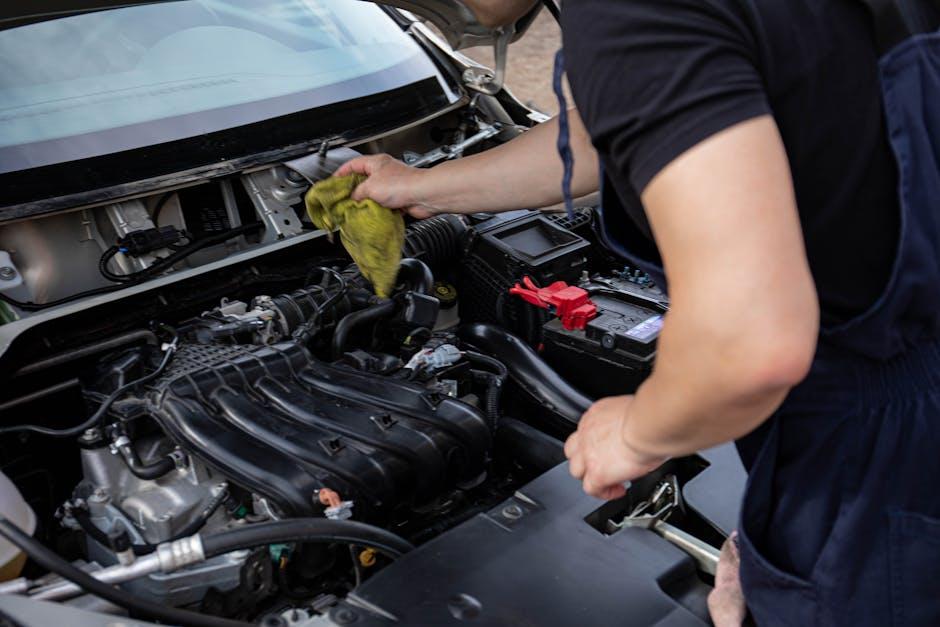
Preparing Your Engine Bay for a Thorough Clean
Before diving into the cleaning process, it’s essential to create a safe and organized workspace around your engine bay. Start by ensuring the car is turned off and completely cooled down to avoid burns or damage to sensitive components. Next, disconnect the negative terminal of the battery to prevent any accidental electrical shorts. This simple precaution allows you to work confidently without the risk of sparking or harming the vehicle’s electrical system. Also, cover any exposed wiring, air intake, and sensitive parts using plastic bags or cling wrap—this will protect them from moisture intrusion during cleaning.
Gather your tools and materials thoughtfully to streamline the cleaning procedure. A basic kit might include:
- Degreaser spray formulated for engine use
- Stiff brushes and microfiber cloths
- Plastic tarps or old towels to catch drips
- Protective gloves and eyewear for safety
- A garden hose with a gentle spray nozzle
Having everything at hand will reduce interruptions and help maintain focus. Lastly, perform a quick inspection to note any damage or worn-out seals that might need attention before or after cleaning. These careful prep steps set the foundation for a thorough, hassle-free engine bay wash without compromising your vehicle’s delicate components.

Choosing the Right Cleaning Products for Engine Components
When selecting cleaning agents for your engine bay, it’s essential to prioritize safety and compatibility with engine materials. Harsh chemicals can corrode sensitive components like rubber hoses, plastic covers, and electrical connections. Opt for degreasers specifically formulated for automotive use, which effectively break down oil and grime without damaging parts. Consider pH-neutral cleaners or those labeled biodegradable to reduce environmental impact. It’s also advisable to avoid products containing bleach, petroleum solvents, or acids, as these can compromise engine integrity over time.
In addition to product ingredients, the method of application and rinsing should guide your choice. Foam sprays provide controlled cleaning, minimizing overspray on electrical parts, while water-based cleaners offer easy rinsing and fast drying. To help you evaluate options quickly, here’s a simple breakdown of common cleaning agents and their suitability:
| Type of Cleaner | Effectiveness | Material Compatibility | Environmental Impact |
|---|---|---|---|
| Water-Based Degreaser | High | Safe on plastics and rubber | Biodegradable |
| Solvent-Based Cleaner | Very High | May damage rubber | Potentially toxic |
| Foam Cleaner | Moderate | Gentle on surfaces | Generally safe |
| Household Detergents | Low | Risky for plastics | Varies |
- Always test a small area before full application to ensure no adverse reaction.
- Use protective gear like gloves and eyewear to handle chemicals safely.
- Follow manufacturer instructions meticulously for best results and safety.
Protecting Sensitive Electrical Parts Before Washing
Before diving into the cleaning process, it’s crucial to shield the delicate electrical components that power your car’s engine bay. These parts can be exquisitely sensitive to moisture and aggressive cleaning agents, so safeguarding them reduces the risk of malfunctions or costly repairs. Focus on covering the battery terminals, fuse boxes, wiring harnesses, and exposed connectors with high-quality plastic bags or specialized waterproof wraps. Secure these coverings tightly with rubber bands or zip ties to prevent water infiltration during rinsing.
To ensure thorough protection, create a checklist to keep track of which parts have been covered:
- Battery terminals
- Electrical connectors and plugs
- Engine control modules
- Sensors exposed near the engine bay
| Component | Preferred Protection Method | Notes |
|---|---|---|
| Battery Terminals | Plastic wrap + rubber bands | Ensure no contact with metal tools |
| Fuse Box | Waterproof cover or plastic bag | Seal all edges tightly |
| Wiring Harnesses | Plastic wrap or electrical tape | Avoid stretching wires |
Step-by-Step Guide to Safe Degreasing and Scrubbing
Before diving into the scrubbing process, it’s crucial to prepare your workspace and your vehicle. Start by ensuring the engine is completely cool to avoid burns and prevent thermal shock to components. Cover sensitive areas like the air intake, battery terminals, and exposed wiring with plastic bags and secure them firmly with rubber bands or tape. This step is vital to keep moisture from causing electrical issues or internal damage. Gather your cleaning tools such as a soft-bristle brush, microfiber towels, and a car-specific degreaser — preferably biodegradable and non-corrosive for environmental and component safety.
Once prepped, apply the degreaser liberally over greasy spots and areas coated in grime, allowing it to penetrate gently for 5 to 10 minutes. Avoid aggressive scrubbing initially to let the chemical work its magic. Then, using a soft brush, work in gentle circular motions — focusing on metal and plastic parts while steering clear of delicate sensors and connectors. After loosening the dirt, rinse sparingly with low-pressure water or a damp microfiber cloth, ensuring no pooling water remains. Before removing plastic covers, confirm all areas are thoroughly dry to prevent rust or electrical malfunctions.
- Tip: Always test the degreaser on a small, hidden section first to check for discoloration.
- Safety: Wear gloves and eye protection to avoid skin irritation.
- Aftercare: Use a silicone-based protectant for hoses and plastic to restore a polished finish.

Rinsing Techniques to Avoid Water Damage
When rinsing your engine bay, it’s crucial to maintain control over the water flow to prevent soaking sensitive components. Start by using a gentle spray nozzle or a low-pressure hose setting; this ensures water doesn’t infiltrate electrical connectors or air intake parts. Avoid direct bursts or high-pressure jets aimed at delicate areas like the fuse box or sensors. Instead, wave the spray nozzle in sweeping motions, allowing water to gently wash away dirt without pooling or forcing its way into cracks and crevices.
Helpful tips for a safer rinse include:
- Covering sensitive parts with plastic bags secured by rubber bands.
- Starting the rinse from the rear of the engine bay, moving forward to avoid flushing dirt into the intake.
- Using a spray bottle for precise rinsing in tight spots.
- Rinsing quickly but thoroughly to minimize water exposure time.
| Component | Rinsing Tip |
|---|---|
| Battery | Cover with plastic wrap |
| Electrical Connectors | Use low-pressure spray |
| Air Intake | Aim spray away from intake |
| Engine Block | Gentle sweeping spray |
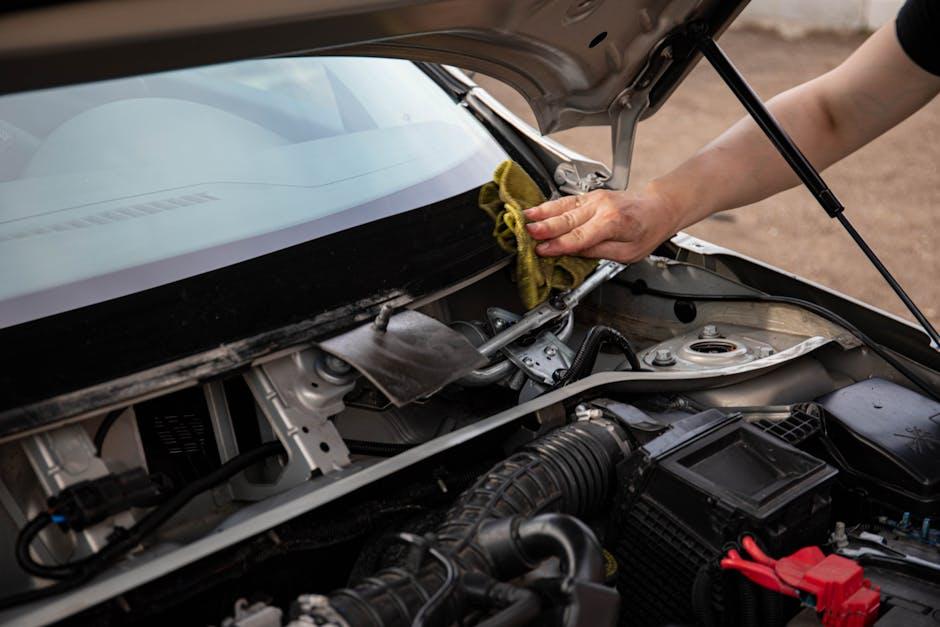
Proper Drying and Post-Cleaning Maintenance Tips
Once you have thoroughly cleaned your engine bay, the next crucial step is to ensure it dries properly to prevent any moisture-related issues. Start by using a microfiber towel to gently blot excess water from surfaces, paying special attention to delicate electronic components. For areas hard to reach with a towel, compressed air or a leaf blower on a low setting works wonders in pushing moisture away from connectors and nooks. Let the engine bay air-dry in a warm, shaded spot — avoid direct sunlight to prevent rapid drying, which can lead to water spots or damage.
Maintenance after cleaning is just as important to keep your engine bay looking fresh and protected. Apply a silicone-based protectant to rubber and plastic parts to restore their appearance and shield them from cracking or fading. Check your battery terminals and other electrical connections for any moisture buildup and clean them if necessary. Here’s a quick reference table to help you remember the essentials for post-cleaning care:
| Task | Recommended Action | Frequency |
|---|---|---|
| Drying | Blot water, use compressed air, air dry in shade | After every wash |
| Protectants | Apply silicone-based spray on plastics & rubber | Monthly |
| Electrical Checks | Inspect & clean terminals if moist | Every 3 months |
- Tip: Avoid high-pressure air directly on sensors or electrical plugs.
- Pro Tip: Consistent maintenance extends the life of your engine components and keeps your bay showroom-ready.
Q&A
Q: Why should I clean my car’s engine bay?
A: Cleaning your engine bay helps remove dirt, grime, and grease that can cause corrosion or affect performance over time. It also makes it easier to spot leaks or worn parts, improving maintenance and extending your car’s lifespan.
Q: Can I use a pressure washer to clean the engine bay?
A: It’s best to avoid high-pressure washers directly on your engine. Water force can damage electrical components or force moisture into sensitive areas. Instead, use a gentle spray or a damp cloth for most parts.
Q: What preparations should I make before cleaning the engine bay?
A: Start by ensuring the engine is cool to prevent burns and avoid thermal shock to components. Disconnect the battery terminals to reduce the risk of electrical shorts. Cover vulnerable parts—like the alternator, exposed wiring, and air intake—with plastic bags or cling wrap.
Q: Which cleaning products are safe for engine bays?
A: Use a degreaser specifically formulated for automotive engines that is non-corrosive and biodegradable. Avoid harsh chemicals like harsh solvents or acids that might damage rubber, plastic, or painted surfaces.
Q: How do I properly clean the engine bay without causing damage?
A: Spray your chosen degreaser lightly and let it sit for a few minutes to break down grease. Use a soft brush to agitate dirt gently. Rinse with a low-pressure water stream or wipe down with a wet cloth. Remove all plastic coverings and dry the engine bay thoroughly with microfiber towels or compressed air.
Q: How often should I clean my engine bay?
A: For most drivers, cleaning every 6 to 12 months is sufficient. However, if you frequently drive in muddy or dusty conditions, doing a light clean more often can help prevent buildup.
Q: Are there any risks associated with cleaning the engine bay?
A: Risks include water infiltration into electrical systems, dislodging loose components, or damaging sensitive parts with harsh chemicals or pressure. Following proper procedures minimizes these risks.
Q: What are the benefits of keeping the engine bay clean?
A: Beyond improved aesthetics, a clean engine bay can enhance cooling efficiency, make routine inspections easier, and potentially increase resale value by showing attentive maintenance.
Q: Can I clean the engine bay myself, or should I hire a professional?
A: Many car enthusiasts safely clean their engine bays at home with the right tools and precautions. However, if you’re unsure, prefer professional detailing to avoid accidental damage and achieve a thorough job.
Q: Any final tips for safe engine bay cleaning?
A: Patience and preparation are key. Always work on a cool engine, protect electrical parts, use gentle methods, and dry everything thoroughly. A careful approach will keep your engine bay looking sharp without risks.
In Retrospect
In the end, a clean engine bay isn’t just about aesthetics—it’s a quiet promise to your car’s health and longevity. Approached with care and the right techniques, cleaning your engine bay can be a satisfying ritual rather than a risky chore. So, roll up your sleeves, gather your tools thoughtfully, and give your car’s heart the gentle refresh it deserves. After all, a well-tended engine bay is a small investment that keeps your car humming smoothly and looking sharp beneath the hood.