

When the summer heat hits and your car’s air conditioner starts to falter, discomfort quickly turns the daily drive into a test of patience. Before rushing to a mechanic or shelling out unexpected repair bills, there’s a world of simple, do-it-yourself troubleshooting that can help identify and sometimes even solve common AC issues. Understanding the basics of your car’s cooling system not only empowers you to take quick action but also saves time and money. This guide walks you through practical DIY car AC troubleshooting tips, equipping you with the know-how to keep your cool on the road.
Table of Contents
- Common Signs Your Car AC Needs Attention
- Identifying and Diagnosing Refrigerant Leaks
- Step-by-Step Guide to Checking AC Compressor Functionality
- Simple Fixes for Clogged Cabin Air Filters
- Essential Tools for DIY AC Maintenance
- When to Seek Professional Help for Complex AC Issues
- Q&A
- Closing Remarks

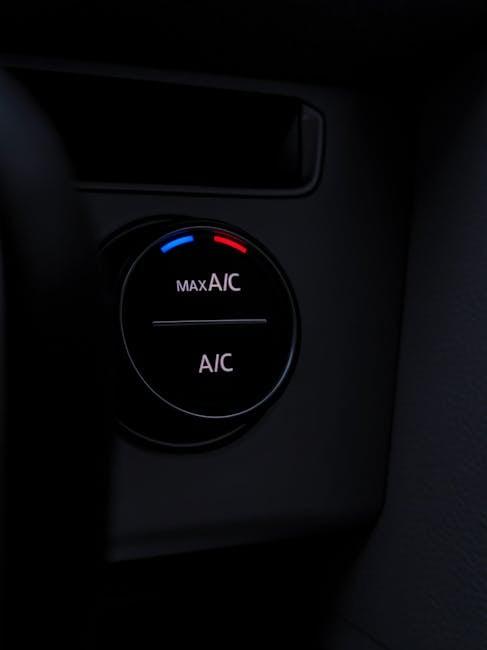
Common Signs Your Car AC Needs Attention
When your car’s air conditioning starts acting up, it rarely sneaks up on you. Instead, it announces its distress through a series of unmistakable clues. You might notice that the cool air suddenly feels like a warm breeze or that it takes much longer than usual to chill the cabin. Another common red flag is when the AC emits strange noises like hissing or rattling. Sometimes, you may even detect an unusual odor, often musty or moldy, which signals trapped moisture or a clogged filter. Paying attention to these symptoms early can save you from a costly repair down the line.
Other subtle signs point to deeper issues that demand your attention. For example, if the AC compressor isn’t engaging reliably, it may be a sign of electrical trouble or low refrigerant levels. Leaks under the car, especially oily spots, are a telltale sign of refrigerant loss. Your dashboard may even light up with warning icons indicating AC system malfunctions. The following quick checklist can help you track the health of your car’s cooling system:
- Warm or inconsistent airflow from vents
- Loud or unusual noises when AC runs
- Foul odors inside the cabin
- Visible leaks beneath the vehicle
- Warning lights illuminated on dashboard
| Symptom | Possible Cause | Quick DIY Check |
|---|---|---|
| Weak cooling | Low refrigerant | Listen for compressor sound |
| Strange noise | Worn compressor or fan | Inspect visible components |
| Bad odor | Mold/mildew buildup | Check and replace cabin air filter |
| Visible leakage | Refrigerant or oil leak | Look for oily spots under car |

Identifying and Diagnosing Refrigerant Leaks
Detecting a refrigerant leak in your car’s AC system can feel like solving a puzzle, but with some keen observation, it becomes manageable. Start by inspecting the most common trouble spots such as the condenser, hoses, and compressor. Look for oily residues or stains around joints and connections—the refrigerant often carries a small amount of oil that leaves a telltale mark. Additionally, a distinct chemical smell or hissing sound from the AC components when the system is running can be a critical clue.
For a more hands-on approach, you can use a few widely accessible methods to confirm a leak:
- Soap and water solution: Spray the mixture on suspect areas and watch for bubbles forming;
- UV dye: Add it to the refrigerant, then use a UV light to spot glowing leak points;
- Electronic leak detectors: These gadgets sense escaping refrigerant gases with precision.
Here’s a simple comparison of these diagnostic methods in terms of ease, cost, and accuracy:
| Method | Cost | Ease of Use | Accuracy |
|---|---|---|---|
| Soap & Water | Low | High | Moderate |
| UV Dye | Medium | Moderate | High |
| Electronic Detector | High | High | Very High |
Step-by-Step Guide to Checking AC Compressor Functionality
Begin by locating the AC compressor under the hood of your vehicle; it’s usually attached to the engine and connected by a serpentine belt. With the engine off, inspect the compressor pulley and belt for any visible signs of wear or damage. Once the engine is running, turn your car’s AC to the maximum cooling setting and observe the compressor clutch engaging – this means you should hear a distinct click as the clutch activates, causing the pulley to spin. If this engagement doesn’t occur, it’s likely an electrical issue such as a blown fuse or faulty relay, or the system may be low on refrigerant.
Next, perform a pressure test using a manifold gauge set connected to the service ports. This will help you determine if the pressure levels are within expected values for working compressors. Use the table below as a quick reference for typical pressure readings:
| Condition | Low Side (psi) | High Side (psi) |
|---|---|---|
| Engine Off | 0 | 0 |
| AC On, Idle | 25–45 | 200–250 |
| AC On, Revving | 30–50 | 250–300 |
If pressures fall outside these ranges, there may be an internal blockage or leak. Additionally, listen for unusual noises like grinding or rattling, which hint at mechanical problems. For safety, always wear protective gloves and goggles while working with refrigerants, and consult your car manual for specific compressor details.

Simple Fixes for Clogged Cabin Air Filters
One of the most common causes of a struggling car AC system is a clogged cabin air filter. Over time, dust, pollen, and debris accumulate, restricting airflow and reducing cooling efficiency. To tackle this, first, locate the filter—usually behind the glove box or under the dashboard—and remove it carefully. Give your filter a gentle tap to dislodge loose dirt or use a vacuum cleaner for a deeper clean. If it’s too grimy or worn out after inspection, replacing it is often the best way to restore crisp, fresh airflow.
Maintaining your cabin air filter is straightforward and doesn’t require professional tools. Keep a simple maintenance checklist handy:
- Inspect every 12,000 miles or yearly (whichever comes first)
- Clean or replace during regular oil changes to ensure maximum efficiency
- Use quality cabin filters designed specifically for your vehicle make and model
| Step | Action | Estimated Time |
|---|---|---|
| 1 | Locate and remove the cabin filter | 2-3 minutes |
| 2 | Clean or replace filter | 5-7 minutes |
| 3 | Reinstall filter and test airflow | 2 minutes |

Essential Tools for DIY AC Maintenance
Before diving into any troubleshooting or repair, having the right equipment is essential. Keep in your toolbox a digital multimeter to check electrical connections and voltage throughout the AC system. A refrigerant pressure gauge is crucial for diagnosing leaks or insufficient coolant levels by measuring system pressure accurately. Additionally, a UV leak detection kit helps pinpoint refrigerant leaks invisible to the naked eye, saving time and unnecessary parts replacement.
Alongside these, don’t overlook basic tools like a set of screwdrivers, wrenches, and pliers for removing panels and components safely. An insulated thermometer will aid in measuring vent temperatures to verify cooling efficiency. Investing in a quality vacuum pump is also worthwhile if you plan to recharge or evacuate your system, ensuring debris and moisture are properly removed for optimized performance.

When to Seek Professional Help for Complex AC Issues
When your car’s AC system exhibits symptoms beyond typical DIY fixes—such as persistent leaks, strange noises from the compressor, or electrical malfunctions—it’s time to call in the experts. Attempting to tackle these issues without the right tools or knowledge can lead to further damage or safety hazards. Remember, some components require specialized equipment for accurate diagnosis and repair, so recognizing when the problem is out of your league will save both time and money in the long run.
Here are some key signs that signal it’s best to seek professional assistance:
- AC blowing warm air after recharge – could indicate a deeper refrigerant leak or compressor failure.
- Unusual burning smell – might point to electrical shorts or worn-out wiring.
- Excessive moisture or fluid leakage – can be a sign of a damaged evaporator core or clogged drain lines.
- Consistently uneven cooling – may reveal problems with blend doors or climate control sensors.
| Symptom | Possible Cause | Professional Intervention Needed |
|---|---|---|
| Compressor noise | Worn bearings or internal damage | Yes |
| Refrigerant leak | Damaged hoses or seals | Yes |
| Electrical failure | Blown fuses or wiring issues | Yes |
| Blocked airflow | Clogged cabin filter | Maybe |
Q&A
Q: Why isn’t my car’s AC blowing cold air?
A: Often, the culprit is low refrigerant levels due to a leak or normal wear. It could also be a faulty compressor, clogged cabin air filter, or electrical issues. Start by checking the refrigerant and filter before moving to more complex parts.
Q: How can I tell if my car AC compressor is failing?
A: Listen for unusual noises like squealing or grinding when the AC is on. Also, if the compressor clutch isn’t engaging or the airflow remains warm despite proper refrigerant, your compressor might need attention.
Q: Is it safe to recharge my car AC system at home?
A: Yes, if you follow the instructions carefully and use the correct refrigerant type. Use a pressure gauge to avoid overcharging, and work in a well-ventilated area. When unsure, professional help is always a good backup.
Q: What are common signs of a clogged cabin air filter?
A: Reduced airflow from vents, unpleasant odors, and increased dust inside the car can signal a dirty or clogged filter. Replacing it is usually a quick and inexpensive fix.
Q: Can electrical problems affect my car’s AC?
A: Definitely. Blown fuses, faulty relays, or damaged wiring can prevent the AC system from working properly. Checking the fuse box and wiring connections can save you a visit to the mechanic.
Q: How do I diagnose a refrigerant leak?
A: Look for oily residue around AC components and listen for hissing sounds. You can also use a UV dye kit or electronic leak detector for a more precise check.
Q: What maintenance can I do to keep my car AC running smoothly?
A: Regularly replace cabin air filters, run the AC system even during cooler months, and keep condenser coils clean. Periodic professional inspections can also catch issues early.
Q: When should I call a professional instead of DIY?
A: If you’re dealing with refrigerant handling beyond adding a small amount, complex electrical issues, or compressor replacements, it’s safer and often more cost-effective to seek expert help.
Closing Remarks
Embarking on the journey of DIY car AC troubleshooting can turn what once felt like an intimidating challenge into an empowering adventure. With a bit of patience, the right tools, and a dash of curiosity, you can breathe new life into your vehicle’s cooling system without immediately reaching for professional help. Remember, every rattle, hiss, or chill is a clue guiding you closer to comfort on the road. So before the summer heat steams up your drive, take these tips out for a spin—your car (and your wallet) will thank you.