

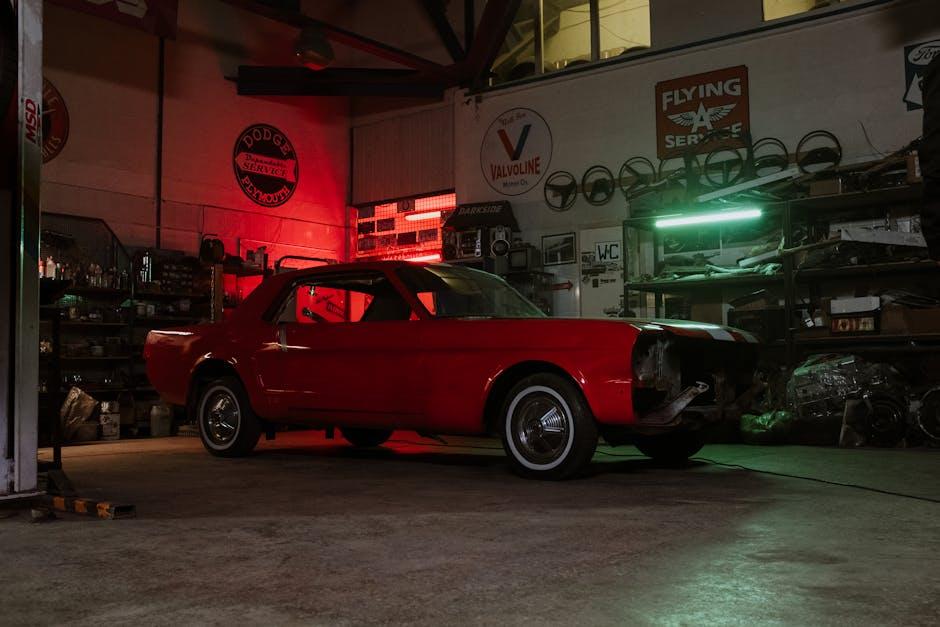
Beneath every gleaming vehicle lies the satisfaction of a job well done—one that doesn’t require a professional touch or an expensive trip to the detailing shop. DIY car detailing is more than just a chore; it’s a rewarding blend of art and care that transforms your ride into a showroom-worthy masterpiece. Whether you’re a seasoned gearhead or a weekend warrior, this step-by-step guide will equip you with the knowledge and techniques to bring out the best in your car, right in your own driveway. Ready to roll up your sleeves and breathe new life into your vehicle? Let’s dive in.
Table of Contents
- Choosing the Right Tools and Products for Effective Car Detailing
- Preparing Your Vehicle for a Thorough Clean
- Mastering Exterior Washing Techniques for a Spotless Finish
- Detailed Approaches to Interior Cleaning and Care
- Polishing and Waxing Tips to Restore Shine and Protection
- Final Touches and Maintenance for Long-Lasting Results
- Q&A
- The Way Forward
Choosing the Right Tools and Products for Effective Car Detailing
Selecting the ideal tools and products can transform your car detailing experience from a tedious chore into a satisfying ritual. Start with microfiber cloths for their unmatched gentleness on paint and glass. Invest in a quality dual-action polisher if you want to tackle swirl marks and minor scratches efficiently. Don’t overlook the power of specialized brushes; a soft-bristle wheel brush for your tires and a long-handled brush for hard-to-reach crevices can make a noticeable difference. When it comes to cleaning agents, opt for pH-balanced shampoos that protect your car’s finish and ensure that every wash enhances the gloss rather than dulling it.
Choosing the right products extends beyond just cleaners and brushes. Here’s a quick reference to help you build your kit:
| Tool/Product | Purpose | Best Feature |
|---|---|---|
| Microfiber Cloths | Wiping & drying | Non-scratch, high absorbency |
| Dual-Action Polisher | Buffing & polishing | Safe for beginners, effective swirl removal |
| pH-Balanced Shampoo | Washing exterior | Maintains wax, gentle on paint |
| Wheel Brush | Cleaning rims & tires | Ergonomic handle, non-abrasive bristles |
| Detailing Brushes | Interior & trim cleaning | Varied sizes for intricate spots |
Preparing Your Vehicle for a Thorough Clean
Before diving into the deep cleaning process, it’s essential to create an organized workspace and ensure your vehicle is ready for a thorough detail. Start by parking your car in a shaded, well-ventilated area to prevent cleaning products from drying too quickly and leaving stubborn marks. Clear out all personal belongings, trash, and loose items from both the interior and trunk—this allows for unhindered access to every nook and cranny, ensuring no spot goes unnoticed.
Gathering the right tools and supplies ahead of time will streamline your process and boost efficiency. Stock up on microfiber cloths, degreasers, brushes, and a high-quality vacuum, among others. It’s also wise to protect surrounding surfaces by laying down soft mats or towels under tire rims and inside doors where drips or residue might fall during washing.
- Choose a shaded parking spot for cooler, safer uptime
- Remove all personal items to unclutter the space
- Have all cleaning materials at your fingertips
- Laying protective covers to avoid accidental stains
| Essential Supply | Purpose |
|---|---|
| Microfiber Towels | Gentle cleaning & drying |
| Detailing Brushes | Reaching tight spaces |
| Vacuum Cleaner | Removing dirt & debris |
| Soap & Degreaser | Breaking down grime |
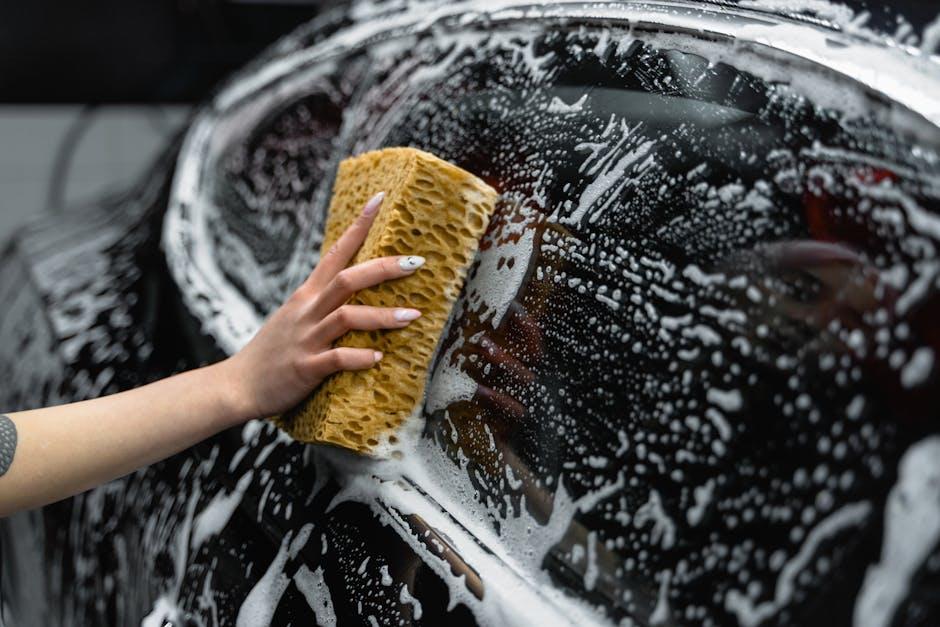
Mastering Exterior Washing Techniques for a Spotless Finish
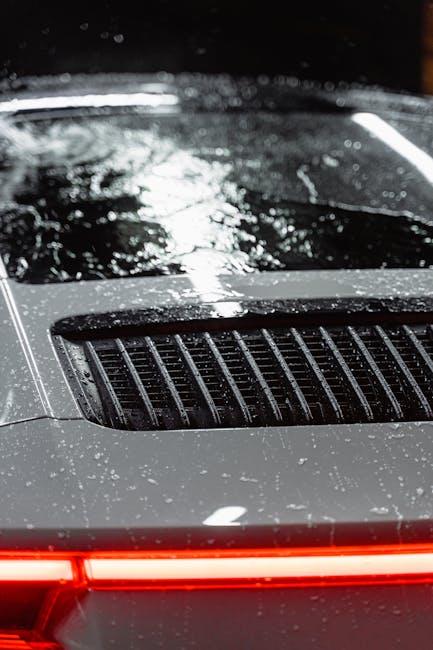
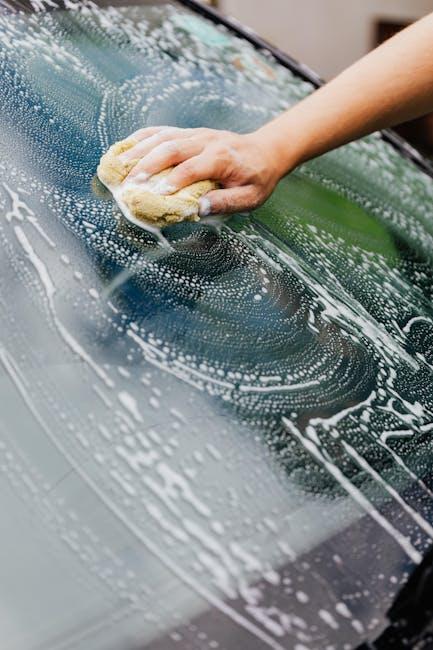
Achieving a pristine exterior requires more than just a quick rinse—it’s about understanding the nuances of dirt, grime, and the delicate automotive paint beneath. Start by rinsing your vehicle thoroughly with a gentle stream of water to loosen dirt particles. Next, use a high-quality, pH-balanced car shampoo combined with a microfiber wash mitt to gently lift contaminants away without causing scratches. Remember to wash using a two-bucket method: one bucket for the soapy water and another for rinsing your mitt, minimizing the risk of grit returning to your car’s surface.
Focus on these key areas to ensure a consistent, spotless finish:
- Wheels and Tires: Use a dedicated wheel cleaner and brush. Their tough surfaces benefit from specific products that break down brake dust and road grime.
- Lower Panels and Bumpers: These collect the most dirt. Clean from the bottom up to prevent re-depositing debris on freshly washed sections.
- Glass and Mirrors: Finish strong by wiping down windows with an ammonia-free glass cleaner to avoid streaks and maintain clarity.
| Step | Action | Why It Matters |
|---|---|---|
| 1 | Pre-rinse | Loosens dirt, reduces scratches |
| 2 | Two-bucket wash | Keeps grit out of paintwork |
| 3 | Clean wheels first | Prevents brake dust transfer |
| 4 | Detail glass last | Ensures crystal-clear visibility |

Detailed Approaches to Interior Cleaning and Care
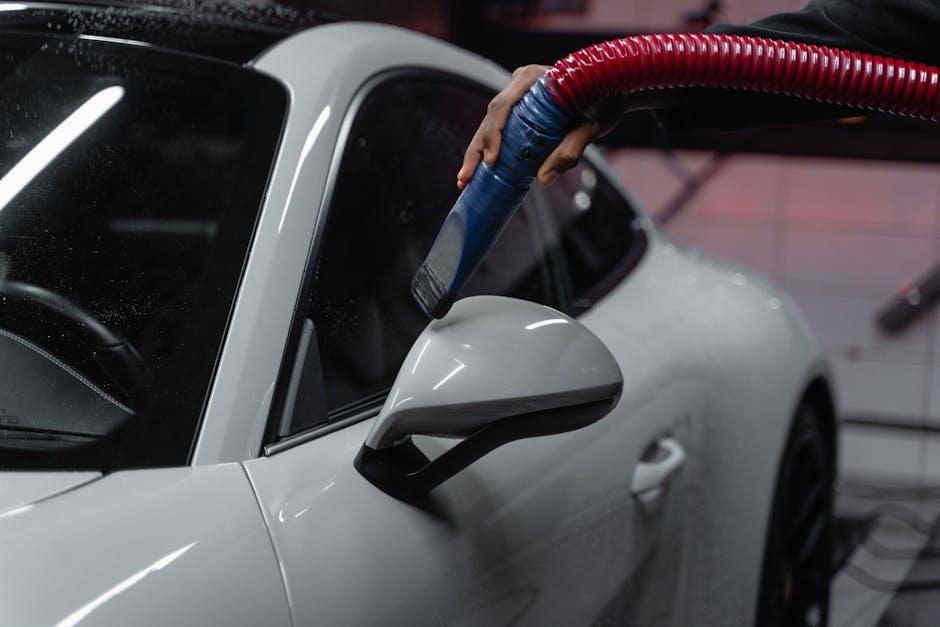
Start by removing all loose debris such as trash, leaves, and crumbs from your car’s interior. Use a handheld vacuum with various attachments to reach tight spaces like under the seats, air vents, and between seat cushions. For fabric surfaces, consider a fabric cleaner or upholstery shampoo; apply it with a soft brush to gently lift stains without damaging fibers. Don’t forget to spray a quick upholstery freshener afterward to keep the cabin smelling crisp and inviting.
For leather interiors, a specialized leather cleaner and conditioner is key to maintaining suppleness and preventing cracks. Apply the cleaner with a microfiber cloth in circular motions, then wipe away any residue. Follow with a leather conditioner to nourish the surface and restore its natural sheen. Additionally, use a soft brush or compressed air to dust air vents and intricate dashboard areas. Below is a quick reference table for common interior materials and recommended care products:
| Material | Cleaning Product | Care Tip |
|---|---|---|
| Fabric Seats | Upholstery Shampoo | Use soft brush & air dry |
| Leather Seats | Leather Cleaner & Conditioner | Wipe gently, avoid water |
| Dashboard & Trim | Interior Detailer Spray | Use microfiber cloth only |
| Carpets | Carpet Cleaner | Spot clean, vacuum regularly |
Polishing and Waxing Tips to Restore Shine and Protection
Achieving a brilliant finish requires attention to detail and the right techniques. Before applying any product, make sure your vehicle’s surface is completely clean and dry to avoid trapping dirt or moisture beneath wax or polish. Use a clay bar if necessary to remove embedded contaminants for a smoother surface. When selecting a polish, choose one that matches your paint’s condition—mild polishes for light oxidation and scratch removal, and more abrasive options for deeper flaws. Apply polish using a microfiber applicator pad in small, circular motions, ensuring even coverage without applying excessive pressure which can cause unnecessary wear on your paint.
Once the polish has done its job, wax acts as your paint’s guardian, locking in shine and repelling environmental damage. Opt for a high-quality paste or liquid wax, applying it thinly using a foam applicator pad. Allow the wax to haze over, then buff it off with a clean microfiber towel to reveal a glass-like glow. Here’s a quick guide for the waxing process:
| Step | Tip |
|---|---|
| Apply Thin Layers | Less is more; too much wax causes streaking |
| Buff in Circular Motions | Enhances even shine and prevents streaks |
| Use Clean Towels | Different towels for buffing and polishing avoid cross-contamination |
| Work in Shade | Prevents quick drying and ensures better adhesion |
- Patience is key: Allow wax to cure for maximum durability before exposure to weather.
- Routine application: Wax every 3-4 months to maintain protective barrier.
Final Touches and Maintenance for Long-Lasting Results
To ensure your efforts shine for months to come, it’s crucial to apply a high-quality wax or sealant. These products act as a protective barrier against environmental elements like UV rays, dirt, and water spots. Use a microfiber applicator to spread the wax evenly, then buff it off with a clean, soft cloth to reveal a glossy, smooth finish. Don’t forget to keep your wheels and tires conditioned with dedicated tire dressings that repel dust and uplift the overall look. Regular touch-ups every few weeks will maintain that freshly-detailed feel without the major time commitment.
Long-term upkeep is all about establishing simple habits that safeguard your investment. Consider these tips to keep your car looking its best:
- Frequent quick washes: Rinse off grime before it bonds to the paint.
- Use quality microfiber towels: Prevent scratches during drying and dusting.
- Park in shaded or covered areas: Minimize sun damage and bird droppings.
- Inspect regularly: Spot treat small stains or chips promptly.
| Maintenance Task | Frequency | Benefit |
|---|---|---|
| Wax Application | Every 3 months | Long-lasting shine and protection |
| Quick Wash | Weekly | Removes surface contaminants |
| Tire Dressing | Monthly | Enhances appearance and prevents cracking |
Q&A
Q&A: DIY Car Detailing – A Step-by-Step Guide
Q1: What exactly is car detailing, and how does it differ from a regular car wash?
A: Car detailing is an in-depth cleaning process that goes beyond a simple wash. It involves thoroughly cleaning, restoring, and protecting every inch of your vehicle—both inside and out. Unlike a basic car wash, which typically only removes surface dirt, detailing focuses on deep cleaning, polishing paint, treating upholstery, and even addressing minor imperfections to bring back that showroom shine.
Q2: What are the essential tools and materials I need for DIY car detailing?
A: To get started, gather microfiber towels, car wash soap (not dish detergent), a bucket, a soft-bristled brush, clay bar, polish, wax or sealant, tire cleaner, interior cleaner, and a vacuum. Optional but helpful items include a dual-action polisher and an air compressor or canned air for tight spots. Having the right supplies ensures each step delivers optimal results without damaging your car.
Q3: How do I prepare my car before detailing?
A: Begin by parking your car in a shaded, cool area to prevent water spots. Remove personal items and debris from the interior. Rinse the exterior to remove loose dirt. Check for any paint chips or scratches to treat later. Proper prep helps maximize the effectiveness of each step and protects surfaces during cleaning.
Q4: What is the best sequence for washing and detailing my car?
A: Start with the exterior: wash from top to bottom using a two-bucket method (one for soapy water, one for rinsing). Then, clay bar the paint to remove embedded contaminants. Next, polish any dull or scratched areas, followed by applying wax or sealant for protection. After the exterior, tackle the wheels and tires with dedicated cleaners and brushes. Finally, move inside: vacuum carpets and seats, clean upholstery and windows, and condition leather or vinyl surfaces.
Q5: How often should I detail my car to keep it looking its best?
A: Generally, a full detail every 3–6 months is ideal for maintaining your car’s appearance and value. Washing should be done more frequently, about every 1–2 weeks, depending on driving conditions. Regular upkeep prevents build-up of grime and protects surfaces from wear and environmental damage.
Q6: Can DIY car detailing help protect my car’s resale value?
A: Absolutely! Maintaining your vehicle’s interior and exterior condition through regular detailing helps preserve its paint, upholstery, and overall appearance. A well-kept car feels newer, makes a great impression, and often commands a higher price when selling or trading in.
Q7: Are there any common mistakes to avoid when detailing my car?
A: Yes—avoid washing your car under direct sunlight, which causes soap to dry too quickly and leave spots. Don’t use household cleaners on your car’s surfaces, as they can strip protective coatings. Using dirty towels or brushes can create scratches, so always use clean, dedicated tools. Lastly, be gentle with polishes and waxes; aggressive scrubbing can damage paint layers.
Q8: Is DIY car detailing suitable for beginners, or should I consider professional services?
A: DIY detailing can be very rewarding and cost-effective, even for beginners, provided you follow the steps carefully and use the right products. However, professional detailers have specialized tools and expertise for severe paint imperfections or deep interior stains. For routine maintenance, DIY is a great option, but professionals can help when your car needs more intensive care.
Q9: How long does a full DIY car detailing session typically take?
A: Timing varies depending on your experience level and the condition of your car, but expect to spend 3 to 6 hours on a full detail. Breaking the process into sessions over a weekend can make it more manageable and ensure thorough results without rushing.
Q10: What’s the biggest benefit of learning to detail my own car?
A: Besides saving money, DIY car detailing offers a satisfying hands-on experience that deepens your connection with your vehicle. Seeing your car transform into a spotless, gleaming ride—knowing you did it yourself—brings a unique sense of pride and accomplishment.
The Way Forward
Whether you’re a weekend warrior or a meticulous perfectionist, DIY car detailing offers a rewarding way to revive your ride’s shine without breaking the bank. With patience, the right tools, and a little elbow grease, turning your vehicle into a showroom-worthy masterpiece is entirely within reach. So roll up your sleeves, embrace the process, and let your car tell its story through a gleam that only your own hands could achieve. After all, every detail counts on the road to automotive pride.
486 Comments
nootzp
nootzp
uglu7w
tndimc
xmz0yf
sys57f
2opyrw
tu0k11
a2t2av
c8mxix
pd2333
https://t.me/s/Online_1_xbet/998
https://t.me/s/Online_1_xbet/3143
https://t.me/s/Official_1xbet_1xbet
https://t.me/rating_online
https://t.me/rating_online/6
https://t.me/s/rating_online/8
https://t.me/rating_online/3
https://t.me/rating_online/5
https://t.me/s/rating_online/9
https://t.me/rating_online/13
https://t.me/s/rating_online
https://t.me/s/rating_online/6
https://t.me/Online_1_xbet/3421
https://t.me/Online_1_xbet/2136
https://t.me/Online_1_xbet/3537
6fzjkk
https://t.me/Online_1_xbet/1995
https://t.me/Online_1_xbet/2386
https://t.me/Online_1_xbet/2247
https://t.me/Online_1_xbet/3523
https://t.me/Online_1_xbet/3072
https://t.me/Online_1_xbet/1889
https://t.me/Online_1_xbet/2148
https://t.me/Online_1_xbet/1873
https://t.me/Official_1xbet_1xbet/s/385
https://t.me/Official_1xbet_1xbet/s/1231
https://t.me/Official_1xbet_1xbet/s/815
https://t.me/Official_1xbet_1xbet/s/1090
https://t.me/Official_1xbet_1xbet/s/429
https://t.me/Official_1xbet_1xbet/s/761
https://t.me/Official_1xbet_1xbet/s/540
https://t.me/Official_1xbet_1xbet/s/65
https://t.me/Official_1xbet_1xbet/s/789
https://t.me/Official_1xbet_1xbet/s/1312
https://t.me/Official_1xbet_1xbet/s/434
https://t.me/Official_1xbet_1xbet/s/902
https://t.me/Official_1xbet_1xbet/s/213
https://t.me/Official_1xbet_1xbet/s/480
https://t.me/Official_1xbet_1xbet/s/1491
https://t.me/Official_1xbet_1xbet/s/782
https://t.me/Official_1xbet_1xbet/s/1427
https://t.me/Official_1xbet_1xbet/s/1328
https://t.me/Official_1xbet_1xbet/s/600
https://t.me/Official_1xbet_1xbet/s/1474
https://t.me/Official_1xbet_1xbet/s/1541
https://t.me/Official_1xbet_1xbet/s/985
https://t.me/Official_1xbet_1xbet/s/1473
https://t.me/Official_1xbet_1xbet/s/1049
https://t.me/Official_1xbet_1xbet/s/122
https://t.me/Official_1xbet_1xbet/s/1210
https://t.me/Official_1xbet_1xbet/s/654
https://t.me/Official_1xbet_1xbet/s/519
https://t.me/Official_1xbet_1xbet/s/1080
https://t.me/Official_1xbet_1xbet/s/1109
https://t.me/Official_1xbet_1xbet/s/587
https://t.me/Official_1xbet_1xbet/s/942
https://t.me/Official_1xbet_1xbet/s/1411
https://t.me/Official_1xbet_1xbet/s/744
https://t.me/Official_1xbet_1xbet/s/1239
https://t.me/Official_1xbet_1xbet/s/803
https://t.me/Official_1xbet_1xbet/s/200
https://t.me/Official_1xbet_1xbet/s/88
https://t.me/Official_1xbet_1xbet/s/1465
https://t.me/Official_1xbet_1xbet/s/681
https://t.me/Official_1xbet_1xbet/s/655
https://t.me/Official_1xbet_1xbet/s/771
https://t.me/Official_1xbet_1xbet/s/267
https://t.me/Official_1xbet_1xbet/1645
https://t.me/Official_1xbet_1xbet/1729
https://t.me/Official_1xbet_1xbet/1754
https://t.me/Official_1xbet_1xbet/1695
https://t.me/s/Official_1xbet_1xbet/1729
https://t.me/Official_1xbet_1xbet/1792
https://t.me/Official_1xbet_1xbet/1841
https://t.me/s/Official_1xbet_1xbet/1790
https://t.me/Official_1xbet_1xbet/1623
https://t.me/s/Official_1xbet_1xbet/1707
https://t.me/s/Official_1xbet_1xbet/1855
https://t.me/Official_1xbet_1xbet/1662
https://t.me/s/Official_1xbet_1xbet/1621
https://t.me/s/Official_1xbet_1xbet/1787
https://t.me/s/Official_1xbet_1xbet/1809
https://t.me/s/Official_1xbet_1xbet/1648
https://t.me/Official_1xbet_1xbet/1693
https://t.me/Official_1xbet_1xbet/1633
https://t.me/Official_1xbet_1xbet/1802
https://t.me/s/Official_1xbet_1xbet/1650
https://t.me/s/Official_1xbet_1xbet/1616
https://t.me/s/Official_1xbet_1xbet/1613
https://t.me/s/Official_1xbet_1xbet/1792
https://t.me/Official_1xbet_1xbet/1696
https://t.me/Official_1xbet_1xbet/1734
https://t.me/s/Official_1xbet_1xbet/1695
https://t.me/s/Official_1xbet_1xbet/1737
https://t.me/s/Official_1xbet_1xbet/1740
https://t.me/s/Official_1xbet_1xbet/1661
https://t.me/Official_1xbet_1xbet/1788
https://t.me/Official_1xbet_1xbet/1785
https://t.me/Official_1xbet_1xbet/1625
https://t.me/s/Official_1xbet_1xbet/1839
https://t.me/Official_1xbet_1xbet/1740
https://t.me/Official_1xbet_1xbet/1622
https://t.me/Official_1xbet_1xbet/1681
https://t.me/Official_1xbet_1xbet/1767
https://t.me/Official_1xbet_1xbet/1712
https://t.me/Official_1xbet_1xbet/1671
https://t.me/s/Official_1xbet_1xbet/1680
https://t.me/s/Official_1xbet_1xbet/1636
https://t.me/Official_1xbet_1xbet/1674
https://t.me/s/Official_1xbet_1xbet/1724
https://t.me/Official_1xbet_1xbet/1826
https://t.me/Official_1xbet_1xbet/1749
https://t.me/s/Official_1xbet_1xbet/1612
https://t.me/Official_1xbet_1xbet/1626
https://t.me/Official_1xbet_1xbet/1793
https://t.me/Official_1xbet_1xbet/1618
https://t.me/Official_1xbet_1xbet/1858
https://t.me/s/Official_1xbet_1xbet/1691
https://t.me/Official_1xbet_1xbet/1838
https://t.me/s/Official_1xbet_1xbet/1619
https://t.me/Official_1xbet_1xbet/1840
https://t.me/s/Official_1xbet_1xbet/1751
https://t.me/s/Official_1xbet_1xbet/1802
https://t.me/Official_1xbet_1xbet/1819
https://t.me/s/Official_1xbet_1xbet/1826
https://t.me/s/Official_1xbet_1xbet/1651
https://t.me/Official_1xbet_1xbet/1744
https://t.me/s/Official_1xbet_1xbet/1820
https://t.me/s/Official_1xbet_1xbet/1768
https://t.me/s/Official_1xbet_1xbet/1655
https://t.me/s/Official_1xbet_1xbet/1760
https://t.me/s/topslotov
6bs6zm
https://t.me/s/official_1win_aviator
https://t.me/reiting_top10_casino/5
https://t.me/s/reiting_top10_casino/5
https://t.me/s/reiting_top10_casino
https://t.me/reiting_top10_casino
https://t.me/s/reiting_top10_casino/2
https://t.me/reiting_top10_casino/4
https://t.me/reiting_top10_casino/2
https://t.me/reiting_top10_casino/9
https://t.me/s/reiting_top10_casino/6
https://t.me/reiting_top10_casino/3
https://t.me/s/reiting_top10_casino/3
https://t.me/s/reiting_top10_casino/8
https://t.me/s/reiting_top10_casino/7
https://t.me/reiting_top10_casino/7
https://t.me/reiting_top10_casino/6
https://t.me/reiting_top10_casino/10
https://t.me/s/reiting_top10_casino/4
https://t.me/s/reiting_top10_casino/9
https://t.me/s/reiting_top10_casino/10
https://t.me/reiting_top10_casino/8
https://t.me/s/Gaming_1xbet
https://t.me/s/PlayCasino_1xbet
https://t.me/s/PlayCasino_1xbet
https://t.me/s/PlayCasino_1win
https://t.me/s/PlayCasino_1win
https://t.me/s/ofitsialniy_1win/33/evith
https://t.me/s/ofitsialniy_1win
https://t.me/s/iw_1xbet
https://t.me/s/Official_beefcasino
bwmzcj
https://t.me/bs_1xbet/21
https://t.me/bs_1xbet/51
https://t.me/s/bs_1xbet/6
https://t.me/s/bs_1xbet/8
https://t.me/s/bs_1xbet/43
https://t.me/bs_1xbet/32
https://t.me/s/bs_1xbet/8
https://t.me/s/bs_1xbet/5
https://t.me/bs_1xbet/32
https://t.me/bs_1xbet/28
https://t.me/bs_1xbet/2
https://t.me/bs_1xbet/26
https://t.me/bs_1xbet/19
https://t.me/s/bs_1xbet/31
https://t.me/s/bs_1xbet/18
https://t.me/s/bs_1xbet/5
https://t.me/s/bs_1xbet/20
https://t.me/bs_1xbet/24
https://t.me/s/bs_1xbet/29
https://t.me/s/bs_1xbet/45
https://t.me/s/bs_1xbet/47
https://t.me/bs_1xbet/9
https://t.me/bs_1xbet/48
https://t.me/bs_1xbet/15
https://t.me/bs_1xbet/40
https://t.me/s/bs_1xbet/36
https://t.me/s/bs_1xbet/49
https://t.me/s/bs_1xbet/39
https://t.me/s/bs_1xbet/9
https://t.me/bs_1xbet/15
https://t.me/s/bs_1xbet/38
https://t.me/s/bs_1xbet/30
https://t.me/s/bs_1xbet/43
https://t.me/bs_1xbet/46
https://t.me/bs_1xbet/39
https://t.me/bs_1xbet/6
https://t.me/s/bs_1xbet/6
https://t.me/bs_1xbet/12
https://t.me/s/bs_1xbet/13
https://t.me/s/bs_1xbet/47
https://t.me/s/bs_1xbet/31
https://t.me/s/jw_1xbet/699
https://t.me/jw_1xbet/731
https://t.me/s/jw_1xbet/332
https://t.me/s/jw_1xbet/806
https://t.me/jw_1xbet/344
https://t.me/s/bs_1Win/1198
https://t.me/s/bs_1Win/502
https://t.me/s/bs_1Win/1074
https://t.me/s/bs_1Win/993
https://t.me/s/bs_1Win/706
https://t.me/bs_1Win/830
https://t.me/s/bs_1Win/702
https://t.me/s/bs_1Win/617
https://t.me/s/bs_1Win/728
https://t.me/s/bs_1Win/826
https://t.me/bs_1Win/1039
https://t.me/bs_1Win/1078
https://t.me/Official_mellstroy_casino/8
https://t.me/s/Official_mellstroy_casino/30
https://t.me/Official_mellstroy_casino/53
https://t.me/s/Beefcasino_rus/12
https://t.me/s/Official_mellstroy_casino/31
https://t.me/Official_mellstroy_casino/50
https://t.me/Official_mellstroy_casino/47
https://t.me/s/Official_mellstroy_casino/9
https://t.me/Official_mellstroy_casino/57
https://t.me/s/Official_mellstroy_casino/51
https://t.me/Official_mellstroy_casino/22
https://t.me/Official_mellstroy_casino/37
https://t.me/s/Official_mellstroy_casino/29
https://t.me/Best_promocode_rus/2737
https://t.me/s/Best_promocode_rus/782
https://t.me/Beefcasino_rus/57
https://t.me/s/ud_Monro/46
https://t.me/s/ud_Sol/55
https://t.me/s/ud_Vulkan/54
https://t.me/s/ud_1xSlots/64
https://t.me/s/ud_Starda/64
https://t.me/ud_Gama/48
https://t.me/s/ud_Fresh/63
https://t.me/ud_Gizbo/59
https://t.me/s/ud_Pokerdom/61
https://t.me/s/ud_Kent/53
https://t.me/ud_Rox/47
https://t.me/ud_Pokerdom/58
https://t.me/ud_Irwin/56
https://t.me/ud_JoyCasino/62
https://t.me/s/ud_Legzo/45
https://t.me/s/ud_Sol/64
https://t.me/s/ud_Pin_Up/60
https://t.me/Beefcasino_rus/59
https://t.me/ud_Starda/46
https://t.me/s/ud_1xSlots/61
https://t.me/s/ud_Pokerdom/47
https://t.me/s/ud_MostBet/44
https://t.me/ud_Booi/44
https://t.me/ud_Gizbo/61
https://t.me/ud_Kent/50
https://t.me/ud_Vulkan/64
https://t.me/ud_Vodka/53
https://t.me/ud_1xSlots/11
https://t.me/ud_Irwin/28
https://t.me/s/Ud_GAMa
https://t.me/s/Ud_rIoBet
https://t.me/s/uD_daddy
https://t.me/s/uD_MOSTBEt
https://t.me/s/Ud_KEnT
https://t.me/s/uD_dRagonMOneY
https://t.me/s/Ud_MRbiT
https://t.me/s/uD_1XBET
https://t.me/s/official_1win_aviator/42
https://t.me/s/uD_stArda
https://t.me/s/ud_StaKe
https://t.me/s/official_1win_aviator/70
https://t.me/s/uD_fRESH
https://t.me/s/UD_VULKAN
https://t.me/s/Ud_catcasINo
https://t.me/s/Ud_GiZbo
https://t.me/s/Ud_monRo
https://t.me/s/tf_1win
https://t.me/s/kfo_1win
https://t.me/s/Top_bk_ru
https://t.me/s/tf_1win
https://t.me/s/official_1win_aviator/281
https://t.me/s/ud_PLAYfortunA
https://t.me/s/UD_vULKAn
https://t.me/s/ud_1Go
https://t.me/s/ud_FRESh
https://t.me/s/uD_1xbeT
https://t.me/s/uD_mArTIN
https://t.me/s/ud_MRbIt
https://t.me/s/uD_KomEtA
https://t.me/s/UD_DriP
https://t.me/s/UD_DADdy
https://t.me/s/Ud_StarDa
https://t.me/s/ud_lEon
https://t.me/s/uD_fLAgmAn
https://t.me/s/ke_CatCasino
https://t.me/s/ke_Kometa
https://t.me/s/ke_1xbet
https://t.me/s/ke_DragonMoney
https://t.me/official_1win_aviator/123
https://t.me/s/ke_Starda
https://t.me/s/ke_mellstroy
https://t.me/s/ke_MrBit
https://t.me/s/ke_Casino_X
https://t.me/s/ke_Riobet
https://t.me/s/ke_Leon
https://t.me/s/ke_Vulkan
https://t.me/s/ke_Pinco
https://t.me/s/ke_Drip
https://t.me/s/ke_Gizbo
https://t.me/s/ke_Daddy
https://t.me/s/ke_JoyCasino
https://t.me/s/ke_Pokerdom
https://t.me/s/kef_Rox
https://t.me/s/ke_Vodka
https://t.me/s/ke_Pin_Up
https://t.me/s/ke_1xSlots
https://t.me/s/kef_Lex
https://t.me/s/ke_Fresh
https://t.me/s/kef_R7
https://t.me/s/ke_Flagman
https://t.me/s/ke_Monro
https://t.me/s/ke_Gama
https://t.me/official_1win_aviator/429
https://t.me/s/ke_1Win
https://t.me/s/official_1win_aviator/264
https://t.me/s/ke_Sol
https://t.me/s/ke_Izzi
https://t.me/s/ke_Jet
https://t.me/s/kef_beef
https://t.me/s/ke_Stake
https://t.me/s/ke_Irwin
https://t.me/s/ke_Booi
https://t.me/s/official_1win_aviator/441
https://t.me/s/topcasino_v_rossii
https://t.me/s/top_kazino_z
https://t.me/s/a_Top_onlinecasino/10
https://t.me/a_Top_onlinecasino/4
https://t.me/s/a_Top_onlinecasino/6
https://t.me/s/a_Top_onlinecasino/13
https://t.me/a_Top_onlinecasino/20
https://t.me/a_Top_onlinecasino/14
https://t.me/a_Top_onlinecasino/18
https://t.me/s/a_Top_onlinecasino/3
https://t.me/a_Top_onlinecasino/11
https://t.me/s/a_Top_onlinecasino/14
https://t.me/a_Top_onlinecasino/21
https://t.me/topcasino_rus/
https://t.me/s/official_Irwin_es
https://t.me/s/official_Riobet_es
https://t.me/s/official_CasinoX_es
https://t.me/s/official_Izzi_ed
https://t.me/s/official_Kometa_ed
https://t.me/s/official_Pinco_es
https://t.me/s/official_Vodka_ed
https://t.me/s/official_GGBet_es
https://t.me/s/official_Kent_es
https://t.me/s/official_Fresh_es
https://t.me/s/official_GGBet_ed
https://t.me/s/official_Kent_ed
https://t.me/s/official_Kometa_es
https://t.me/s/official_Lex_es
https://t.me/s/official_Booi_ed
https://t.me/s/official_Pokerdom_es
https://t.me/s/official_Rox_ed
https://t.me/s/official_Legzo_ed
https://t.me/s/official_R7_es
https://t.me/s/official_Gizbo_ed
https://t.me/s/official_JoyCasino_es
https://t.me/s/official_Riobet_ed
https://t.me/s/official_Martin_ed
https://t.me/s/official_PinUp_ed
https://t.me/s/official_Vodka_es
https://t.me/s/official_Pokerdom_ed
https://t.me/s/official_Leon_es
https://t.me/s/Irwin_egs/10
https://t.me/s/Starda_egs/18
https://t.me/Lex_egs/4
https://t.me/JoyCasino_egs/13
https://t.me/s/iGaming_live/4603
https://t.me/Pokerdom_egs/6
https://t.me/Daddy_egs/8
https://t.me/Volna_egs/14
https://t.me/s/Pokerdom_egs/18
https://t.me/Gizbo_egs/18
https://t.me/s/Flagman_egs/12
https://t.me/Pokerdom_egs/7
https://t.me/s/Gizbo_egs/16
https://t.me/Volna_egs/18
https://t.me/s/Sol_egs/17
https://t.me/s/Irwin_egs/5
https://t.me/s/Legzo_egs/7
https://t.me/R7_egs/16
https://t.me/s/Leon_egs/9
https://t.me/s/MostBet_egs/20
https://t.me/Kent_egs/4
https://t.me/Vodka_egs/4
https://t.me/s/Jet_egs/10
https://t.me/Fresh_egs/3
https://t.me/s/Irwin_egs/21
https://t.me/va_1xbet/14
https://t.me/va_1xbet
https://t.me/iGaming_live/4617
https://t.me/va_1xbet/24
https://t.me/va_1xbet/16
https://t.me/s/va_1xbet/16
https://t.me/s/va_1xbet/7
https://t.me/s/va_1xbet
https://t.me/s/va_1xbet/20
https://t.me/va_1xbet/12
https://t.me/va_1xbet/7
https://t.me/va_1xbet/18
https://t.me/va_1xbet/5
https://t.me/s/va_1xbet/6
https://t.me/surgut_narashchivaniye_nogtey/6
https://t.me/surgut_narashchivaniye_nogtey/7
https://t.me/s/rating_online
https://t.me/s/ah_1xbet/13
https://t.me/ah_1xbet/9
https://t.me/s/ah_1xbet/21
https://t.me/s/ah_1xbet/2
https://t.me/s/ah_1xbet/18
https://t.me/ah_1xbet/18
https://t.me/s/ah_1xbet/11
https://t.me/s/ah_1xbet/20
https://t.me/ah_1xbet/3
https://t.me/ah_1xbet/17
https://t.me/s/ah_1xbet/14
https://t.me/s/ah_1xbet/22
https://t.me/s/Best_rating_casino
https://t.me/s/reyting_topcazino/20
https://t.me/topcasino_rus/
https://t.me/a_Topcasino/9
https://t.me/top_ratingcasino/2
https://t.me/a_Topcasino/4
https://t.me/a_Topcasino/8
https://t.me/top_ratingcasino/4
https://t.me/a_Topcasino/5
https://t.me/a_Topcasino/7
https://t.me/a_Topcasino/2
https://t.me/top_ratingcasino/5
https://telegra.ph/Top-kazino-11-14-2
https://t.me/kazino_bez_filtrov
https://t.me/s/kazino_bez_filtrov
https://t.me/da_1xbet/8
https://t.me/da_1xbet/10
https://t.me/da_1xbet/5
https://t.me/da_1xbet/4
https://t.me/da_1xbet/3
https://t.me/da_1xbet/6
https://t.me/da_1xbet/2
https://t.me/da_1xbet/9
https://t.me/Best_promocode_rus/52
https://t.me/da_1xbet/12
https://t.me/rq_1xbet/1181
https://t.me/rq_1xbet/1413
https://t.me/rq_1xbet/1118
https://t.me/s/rq_1xbet/1103
https://t.me/s/rq_1xbet/1371
https://t.me/s/rq_1xbet/971
https://t.me/s/rq_1xbet/840
https://t.me/Official_1xbet1/559
https://t.me/s/Official_1xbet1/817
https://t.me/s/Official_1xbet1/732
https://t.me/s/Official_1xbet1/1222
https://t.me/s/Official_1xbet1/981
https://t.me/Official_1xbet1/857
https://t.me/Official_1xbet1/1081