

There’s something undeniably satisfying about driving a car that gleams under the sunlight, its surface smooth and radiant like a freshly polished gem. While professional detailing can achieve this glossy finish, the art of DIY car polishing offers an accessible and rewarding path to restoring your vehicle’s shine at home. With the right techniques and a bit of patience, you can transform your car’s exterior from dull and tired to brilliantly lustrous. This article delves into essential tips and tricks for polishing your car yourself, ensuring that every inch reflects care and craftsmanship without breaking the bank.
Table of Contents
- Choosing the Right Polishing Products for Your Vehicle
- Preparing Your Car Surface for Optimal Shine
- Step-by-Step Guide to Applying Polish Like a Pro
- Techniques for Avoiding Common Polishing Mistakes
- Enhancing Shine with Buffing Tools and Methods
- Post-Polishing Care to Maintain Long-Lasting Gloss
- Q&A
- In Summary

Choosing the Right Polishing Products for Your Vehicle
When selecting the perfect polishing products, it’s essential to consider the condition of your vehicle’s paint. For minor scratches and swirl marks, opt for a fine polish or glaze that smooths imperfections without being too abrasive. Conversely, if your car’s surface shows traces of oxidation or deeper scratches, a more aggressive compound might be necessary before refining with a finer polish. Don’t forget that the type of paint finish—whether metallic, matte, or classic gloss—can influence product choice, so always check for compatibility to avoid unwanted damage or discoloration.
Quality tools enhance the results no matter which product you choose. Here’s a quick guide to help you determine what suits your shine quest best:
- Polishing Compounds: Heavy-duty for oxidation or scratches
- Finishing Polishes: Light abrasiveness to eliminate swirls and enhance gloss
- Microfiber Towels: Essential for buffing without scratching
- Applicator Pads: Foam or microfiber, chosen based on polish type and area size
| Product Type | Use Case | Recommended When |
|---|---|---|
| Cutting Compound | Remove deep scratches | Paint is heavily oxidized or scratched |
| Polish | Refining surface and swirl removal | Paint is dull or has minor imperfections |
| Glaze | Fill in tiny scratches temporarily | Quick shine boost |
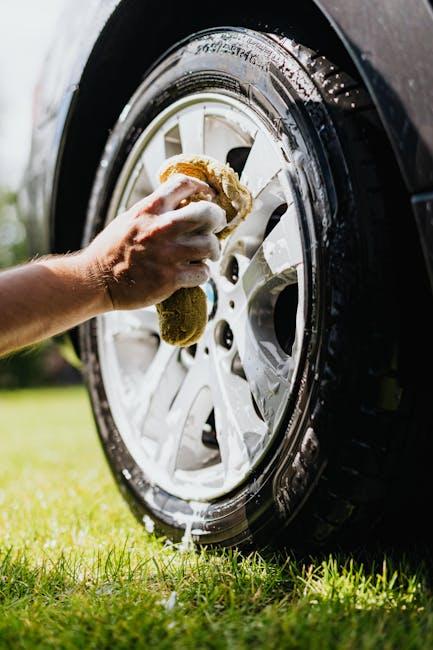
Preparing Your Car Surface for Optimal Shine
Before diving into the polishing process, ensuring a spotless canvas is key to achieving that coveted mirror-like finish. Start by giving your car a thorough wash using a pH-balanced automotive shampoo to gently remove dirt and grime without stripping away the wax layer. Don’t forget to dry the surface with a microfiber towel — this prevents water spots and prepares the surface for a flawless polish. For the best results, work in a shaded area to avoid the polish drying too quickly and leaving streaks.
Next, inspect your car’s surface for imperfections like old wax, oxidation, or light scratches. If these are present, a light clay bar treatment followed by a mild paint cleaner or pre-polish will smooth the paintwork and create a perfect base. Below is a simple checklist to guide your prep work:
- Wash and dry with car-specific shampoo and microfiber towels
- Clay bar treatment to remove embedded contaminants
- Paint inspection under good lighting for swirls and scratches
- Apply pre-polish product for surface leveling
| Step | Purpose | Recommended Tool |
|---|---|---|
| Washing | Remove loose dirt | Microfiber mitt |
| Clay bar | Eliminate bonded contaminants | Clay bar & lubricant |
| Inspect | Assess surface condition | Bright light source |
| Pre-polish | Level minor imperfections | Foam applicator pad |

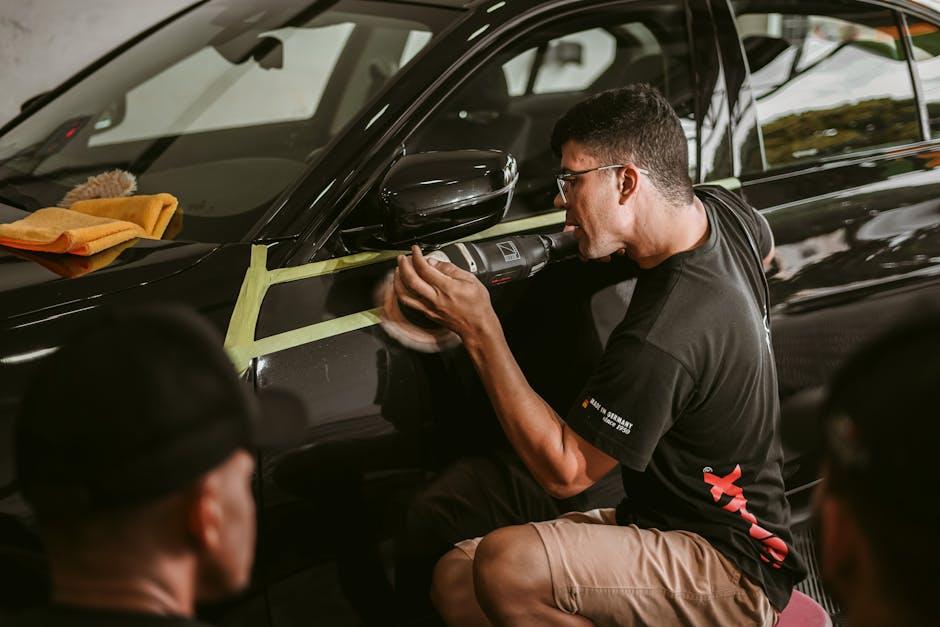
Step-by-Step Guide to Applying Polish Like a Pro
Begin by ensuring your car’s surface is spotless; wash and dry thoroughly to avoid trapping dirt under the polish, which can cause scratches. Use a clay bar to remove embedded contaminants for a perfectly smooth canvas. When you’re ready to apply, work in small, manageable sections under shade to prevent premature drying. Dab a small amount of polish onto a foam applicator pad and spread it evenly over the paint in gentle, circular motions. This technique helps to break down oxidation and minor surface imperfections without damaging the paintwork.
After allowing the polish to haze slightly (usually a few minutes), it’s time to buff it off using a clean microfiber cloth. Always flip your cloth to a fresh side to avoid reapplying buffed residue. For a clear overview of application times and polishing pad recommendations, refer to the handy guide below:
| Polish Type | Application Time | Best Pad |
|---|---|---|
| Light Polish | 2-3 minutes | Soft Foam |
| Medium Polish | 3-5 minutes | Medium Foam |
| Heavy Cut Polish | 5-7 minutes | Aggressive Foam |
- Work methodically: avoid rushing to achieve even coverage.
- Stay consistent: maintain firm, but gentle pressure to protect the finish.
- Repeat when needed: but avoid over-polishing to keep paint healthy.
Techniques for Avoiding Common Polishing Mistakes
Avoiding common polishing mistakes is essential to achieving that enviable, mirror-like shine on your vehicle. One of the biggest errors is rushing through the process—patience is key. Always work in small sections, applying the polish evenly and using consistent pressure. Additionally, make sure your polishing pad stays clean throughout the job; a dirty pad can trap debris and cause swirl marks or scratches. Using the right product for your car’s paint type is equally important, so test on a small, inconspicuous area before committing to the entire surface.
- Avoid high heat: Polishing in direct sunlight or on a hot surface can cause the polish to dry too quickly, making it difficult to buff out smoothly.
- Check your technique: Use gentle, circular motions instead of aggressive back-and-forth scrubbing to minimize paint damage.
- Don’t neglect prep work: Always wash and dry your car thoroughly to prevent dirt from scratching the paint during polishing.
| Common Mistake | How to Avoid |
|---|---|
| Skipping prep wash | Thoroughly wash and dry car first |
| Using dirty pads | Clean pads regularly during polishing |
| Excessive pressure | Apply light, even pressure throughout |
| Polishing under sun | Work in shade or garage for control |
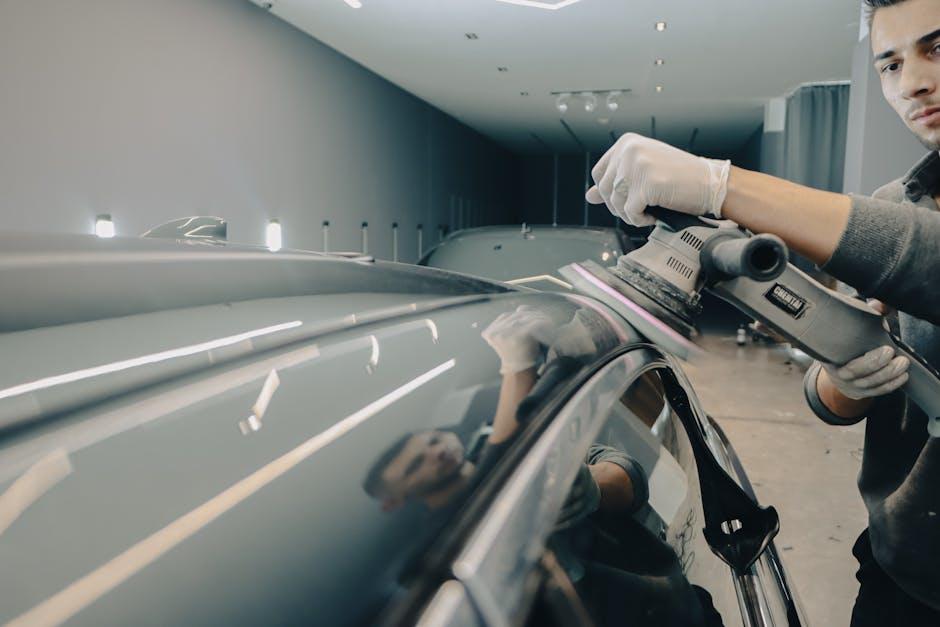
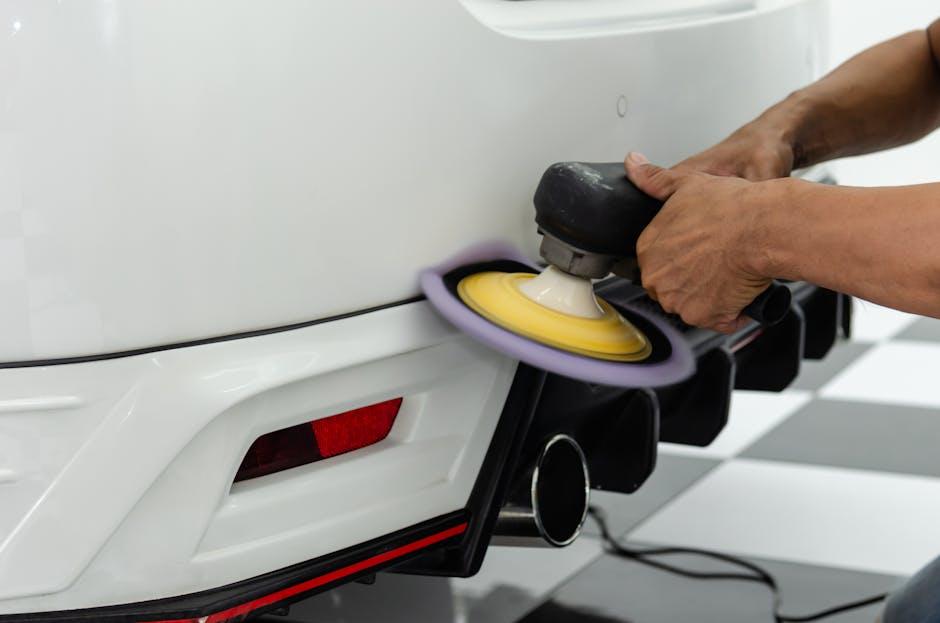
Enhancing Shine with Buffing Tools and Methods
When aiming for that impeccable gleam, investing in quality buffing tools can make all the difference. Whether you choose an electric buffer or a manual microfiber pad, the key is to work steadily and evenly. Buffing machines with adjustable speeds give you greater control, reducing the risk of swirl marks and ensuring the polish penetrates deeply for a professional-grade shine. Pair these tools with foam or microfiber pads designed for finishing, which help distribute the product smoothly, reviving your car’s paintwork without causing damage.
Mastering the technique involves more than just picking the right tool — your method plays a crucial role too. Start with light pressure and slow, overlapping motions to allow the polish to work effectively. Remember these essential tips to achieve a dazzling finish:
- Clean surface: Always wash and dry your car thoroughly before buffing to avoid scratching.
- Use proper polish: Select a polish compatible with your car’s paint type.
- Buff in shade: Avoid direct sunlight to prevent premature drying and uneven results.
| Buffing Tool | Best Use | Speed Setting |
|---|---|---|
| Dual Action Polisher | Beginner to intermediate | 1,500-2,500 RPM |
| Rotary Buffer | Expert use for heavy correction | 2,500-3,500 RPM |
| Manual Microfiber Pad | Spot touch-ups and delicate areas | N/A |
Post-Polishing Care to Maintain Long-Lasting Gloss
Once your car gleams from a fresh polish, it’s crucial to protect that dazzling shine by adopting a consistent care routine. Avoid washing your vehicle under direct sunlight to prevent water spots and streaks. Opt instead for gentle, pH-balanced car shampoos paired with soft microfiber cloths for drying. Regularly applying a quality wax or paint sealant not only enhances the gloss but also forms a resilient barrier against contaminants like bird droppings, tree sap, and road grime.
Maintaining your car’s brilliance doesn’t have to be tedious. Incorporate these simple habits into your post-polishing care:
- Store your vehicle in shaded or covered areas whenever possible to minimize UV damage and oxidation.
- Quickly address spills and stains before they can etch into the paint finish.
- Use spray detailers between washes to remove minor dust and fingerprints while boosting surface slickness.
| Action | Benefit | Frequency |
|---|---|---|
| Apply Wax | Protects paint & enhances gloss | Every 6 weeks |
| Quick Detail Spray | Removes dust & fingerprints | Every 2 weeks |
| Shade Parking | Prevents UV fading | Daily if possible |
Q&A
Q&A: DIY Car Polishing Tips for a Shiny Finish
Q1: Why should I bother polishing my car myself?
A1: Polishing your car at home not only saves you money but also gives you full control over the process. It’s a satisfying way to maintain your vehicle’s shine and protect the paint from wear and tear. Plus, a polished car just looks incredible—almost like it’s brand new.
Q2: How often should I polish my car?
A2: Generally, polishing every 3 to 6 months is ideal to keep that brilliant finish. Over-polishing can wear down the clear coat, so regular but moderate polishing maintains the balance between shine and paint protection.
Q3: What’s the difference between polishing and waxing?
A3: Polishing smooths out minor scratches and imperfections by removing a tiny layer of clear coat, restoring the paint’s depth and gloss. Waxing, on the other hand, adds a protective layer on top of the polished surface, sealing in the shine and shielding against environmental damage.
Q4: What tools and products do I need for DIY polishing?
A4: At minimum, you’ll want a dual-action polisher, microfiber cloths, a quality polishing compound, and finishing polish. Some enthusiasts also use foam or wool pads to boost results. Always choose products compatible with your car’s paint type.
Q5: How do I avoid damaging my car’s paint while polishing?
A5: Patience is key. Work in small sections, apply moderate pressure, and keep the polisher moving to avoid heat buildup. Always start with the least abrasive polish and test it on a small, inconspicuous area first. Clean your surface thoroughly before polishing to avoid grinding dirt into the paint.
Q6: Can I polish my car in direct sunlight?
A6: It’s best to avoid direct sunlight. Heat causes the polish to dry too fast, which can lead to uneven results or streaking. Find a shaded, cool place or work during early morning or late afternoon for the best outcome.
Q7: What are some common mistakes to watch out for?
A7: Getting too aggressive with heavy compounds, skipping surface prep, or neglecting to clean your pads can all cause swirl marks or dull spots. Take your time, follow product instructions, and keep everything clean.
Q8: After polishing, what’s the best way to maintain the shine?
A8: Apply a quality wax or paint sealant to lock in the polished finish and protect against UV rays, road grime, and water spots. Regular washing with a pH-balanced shampoo will help maintain that mirror-like gloss between polishing sessions.
Q9: Is it worth investing in a professional-grade polisher?
A9: For beginners, a good dual-action polisher strikes the perfect balance of power and safety, reducing the risk of paint damage. Professional rotary polishers can offer deeper correction but require experience to use confidently.
Q10: How do I know when my car needs polishing?
A10: Look for dullness, light scratches, water spots, or oxidation on the surface. If your car’s paint looks tired or lacks depth, it’s probably time to get polishing—your finish will thank you!
In Summary
With these DIY car polishing tips in your toolkit, achieving a showroom shine is no longer a distant dream but a satisfying reality. Remember, patience and the right technique transform your vehicle’s surface from dull to dazzling, reflecting not just light, but the care you put into your ride. So roll up your sleeves, gather your supplies, and give your car the shine it deserves—because every drive is better when it gleams with pride.