

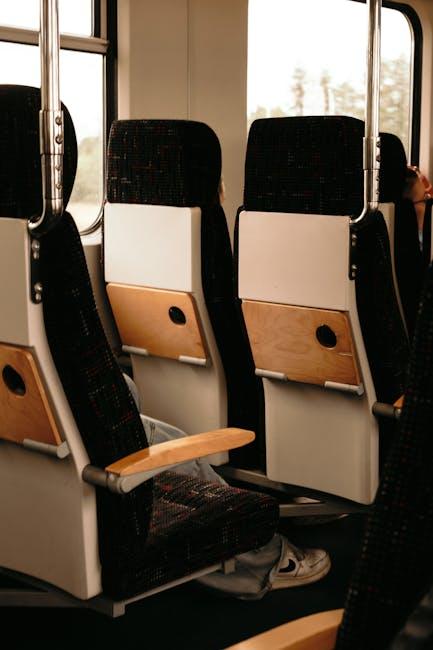
Your car is more than just a means of transportation—it’s a personal space where countless memories are made, from road trips to daily commutes. Over time, however, those trusty car seats inevitably collect dirt, spills, and unexpected stains that can dull their appearance and compromise comfort. While professional cleaning services offer a solution, they can often be costly and time-consuming. That’s where DIY car seat cleaning hacks come in—simple, effective methods using everyday household items to refresh your seats and restore that like-new feel. Whether you’re tackling stubborn stains or just looking to maintain a spotless interior, this guide will equip you with easy, practical tips to keep your car seats looking their best without breaking the bank.
Table of Contents
- The Ultimate Guide to Preparing Your Car Seats for Deep Cleaning
- Eco-Friendly Solutions for Tackling Stubborn Stains
- Step-by-Step Techniques to Revive Fabric and Leather Seats
- Essential Tools and Supplies for Efficient DIY Cleaning
- Preventive Tips to Keep Your Car Seats Spotless Longer
- How to Safely Remove Odors and Maintain Freshness
- Q&A
- Concluding Remarks

The Ultimate Guide to Preparing Your Car Seats for Deep Cleaning
Before diving into a deep clean, start by thoroughly vacuuming your car seats to remove loose debris and dirt particles. Use a crevice tool for seams and folds where crumbs and dust tend to accumulate. For fabric seats, consider using a soft-bristle brush to gently lift dirt. Leather seats require a damp microfiber cloth to wipe away surface dust, followed by a leather-safe cleaner. Remember to test any cleaning solution on a small, hidden area first to avoid discoloration or damage.
Next, gather the essential tools and homemade cleaning solutions to tackle stains and grime effectively. Here’s a quick checklist of DIY essentials to have on hand:
- Baking soda – great for deodorizing and lifting stains
- White vinegar diluted with water – acts as a natural disinfectant
- Mild dish soap – ideal for breaking down grease and dirt
- Soft microfiber cloths – gentle on fabrics and leather
- Soft-bristle brush – helps agitate stains without damage
| Seat Type | Recommended Cleaner | Drying Time |
|---|---|---|
| Fabric | Baking soda paste & vinegar spray | 2-3 hours (air dry) |
| Leather | Leather conditioner & mild soap solution | 1-2 hours (avoid direct sunlight) |
| Vinyl | Dish soap & water mixture | 1-2 hours (towel dry) |

Eco-Friendly Solutions for Tackling Stubborn Stains
When it comes to deep-seated stains, turning to nature’s pantry can provide surprisingly effective results without harsh chemicals. White vinegar is a champion for breaking down dirt and neutralizing odors—mix equal parts with water, spray lightly on the fabric, and blot with a microfiber cloth. Baking soda works wonders, too; sprinkle it generously on the stain, let it sit for 15 minutes, then vacuum away the residue to absorb moisture and eliminate smells. For tougher grime, a combination of mild castile soap and warm water can gently lift dirt without damaging delicate upholstery.
- Lemon juice: Natural bleaching agent; apply carefully to avoid discoloration.
- Hydrogen peroxide (3%): Use sparingly on light-colored fabrics as a spot cleaner.
- Essential oils (tea tree or lavender): Add a few drops to cleaning solutions for antimicrobial benefits and fresh scent.
| Eco Solution | Best For | Application Tip |
|---|---|---|
| White Vinegar & Water | Odor and light stains | Light mist, blot, then air dry |
| Baking Soda | Moisture & odor absorption | Sprinkle, wait, vacuum |
| Castile Soap | Grease and grime | Mild scrub with soft brush |
Step-by-Step Techniques to Revive Fabric and Leather Seats
Begin by vacuuming every nook and cranny of your seats, ensuring all dust and loose dirt are removed. For fabric seats, mix a gentle upholstery cleaner with warm water and apply using a soft brush in circular motions. Avoid soaking the fabric to prevent mold growth. Wipe off excess moisture with a microfiber cloth, then let the seats air dry completely. For stubborn stains, create a paste from baking soda and water, apply it to the spot, let it sit for 15 minutes, and then gently scrub before wiping clean.
Leather seats require a different touch — start with a cleaning solution made of equal parts vinegar and water or opt for a commercial leather cleaner. Use a soft cloth to massage the cleaner into the leather without saturating it. After cleaning, condition the leather with a high-quality cream or oil to restore its softness and prevent cracking. Remember to buff the leather with a dry cloth for a subtle shine. Below is a quick guide to ideal solutions and tools for each seat type:
| Material | Cleaner | Tools | Finishing Touch |
|---|---|---|---|
| Fabric | Upholstery cleaner or baking soda paste | Soft brush, microfiber cloth | Air dry completely |
| Leather | Vinegar-water mix or leather cleaner | Soft cloth | Leather conditioner and buff |
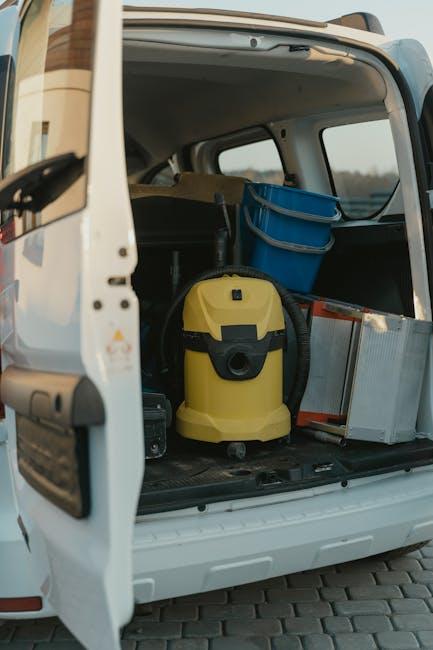
Essential Tools and Supplies for Efficient DIY Cleaning
Having the right tools and supplies at hand transforms car seat cleaning from a chore into an efficient and satisfying task. Start with microfiber cloths—they’re gentle on fabric and upholstery fibers, yet tough enough to lift dirt and grime. A soft-bristled brush is essential for loosening debris embedded between fabric weaves or leather crevices without causing damage. Next, invest in a quality spray bottle filled with DIY cleaners like a diluted vinegar solution or gentle soap mix, which provide a safe and effective cleanse. Don’t overlook a handheld vacuum with crevice tools to reach those hidden corners and seams where crumbs and dust settle.
For tackling persistent stains or odors, a small bucket with warm water and a sponge can be your best friend. Additionally, having baking soda on standby offers a natural deodorizing boost. Using these supplies in tandem encourages a thorough clean, streamlining your workflow and leaving your car seats looking refreshed and cared for. Consider keeping a compact kit with these essentials inside your vehicle for quick touch-ups on the go.
| Tool/Supply | Purpose | DIY Tip |
|---|---|---|
| Microfiber Cloth | Gentle wiping & drying | Use dry for dust, damp for stains |
| Soft-Bristled Brush | Loosening dirt in fabrics | Brush in circular motions |
| Spray Bottle | Applying homemade cleaner | Mix water & vinegar for fabric safe cleaner |
| Handheld Vacuum | Debris extraction from seams | Use crevice tool attachment |
| Baking Soda | Odor elimination | Sprinkle & let sit before vacuuming |

Preventive Tips to Keep Your Car Seats Spotless Longer
Maintaining the pristine condition of your car seats doesn’t have to be a chore. Start by incorporating simple habits that prevent dirt and stains from embedding deeply into the fabric. Consider using reusable seat covers that can be easily washed or wiped down after every trip. Keep a small, microfiber cloth and compact vacuum in your vehicle to quickly tackle spills and crumbs before they become a problem. Additionally, applying a fabric protector spray formulated for automotive seats creates an invisible shield, helping liquids bead off and reducing overall wear from daily use.
Another effective approach is to minimize the introduction of contaminants by implementing a few daily routines. Encourage passengers to avoid eating or drinking in the car to reduce accidental spills, and always remove shoes before getting in when possible. A small bin or organizer for trash and personal items can also keep clutter from accumulating and rubbing against upholstery, which can lead to premature fading or tearing. Below is a quick reference table highlighting key habits and their benefits:
| Preventive Habit | Benefit |
|---|---|
| Using Seat Covers | Protects original fabric from stains and wear |
| Regular Vacuuming | Removes dirt and debris before settling |
| Fabric Protector Spray | Repels liquids and reduces staining |
| No Food or Drink Rule | Minimizes chances of spills and stains |
| Organize Clutter | Prevents abrasion and fabric damage |

How to Safely Remove Odors and Maintain Freshness
Start by sprinkling a generous amount of baking soda over your car seats. This natural deodorizer absorbs unpleasant smells without the use of harsh chemicals. Let it sit for at least 15 minutes—or overnight for stubborn odors—and then vacuum thoroughly using a handheld or car vacuum cleaner. For fabric seats, consider lightly misting a mixture of equal parts water and white vinegar in a spray bottle over the surface. The vinegar neutralizes odors and evaporates quickly, leaving behind a fresh scent. Always test any cleaning solution on a small, inconspicuous area first to avoid discoloration or damage.
To keep your car seats smelling fresh for longer, use these simple habits:
- Use charcoal bags or odor-absorbing sachets under seats to trap moisture and odors.
- Wipe spills immediately with a damp cloth and mild detergent to prevent staining and lingering smells.
- Regularly air out your vehicle by opening windows or doors on dry, sunny days.
| Tip | Effectiveness | Frequency |
|---|---|---|
| Baking Soda Application | High | Weekly |
| Vinegar Misting | Medium | Monthly |
| Charcoal Bags | High | Every 2 Months |
Q&A
Q&A: DIY Car Seat Cleaning Hacks
Q1: Why should I clean my car seats myself instead of going to a professional?
A1: DIY car seat cleaning saves you money, lets you clean on your own schedule, and gives you control over the products you use—plus, it’s surprisingly satisfying to see immediate results from your own efforts!
Q2: What are some everyday household items that can help clean car seats?
A2: Common items like baking soda, white vinegar, dish soap, and even a soft toothbrush can be your best friends. Baking soda deodorizes, vinegar disinfects, and dish soap cuts through grime without harsh chemicals.
Q3: How do I tackle tough stains like coffee or grease on fabric seats?
A3: Start with a mix of equal parts white vinegar and water in a spray bottle. Lightly spray the stain, let it sit for 5-10 minutes, then gently scrub with a soft brush. Finish by blotting dry with a clean cloth. Repeat if needed!
Q4: What’s the best way to clean leather car seats without damaging them?
A4: Use a mild soap mixed with water to gently wipe the surface, then apply a leather conditioner to keep the material supple. Avoid harsh chemicals or abrasive scrubbing, which can cause cracks or discoloration.
Q5: Can baking soda really help with car seat odors?
A5: Absolutely! Sprinkle baking soda generously on the seats, leave it for several hours (or overnight for stubborn odors), and then vacuum thoroughly. It absorbs unwanted smells naturally and leaves your car fresher.
Q6: How often should I clean my car seats to keep them in good condition?
A6: A light cleaning every 1-2 months and a deep clean every 6 months will keep your seats looking sharp. Of course, spills call for immediate attention to avoid permanent stains.
Q7: Are there any quick hacks for last-minute car seat cleaning before guests arrive?
A7: Grab some baby wipes or makeup remover wipes for a quick surface clean. They’re great for wiping away dust, crumbs, and small spills in a flash!
Q8: Can I use a vacuum cleaner for car seats, and if so, what attachments work best?
A8: Yes! Use a crevice tool to reach tight spots and a brush attachment for fabric surfaces. This helps remove embedded dirt and debris without damaging your seats.
Q9: What should I avoid when cleaning car seats at home?
A9: Stay clear of bleach, ammonia-based cleaners, and abrasive brushes—they can ruin fabric fibers and leather finishes. Also, avoid soaking the seats; too much moisture can cause mold or mildew.
Q10: Are DIY car seat cleaning hacks effective long-term?
A10: When done regularly and carefully, DIY cleaning prolongs your car seats’ life and appearance. It also empowers you to maintain a pleasant and hygienic driving environment without breaking the bank.
Concluding Remarks
And there you have it—your go-to guide for transforming tired, grimy car seats into fresh and inviting comfort zones, all without breaking the bank or visiting the pros. With a little elbow grease and these savvy DIY hacks, your car can look and feel like new again. So roll up your sleeves, gather your supplies, and embark on your cleaning adventure—because a cleaner car seat is more than just a chore; it’s a small step toward reclaiming your ride’s pride and your peace of mind. Happy cleaning!
600 Comments
y9yrsg
y9yrsg
Выбирая надежную платформу, стоит обратить внимание на хостинг для хрумера, который обеспечивает бесперебойную работу.
https://t.me/s/rating_online/3
https://t.me/rating_online/7
https://t.me/Online_1_xbet/2561
https://t.me/Online_1_xbet/2618
https://t.me/Online_1_xbet/1997
https://t.me/Official_1xbet_1xbet/s/1009
https://t.me/Official_1xbet_1xbet/s/634
https://t.me/Official_1xbet_1xbet/s/560
https://t.me/Official_1xbet_1xbet/s/1378
https://t.me/Official_1xbet_1xbet/s/822
https://t.me/Official_1xbet_1xbet/s/681
https://t.me/Official_1xbet_1xbet/s/1450
https://t.me/Official_1xbet_1xbet/s/1482
https://t.me/s/Official_1xbet_1xbet/1835
https://t.me/s/Official_1xbet_1xbet/1827
https://t.me/s/Official_1xbet_1xbet/1852
https://t.me/s/Official_1xbet_1xbet/1792
https://t.me/s/Official_1xbet_1xbet/1855
https://t.me/s/Official_1xbet_1xbet/1704
https://t.me/s/Official_1xbet_1xbet/1716
https://t.me/s/Official_1xbet_1xbet/1758
https://t.me/Official_1xbet_1xbet/1746
https://t.me/s/Official_1xbet_1xbet/1804
https://t.me/Official_1xbet_1xbet/1814
https://t.me/s/Official_1xbet_1xbet/1660
https://t.me/s/Official_1xbet_1xbet/1672
https://t.me/Official_1xbet_1xbet/1799
https://t.me/Official_1xbet_1xbet/1630
https://t.me/s/Official_1xbet_1xbet/1681
https://t.me/Official_1xbet_1xbet/1778
https://t.me/Official_1xbet_1xbet/1676
https://t.me/Official_1xbet_1xbet/1705
https://t.me/s/Official_1xbet_1xbet/1733
https://t.me/Official_1xbet_1xbet/1785
https://t.me/s/Official_1xbet_1xbet/1776
https://t.me/Official_1xbet_1xbet/1642
https://t.me/Official_1xbet_1xbet/1680
https://t.me/s/Official_1xbet_1xbet/1857
https://t.me/s/Official_1xbet_1xbet/1639
https://t.me/Official_1xbet_1xbet/1706
https://t.me/s/topslotov
https://t.me/s/official_1win_aviator
https://t.me/s/reiting_top10_casino/4
https://t.me/s/reiting_top10_casino
https://t.me/s/reiting_top10_casino/10
https://t.me/reiting_top10_casino/3
https://t.me/reiting_top10_casino/8
https://t.me/reiting_top10_casino/5
https://t.me/reiting_top10_casino/9
Каждый новый выпуск Авто новости приносит что-то полезное. Недавно узнал про тест новых шин.
https://t.me/s/reiting_top10_casino/7
https://t.me/s/reiting_top10_casino/8
https://t.me/reiting_top10_casino/7
https://t.me/s/reiting_top10_casino/2
https://t.me/s/reiting_top10_casino/6
https://t.me/s/reiting_top10_casino/9
https://t.me/s/reiting_top10_casino/3
https://t.me/reiting_top10_casino/4
https://t.me/reiting_top10_casino/6
https://t.me/reiting_top10_casino/10
https://t.me/s/Gaming_1xbet
https://t.me/s/PlayCasino_1win
https://t.me/s/PlayCasino_1win
https://t.me/s/PlayCasino_1xbet
https://t.me/s/PlayCasino_1xbet
https://t.me/s/ofitsialniy_1win/33/evith
https://t.me/s/iw_1xbet
https://t.me/s/ofitsialniy_1win
https://t.me/s/Official_beefcasino
https://t.me/s/bs_1xbet/22
https://t.me/s/bs_1xbet/24
https://t.me/s/bs_1xbet/30
https://t.me/s/bs_1xbet/3
https://t.me/s/bs_1xbet/46
https://t.me/s/bs_1xbet/47
https://t.me/s/bs_1xbet/31
https://t.me/s/bs_1xbet/19
https://t.me/s/bs_1xbet/14
https://t.me/s/bs_1xbet/3
https://t.me/s/bs_1xbet/36
https://t.me/s/bs_1xbet/42
https://t.me/s/bs_1xbet/48
https://t.me/s/bs_1xbet/50
https://t.me/bs_1xbet/11
https://t.me/bs_1xbet/19
https://t.me/s/bs_1xbet/20
https://t.me/s/bs_1xbet/11
https://t.me/bs_1xbet/37
https://t.me/bs_1xbet/39
https://t.me/jw_1xbet/905
https://t.me/s/jw_1xbet/143
https://t.me/jw_1xbet/284
https://t.me/jw_1xbet/185
https://t.me/jw_1xbet/869
https://t.me/jw_1xbet/760
https://t.me/bs_1Win/711
https://t.me/bs_1Win/382
https://t.me/bs_1Win/678
https://t.me/bs_1Win/862
https://t.me/bs_1Win/455
https://t.me/bs_1Win/573
https://t.me/bs_1Win/516
https://t.me/bs_1Win/801
https://t.me/s/bs_1Win/592
https://t.me/bs_1Win/1258
https://t.me/bs_1Win/1266
https://t.me/bs_1Win/965
https://t.me/bs_1Win/1243
https://t.me/s/Official_mellstroy_casino/12
https://t.me/s/Official_mellstroy_casino/21
https://t.me/Beefcasino_rus/33
https://t.me/s/Official_mellstroy_casino/48
https://t.me/Official_mellstroy_casino/52
https://t.me/s/Official_mellstroy_casino/11
https://t.me/Official_mellstroy_casino/15
https://t.me/s/Official_mellstroy_casino/45
https://t.me/s/Official_mellstroy_casino/47
https://t.me/Official_mellstroy_casino/20
https://t.me/Official_mellstroy_casino/25
https://t.me/Best_promocode_rus/3155
https://t.me/s/Best_promocode_rus/1749
https://t.me/s/Beefcasino_rus/57
https://t.me/s/ud_Lex/56
https://t.me/s/ud_Stake/60
https://t.me/ud_JoyCasino/49
https://t.me/s/ud_Jet/58
https://t.me/s/ud_Casino_X/47
https://t.me/ud_MostBet/59
https://t.me/ud_Jet/44
https://t.me/ud_Vodka/44
https://t.me/s/ud_Monro/53
https://t.me/ud_Gizbo/48
https://t.me/ud_Fresh/50
https://t.me/s/ud_Pokerdom/64
https://t.me/ud_Riobet/58
https://t.me/ud_Gizbo/56
https://t.me/ud_Vulkan/55
https://t.me/ud_Daddy/47
https://t.me/Beefcasino_rus/59
https://t.me/s/ud_Fresh/45
https://t.me/s/ud_Legzo/62
https://t.me/s/ud_Drip/48
https://t.me/s/ud_Riobet/44
https://t.me/ud_Leon/45
https://t.me/s/ud_1xSlots/54
https://t.me/ud_Gizbo/49
https://t.me/ud_Starda/49
https://t.me/s/ud_Pinco/60
https://t.me/ud_DragonMoney/46
https://t.me/s/?ud_1Go/64
https://t.me/ud_Legzo/35
https://t.me/ud_DragonMoney/27
https://t.me/s/uD_CASinO_X
https://t.me/s/uD_soL
https://t.me/s/ud_voDkA
https://t.me/s/ud_MarTin
https://t.me/s/UD_KOmEtA
https://t.me/s/ud_JoycaSino
https://t.me/official_1win_aviator/38
https://t.me/s/uD_dRagonMOneY
https://t.me/s/Ud_MRbiT
https://t.me/official_1win_aviator/45
https://t.me/s/Ud_pIn_up
https://t.me/s/UD_VULKAN
https://t.me/s/Official_mellstroy_casino
https://t.me/s/Beefcasino_rus
https://t.me/s/UD_drIp
https://t.me/s/tf_1win
https://t.me/s/Top_bk_ru
https://t.me/s/kta_1win
https://t.me/s/tf_1win
https://t.me/s/ud_CAsiNo_X
https://t.me/s/ud_MRbIt
https://t.me/s/UD_pokeRdOM
https://t.me/s/ud_1xSlOtS
https://t.me/s/uD_StAkE
https://t.me/s/ud_IRwiN
https://t.me/s/ud_monro
https://t.me/s/ud_MOstBeT
https://t.me/s/uD_1xbeT
https://t.me/s/uD_fLAgmAn
https://t.me/s/Ud_LEX
Votre guide parifoot rd congo: picks quotidiens, cotes comparees, tickets securises, gestion de mise, cash-out et promos. Depots via mobile money, retraits rapides, support francophone. LINAFOOT, CAF, ligues europeennes. Pariez avec moderation.
https://t.me/s/ke_Starda
https://t.me/s/ke_Martin
https://t.me/s/official_1win_aviator/247
https://t.me/s/ke_Sol
https://t.me/s/ke_Drip
https://t.me/s/ke_mellstroy
https://t.me/s/ke_1Win
https://t.me/s/kef_Rox
https://t.me/s/ke_JoyCasino
https://t.me/s/ke_DragonMoney
https://t.me/s/ke_MostBet
https://t.me/s/ke_GGBet
https://t.me/s/ke_Volna
https://t.me/s/ke_1xbet
https://t.me/s/ke_Jet
https://t.me/s/ke_MrBit
https://t.me/s/ke_Gama
https://t.me/s/ke_Izzi
https://t.me/s/kef_R7
https://t.me/s/ke_1xSlots
https://t.me/s/ke_kent
https://t.me/s/ke_Kometa
https://t.me/s/ke_Riobet
https://t.me/s/kef_Lex
https://t.me/s/ke_1Go
https://t.me/s/ke_Irwin
https://t.me/s/ke_Legzo
https://t.me/s/ke_Stake
https://t.me/s/ke_Pinco
https://t.me/s/ke_Fresh
https://t.me/s/official_1win_aviator/598
https://t.me/s/kef_beef
https://t.me/s/ke_PlayFortuna
https://t.me/s/ke_CatCasino
https://t.me/s/ke_Booi
https://t.me/s/ke_Casino_X
https://t.me/s/ke_Gizbo
https://t.me/s/top_kazino_z
https://t.me/s/topcasino_v_rossii
https://t.me/a_Top_onlinecasino/21
https://t.me/s/a_Top_onlinecasino/21
https://t.me/a_Top_onlinecasino/13
https://t.me/s/a_Top_onlinecasino/8
https://t.me/s/a_Top_onlinecasino/7
https://t.me/a_Top_onlinecasino/18
https://t.me/s/a_Top_onlinecasino/2
https://t.me/a_Top_onlinecasino/3
https://t.me/a_Top_onlinecasino/17
https://t.me/a_Top_onlinecasino/6
https://t.me/a_Top_onlinecasino/10
https://t.me/topcasino_rus/
https://t.me/s/official_1xSlots_ed
https://t.me/s/official_JoyCasino_es
https://t.me/s/official_Izzi_es
https://mosquitosalsa.com/
https://pushnews.com.ua/virsh-kokhanomu-iakyy-pomer-zvorushlyvyy-virsh-dlia-pomerloho-kokhanoho/
https://t.me/s/official_Kent_es
Работают по-честному и профессионально, никаких скрытых условий: https://tamozhenniiy-predstavitel11.ru/
Брокер помог с оформлением крупной партии товаров. Всё согласовано, никаких проблем с таможней. Работают отлично: таможенный брокер для юридических лиц
нарколог на дом цена
https://t.me/s/official_MrBit_es
https://factava.com.ua/
DRINKIO порадовал внимательностью к клиентам и скоростью работы. Сайт удобный, заказ оформляется за пару минут, подтверждение приходит сразу. Курьеры всегда звонят заранее и приезжают точно в срок. Радует, что можно заказать в любое время суток, без ограничений по времени. Всё доставляется в аккуратной упаковке и в идеальном состоянии. Прекрасный сервис для тех, кому нужна доставка алкоголя на дом в Москве быстро и удобно https://drinkio105.ru/catalog/category/pivo/
The Inheritance Games Canada: A thrilling mystery game where players unravel secrets, solve puzzles, and compete for a billionaire’s fortune. Perfect for fans of strategy and suspense: Inheritance Games discussion questions
https://t.me/s/official_Gizbo_ed
Binary Options Demo: Learn Before You Trade.
Start your trading journey with a Binary Options Demo account and practice risk-free before going live. Sharpen your skills and explore smart strategies at https://terrasseo.jp/
Работают на совесть, видно, что дорожат клиентами: Таможенный брокер в Шереметьево
https://t.me/s/official_Fresh_ed
https://vsemetonado.ru/
Operation Game Canada: A classic, fun-filled board game where players test their precision by removing ailments from the patient without triggering the buzzer: Operation game rules and pieces
Автоматические выключатели
https://t.me/s/official_Booi_ed
https://shkola-vocala.ru/shkola-igry-na-gitare.php
https://t.me/s/official_Drip_es
Для творческих задач искала способы создавать изображения качественно, и эта статья дала все ответы. Протестировала несколько сервисов, все работают быстро и стабильно. Очень довольна: https://vc.ru/top_rating/2301994-luchshie-besplatnye-nejroseti-dlya-generatsii-izobrazheniy
Casino 7k работает чётко. Удобно оформлять вывод средств, подтверждение приходит сразу. Поддержка всегда отвечает: 7к казино вход
https://t.me/s/official_1xbet_ed
Очень удобно, что можно оформить заказ прямо через телефон. Курьер приехал вовремя, алкоголь качественный, все чеки и накладные на месте. Приятно, что сервис работает без сбоев и перерывов. Теперь если нужна доставка спиртного круглосуточно, беру здесь – https://dostavka-alcohol.ru/
https://t.me/s/official_Riobet_es
https://t.me/s/official_Sol_es
https://t.me/s/official_Lex_es
https://t.me/s/official_JoyCasino_ed
https://t.me/s/official_Stake_ed
https://t.me/s/official_Leon_es
https://t.me/s/official_Flagman_edxjqqc
https://t.me/s/official_DragonMoney_ed
https://t.me/s/official_Volna_es
https://t.me/s/official_Leon_ed
https://t.me/s/official_Pinco_es
https://t.me/s/official_Fresh_es
https://t.me/s/official_Kometa_es
https://t.me/s/official_Jet_ed
https://t.me/s/official_1Go_es
https://t.me/s/iGaming_live/4587
https://t.me/s/official_Volna_ed
https://t.me/s/official_Lex_ed
https://t.me/Drip_egs/18
https://t.me/MostBet_egs/20
https://t.me/Starda_egs/4
https://aviator-game.com.ua/
https://t.me/s/Daddy_egs/15
https://t.me/s/Flagman_egs/3
Energy for TRON rent tron energy instant activation, transparent pricing, 24/7 support. Reduce TRC20 fees without freezing your TRX. Convenient payment and automatic energy delivery to your wallet.
Туристический портал https://cmc.com.ua авиабилеты, отели, туры и экскурсии в одном месте. Сравнение цен, отзывы, готовые маршруты, визовые правила и карты офлайн. Планируйте поездку, бронируйте выгодно и путешествуйте без стресса.
Need TRON Energy? buy tron energy Affordable for your wallet. Secure platform, verified sellers, and instant delivery. Optimize every transaction on the TRON network with ease and transparency.
https://t.me/s/Leon_egs/19
https://t.me/s/MrBit_egs/4
https://t.me/Gizbo_egs/12
Строительный портал https://6may.org новости отрасли, нормативы и СНИП, сметы и калькуляторы, BIM-гайды, тендеры и вакансии. Каталоги материалов и техники, база подрядчиков, кейсы и инструкции. Всё для проектирования, строительства и ремонта.
Всё для стройки https://artpaint.com.ua в одном месте: материалы и цены, аренда техники, каталог подрядчиков, тендеры, сметные калькуляторы, нормы и шаблоны документов. Реальные кейсы, обзоры, инструкции и новости строительного рынка.
Новостной портал https://novosti24.com.ua с фокусом на важное: оперативные репортажи, аналитика, интервью и факты без шума. Политика, экономика, технологии, культура и спорт. Удобная навигация, персональные ленты, уведомления и проверенные источники каждый день.
https://t.me/s/Pokerdom_egs/22
https://t.me/s/Izzi_egs/3
https://t.me/s/Kent_egs/18
https://t.me/s/JoyCasino_egs/11
https://t.me/s/Kent_egs/22
https://t.me/MrBit_egs/17
https://t.me/Lex_egs/9
Оновлення на тему: https://infoteka.com.ua/didzhytal.html
https://t.me/s/Starda_egs/15
https://t.me/s/Daddy_egs/20
https://t.me/Booi_egs/19
https://t.me/s/Kent_egs/6
https://t.me/Legzo_egs/20
Портал о строительстве https://newboard-store.com.ua и ремонте: от проекта до сдачи объекта. Каталоги производителей, сравнение материалов, сметы, BIM и CAD, нормативная база, ленты новостей, вакансии и тендеры. Практика, цифры и готовые решения.
Современный автопортал https://carexpert.com.ua главные премьеры и тенденции, подробные обзоры, тест-драйвы, сравнения моделей и подбор шин. Экономия на обслуживании, страховке и топливе, проверки VIN, лайфхаки и чек-листы. Всё, чтобы выбрать и содержать авто без ошибок да
Женский портал https://magictech.com.ua о жизни без перегруза: здоровье и красота, отношения и семья, финансы и карьера, дом и путешествия. Экспертные статьи, гайды, чек-листы и подборки. Только полезные советы и реальные истории.
Современный новостной https://vestionline.com.ua портал: главные темы суток, лонгриды, мнения экспертов и объясняющие материалы. Проверка фактов, живые эфиры, инфографика, подборка цитат и контекст. Быстрый доступ с любого устройства и без лишних отвлечений.
https://t.me/CatCasino_egs/3
https://t.me/Izzi_egs/9
Главный автопортал https://newsgood.com.ua о драйве и прагматике: премьеры, технологии, электрокары, кроссоверы и коммерческий транспорт. Экспертные обзоры, тест-драйвы, подбор автокредита и страховки, расходы и сервис. Проверка истории авто и советы по экономии и сервисы.
Твой автопортал https://kia-sportage.in.ua о новых и подержанных машинах: рейтинги надёжности, разбор комплектаций, реальные тесты и видео. Помощь в покупке, кредит и страховка, расходы владения, ТО и тюнинг. Карта сервисов, советы по безопасности и сезонные рекомендации плюс
Всё для женщины https://wonderwoman.kyiv.ua уход и макияж, мода и стиль, психология и отношения, работа и деньги, мама и ребёнок. Тренды, тесты, инструкции, подборки брендов и сервисов. Читайте, вдохновляйтесь, действуйте.
Современный женский https://fashiontop.com.ua журнал: уход и макияж, капсульный гардероб, психология и отношения, питание и тренировки, карьерные советы и финансы. Честные обзоры, подборки брендов, пошаговые гайды.
https://t.me/s/MrBit_egs/15
https://t.me/iGaming_live/4715
https://t.me/CatCasino_egs/18
https://t.me/va_1xbet/18
Еженедельный журнал https://sw.org.ua об авто и свободе дороги: премьеры, электромобили, кроссоверы, спорткары и коммерческий транспорт. Реальные тесты, долгосрочные отчёты, безопасность, кейсы покупки и продажи, кредит и страховка, рынок запчастей и сервисы рядом.
Портал о балансе https://allwoman.kyiv.ua красота и самоуход, отношения и семья, развитие и карьера, дом и отдых. Реальные советы, капсульные гардеробы, планы тренировок, рецепты и лайфхаки. Ежедневные обновления и подборки по интересам.
https://t.me/s/va_1xbet/18
https://t.me/va_1xbet/24
https://t.me/va_1xbet/19
https://t.me/va_1xbet/9
Аренда авто turzila.com/ без депозита, аренда яхт и удобный трансфер в отель. Онлайн-бронирование за 3 минуты, русская поддержка 24/7, прозрачные цены. Оплата картой РФ.
Нужна фотосьемка? съемка для вб каталожная, инфографика, на модели, упаковка, 360°. Правильные ракурсы, чистый фон, ретушь, цветопрофили. Готовим комплекты для карточек и баннеров. Соответствие правилам WB/Ozon.
https://t.me/va_1xbet
https://t.me/va_1xbet/12
https://t.me/s/va_1xbet/20
https://t.me/va_1xbet/14
https://t.me/s/va_1xbet/9
Современный журнал https://rupsbigbear.com про авто: новости индустрии, глубокие обзоры моделей, тесты, сравнительные таблицы и советы по выбору. Экономия на обслуживании и страховке, разбор технологий, безопасность и комфорт. Всё, чтобы ездить дальше, дешевле и увереннее.
Автопортал для новичков https://lada.kharkiv.ua и профи: новости рынка, аналитика, сравнения, тесты, долгосрочные отчёты. Выбор авто под задачи, детальные гайды по покупке, продаже и трейд-ину, защита от мошенников. Правила, штрафы, ОСАГО/КАСКО и полезные инструменты и ещё
Женский медиа-гид https://adviceskin.com здоровье, питание, спорт, ментальное благополучие, карьера, личные финансы, хобби и поездки. Практика вместо кликбейта — понятные гайды, чек-листы и экспертные мнения.
https://t.me/s/va_1xbet/21
https://t.me/s/va_1xbet/13
https://t.me/va_1xbet/3
https://t.me/surgut_narashchivaniye_nogtey/12
https://t.me/surgut_narashchivaniye_nogtey/19
Женское медиа https://beautytips.kyiv.ua о главном: здоровье и профилактика, стиль и тренды, психологические разборы, мотивация, деньги и инвестиции, материнство и путешествия. Честные обзоры, подборка сервисов и истории читательниц.
https://t.me/s/rating_online
https://t.me/s/ah_1xbet/4
Медиа для женщин https://feromonia.com.ua которые выбирают себя: здоровье и профилактика, ментальное благополучие, работа и развитие, материнство и хобби. Практичные инструкции, тесты, интервью и вдохновение без кликбейта.
Женский журнал https://dama.kyiv.ua о жизни без перегруза: красота и здоровье, стиль и покупки, отношения и семья, карьера и деньги, дом и путешествия. Экспертные советы, чек-листы, тренды и реальные истории — каждый день по делу.
Всё, что важно https://gryada.org.ua сегодня: мода и стиль, бьюти-рутины, рецепты и фитнес, отношения и семья, путешествия и саморазвитие. Краткие выжимки, длинные разборы, подборки сервисов — удобно и полезно.
https://t.me/ah_1xbet/2
https://t.me/s/ah_1xbet/16
Онлайн-портал https://womanexpert.kyiv.ua для женщин, которые хотят жить в балансе. Красота, здоровье, семья, карьера и финансы в одном месте. Ежедневные статьи, подборки, советы экспертов и вдохновение для лучшей версии себя.
Женский журнал https://krasotka.kyiv.ua про баланс: красота, психология, карьера, деньги, дом и отдых. Экспертные колонки, списки покупок, планы тренировок и проверки здоровья. Материалы, к которым хочется возвращаться.
Глянец без иллюзий https://ladyone.kyiv.ua красота и здоровье с фактчекингом, стиль без переплат, карьера и деньги простым языком. Интервью, тесты, полезные гайды — меньше шума, больше пользы.
https://t.me/ah_1xbet/14
https://t.me/s/ah_1xbet/11
Всё для современной https://model.kyiv.ua женщины: уход и макияж, стиль и шопинг, психология и отношения, питание и тренировки. Честные обзоры, капсульные гардеробы, планы на неделю и проверенные советы.
Мода и красота https://magiclady.kyiv.ua для реальной жизни: капсулы по сезонам, уход по типу кожи и бюджета, честные обзоры брендов, шопинг-листы и устойчивое потребление.
https://t.me/s/ah_1xbet/10
Сайт для женщин https://modam.com.ua о жизни без перегруза: здоровье и красота, отношения и семья, карьера и деньги, дом и путешествия. Экспертные статьи, гайды, чек-листы и подборки — только полезное и применимое.
https://t.me/s/ah_1xbet/21
Медиа для женщин https://otnoshenia.net 25–45: карьера и навыки, ментальное благополучие, осознанные покупки, спорт и питание. Краткие выжимки и глубокие разборы, подборки брендов и сервисов.
Реальная красота https://princess.kyiv.ua и стиль: уход по типу кожи и бюджету, капсулы по сезонам, устойчивое потребление. Гайды, шопинг-листы, честные обзоры и советы стилистов.
https://t.me/s/ah_1xbet/12
Благодаря сопровождению ВЭД мы смогли оптимизировать все процессы и ускорить поставки https://vsoprovozhdenie1.ru/
Женский сайт https://one-lady.com о балансе: работа, финансы, здоровье, дом, дети и отдых. Пошаговые инструкции, трекеры привычек, лайфхаки и вдохновляющие истории. Меньше шума — больше пользы.
https://t.me/s/ah_1xbet/19
https://t.me/ah_1xbet/15
https://t.me/s/ah_1xbet/3
https://t.me/s/Best_rating_casino
Очень удобно, что специалисты по сопровождению ВЭД берут на себя все формальности и проверки: Сопровождение ВЭД
https://t.me/reyting_topcazino/17
Женский блог https://sunshadow.com.ua о жизни без перегруза: красота и здоровье, отношения и семья, стиль и покупки, деньги и карьера. Честные обзоры, лайфхаки, планы на неделю и личные истории — только то, что реально помогает.
Современный женский https://timelady.kyiv.ua сайт о стиле жизни: уход за собой, макияж, прически, фитнес, питание, мода и деньги. Практичные советы, разбор трендов, подборки покупок и личная эффективность. Будь в ресурсе и чувствуй себя уверенно каждый день. Больше — внутри.
https://t.me/topcasino_rus/
Блог для женщин https://sweetheart.kyiv.ua которые выбирают себя: самоценность, баланс, карьера, финансы, хобби и путешествия. Мини-привычки, трекеры, вдохновляющие тексты и практичные советы.
Портал для женщин https://viplady.kyiv.ua ценящих стиль, комфорт и развитие. Мода, уход, отношения, семья и здоровье. Только практичные советы, экспертные мнения и вдохновляющий контент. Узнай, как быть собой и чувствовать себя лучше.
Онлайн-площадка https://topwoman.kyiv.ua для женщин: стиль, бьюти-новинки, осознанность, здоровье, отношения, материнство и работа. Экспертные статьи, инструкции, чек-листы, тесты и вдохновение. Создавай лучший день, развивайся и находи ответы без лишней воды.
Женский медиасайт https://woman365.kyiv.ua с акцентом на пользу: капсульный гардероб, бьюти-рутины, здоровье, отношения, саморазвитие и материнство. Пошаговые инструкции, списки покупок, чек-листы и экспертные ответы. Заботимся о тебе и твоем времени. Подробности — на сайте.
Твой женский помощник https://vsegladko.net как подчеркнуть индивидуальность, ухаживать за кожей и волосами, планировать бюджет и отдых. Мода, психология, дом и карьера в одном месте. Подборки, гайды и истории, которые мотивируют заботиться о себе. Узнай больше на сайте.
Женский портал https://womanportal.kyiv.ua о моде, психологии и уходе за собой. Узнай, как сочетать стиль, уверенность и внутреннюю гармонию. Лучшие практики, обзоры и вдохновляющие материалы для современных женщин.
Всё о развитии https://run.org.ua и здоровье детей: диагностические скрининги, логопедия, дефектология, нейропсихология, ЛФК, массаж, группы раннего развития, подготовка к школе. Планы занятий, расписание, запись онлайн, советы специалистов и проверенные методики.
https://t.me/a_Topcasino/10
Сайт о строительстве https://blogcamp.com.ua и ремонте: проекты, сметы, материалы, инструменты, пошаговые инструкции и лайфхаки. Чек-листы, калькуляторы, ошибки и их решения. Делайте качественно и экономно.
Советы для родителей https://agusha.com.ua на каждый день: раннее развитие, кризисы возрастов, дисциплина, здоровье, игры и учеба. Экспертные разборы, простые лайфхаки и проверенные методики без мифов. Помогаем понять потребности ребёнка и снизить стресс в семье.
https://t.me/top_ratingcasino/3
https://t.me/top_ratingcasino/2
Родителям о главном https://rodkom.org.ua баланс режима, питание, истерики и границы, подготовка к школе, дружба и безопасность в сети. Короткие памятки, чек-листы и практики от специалистов. Только актуальные данные и решения, которые работают в реальной жизни.
https://t.me/a_Topcasino/6
https://t.me/a_Topcasino/9
https://t.me/top_ratingcasino/10
https://t.me/a_Topcasino/3
Женский портал https://womanclub.kyiv.ua о стиле жизни, красоте и вдохновении. Советы по уходу, отношениям, карьере и саморазвитию. Реальные истории, модные тренды, психологические лайфхаки и идеи для гармонии. Всё, что важно каждой современной женщине.
https://t.me/a_Topcasino/7
Автомобильный журнал https://autodream.com.ua для новичков и энтузиастов: тренды, тест-драйвы, сравнения, разбор комплектаций, VIN-проверки и подготовка к сделке. Практичные гайды по уходу и экономии, гаджеты для авто, законы и штрафы. Делимся опытом, чтобы не переплачивали.
https://telegra.ph/Top-kazino-11-14-2
https://t.me/s/kazino_bez_filtrov
Официальный сайт Kraken kra44 cc безопасная платформа для анонимных операций в darknet. Полный доступ к рынку через актуальные зеркала и onion ссылки.
Мужской портал https://kakbog.com о стиле, здоровье, карьере и технологиях. Обзоры гаджетов, тренировки, уход, финансы, отношения и путешествия. Практичные советы и честные разборы каждый день.
Современный женский https://storinka.com.ua портал с полезными статьями, рекомендациями и тестами. Тренды, красота, отношения, карьера и вдохновение каждый день. Всё, что помогает чувствовать себя счастливой и уверенной.
https://s-nano-s.ru/
https://t.me/kazino_bez_filtrov
https://t.me/da_1xbet/5
An image generator that produces impressively realistic results from the very first request! https://gen.new/
http://101paket.ru/
Актуальные новости https://thingshistory.com без перегруза: коротко о событиях и глубоко о смыслах. Репортажи с места, интервью, разборы и аналитика. Умные уведомления, ночной режим, офлайн-доступ и виджеты. Доверяйте проверенным данным и оставайтесь на шаг впереди.
https://t.me/da_1xbet/10
Новостной портал https://pto-kyiv.com.ua для тех, кто ценит фактчекинг и ясность. Картина дня в одном месте: политика, экономика, общество, наука, спорт. Ежедневные дайджесты, обзоры рынков, календари событий и авторские колонки. Читайте, делитесь, обсуждайте.
Всё про технику https://webstore.com.ua и технологии: обзоры гаджетов, тесты, сравнения, ИИ и софт, фото/видео, умный дом, авто-тех, безопасность. Пошаговые гайды, лайфхаки, подбор комплектующих и лучшие приложения. Понятно, актуально, без лишней воды.
https://t.me/da_1xbet/15
https://t.me/da_1xbet/7
https://t.me/da_1xbet/3
Нужна лестница? изготовление лестниц в частный дом под ключ в Москве и области: замер, проектирование, производство, отделка и монтаж. Лестницы на металлокаркасе. Индивидуальные решения для дома и бизнеса.
Поиск работы https://employmentcenter.com.ru по актуальным вакансиям городов России, СНГ, стран ЕАЭС: обновления предложений работы ежедневно, рассылка свежих объявлений вакансий на E-mail, умные поисковые фильтры и уведомления в Telegram, Одноклассники, ВКонтакте. Помогаем найти работу мечты без лишних звонков и спама.
Нужно продвижение? Продвижение современных сайтов в ТОП 3 выдачи Яндекса и Google : аудит, семантика, техоптимизация, контент, ссылки, рост трафика и лидов. Прозрачные KPI и отчёты, реальные сроки, измеримый результат.
https://t.me/da_1xbet/6
https://t.me/da_1xbet/11
https://t.me/da_1xbet/14
Играешь на пианино? ноты для фортепиано Поможем освоить ноты, ритм, технику и красивое звучание. Индивидуальные уроки, гибкий график, онлайн-формат и авторские методики. Реальный прогресс с первого месяца.
Школа фортепиано обучение игре не пианино для начинающих и продвинутых: база, джазовые гармонии, разбор песен, импровизация. Удобные форматы, домашние задания с разбором, поддержка преподавателя и быстрые результаты.
https://t.me/da_1xbet/2
https://t.me/da_1xbet/9
https://t.me/da_1xbet/4
https://t.me/rq_1xbet/1418
https://t.me/rq_1xbet/896
https://t.me/rq_1xbet/1171
https://t.me/s/rq_1xbet/1372
https://t.me/s/rq_1xbet/1311
https://t.me/s/rq_1xbet/628
https://t.me/s/rq_1xbet/699
Казино 7k показалось очень удобным: интерфейс простой, всё интуитивно. Выплаты обрабатывают быстро, даже ночью. Слоты запускаются стабильно, без зависаний: 7k casino зеркало
https://t.me/s/rq_1xbet/1091
https://t.me/Official_1xbet1/437
https://t.me/s/Official_1xbet1/1291
https://t.me/s/Official_1xbet1/844
https://t.me/s/Official_1xbet1/1264
https://t.me/Official_1xbet1/357
https://t.me/s/Official_1xbet1/314
https://t.me/Official_1xbet1/950
https://t.me/Official_1xbet1/429
Automatizovany system https://rocketbitpro.com pro obchodovani s kryptomenami: boti 24/7, strategie DCA/GRID, rizeni rizik, backtesting a upozorneni. Kontrola potencialniho zisku a propadu.
вытрезвление на дому
The best is inside: https://portugal-relocation-agenc57473.bloggazzo.com/37385476/nppr-team-shop-your-premier-hub-for-social-media-marketing-mastery
I don’t think the title of your article matches the content lol. Just kidding, mainly because I had some doubts after reading the article. https://accounts.binance.com/es-AR/register?ref=UT2YTZSU
Хочеш зазнати успіху? ігри казино: свіжі огляди, рейтинг майданчиків, вітальні бонуси та фрізпіни, особливості слотів та лайв-ігор. Докладно розбираємо правила та нагадуємо, що грати варто лише на вільні кошти.
Цікавлять бонуси? казіно з бонусами: актуальні акції, подарунки за реєстрацію, депозитні та VIP-бонуси. Чесно розбираємо правила, допомагаємо зрозуміти вигоду та уникнути типових помилок під час гри.
экстренное вытрезвление спб
Проблемы со здоровьем? неврология и остеопатия краснодар: комплексные обследования, консультации врачей, лабораторная диагностика и процедуры. Поможем пройти лечение и профилактику заболеваний в комфортных условиях без очередей.
ORBS Production https://filmproductioncortina.com is a full-service film, photo and video production company in Cortina d’Ampezzo and the Dolomites. We create commercials, branded content, sports and winter campaigns with local crew, alpine logistics, aerial/FPV filming and end-to-end production support across the Alps. Learn more at filmproductioncortina.com
ЦВЗ центр https://cvzcentr.ru в Краснодаре — команда специалистов, которая работает с вегетативными расстройствами комплексно. Детальная диагностика, сопровождение пациента и пошаговый план улучшения самочувствия.
cam chat online free adult video chat
Nairabet offers https://nairabet-play.com sports betting and virtual games with a simple interface and a wide range of markets. The platform provides live and pre-match options, quick access to odds, and regular updates. Visit the site to explore current features and decide if it suits your preferences.
Todo sobre el cafe https://laromeespresso.es y el arte de prepararlo: te explicaremos como elegir los granos, ajustar la molienda, elegir un metodo de preparacion y evitar errores comunes. Prepara un cafe perfecto a diario sin salir de casa.
Infraestructura y tecnologia https://novo-sancti-petri.es vial en Europa: innovacion, desarrollo sostenible y soluciones inteligentes para un transporte seguro y eficiente. Tendencias, proyectos, ecotransporte y digitalizacion de la red vial.
бонусы казино бонуси казіно
Rodaballo Al Horno https://rodaballoalhorno.es es un viaje a los origenes de la musica. Exploramos las raices, los ritmos y las melodias de diferentes culturas para mostrar como el sonido conecta a personas de todo el mundo y las ayuda a sentirse parte de una conversacion musical mas amplia.
Todo sobre videojuegos https://tejadospontevedra.es noticias y tendencias: ultimos lanzamientos, anuncios, analisis, parches, esports y analisis de la industria. Analizamos tendencias, compartimos opiniones y recopilamos informacion clave del mundo de los videojuegos en un solo lugar.
1win программа 1win регистрация
Profesionalni stehovani V Praze: stehovani bytu, kancelari a chalup, stehovani a baleni, demontaz a montaz nabytku. Mame vlastni vozovy park, specializovany tym a smlouvu s pevnou cenou.
Love elephants? elephant sanctuary: rescued animals, spacious grounds, and care without exploitation. Visitors can observe elephants bathing, feeding, and behaving as they do in the wild.
Want to visit the elephant sanctuary A safe haven for animals who have survived circuses, harsh labor, and exploitation? Visitors support the rehabilitation program and become part of an important conservation project.
https://batery-game.com/
https://englishzoom.ru/
ORBS Production https://filmproductioncortina.com is a full-service film, photo and video production company in Cortina d’Ampezzo and the Dolomites. We create commercials, branded content, sports and winter campaigns with local crew, alpine logistics, aerial/FPV filming and end-to-end production support across the Alps. Learn more at filmproductioncortina.com
anonymous chat rooms 321chat down
казино з бонусами бонуси в казино
Снимки https://mdgt.top на коридори и идеи за осветление видях там
Поради https://remontuem.if.ua щодо реставрація кухонних фасадів івано-франківськ прочитав на сайті.
iskmaster.ru
Польза шоколадного напитка с корицей без сахара
Інформацію https://seetheworld.top про st moritz знайшов тут.
Независимый сюрвей в Москве: проверка грузов и объектов, детальные отчёты, фотофиксация и экспертные заключения. Прозрачная стоимость сюрвейерских услуг, официальные гарантии и быстрая выездная работа по столице и области.
Идеальные торты на заказ — для детей и взрослых. Поможем выбрать начинку, оформление и размер. Десерт будет вкусным, свежим и полностью соответствующим вашей идее.
Стабильный vps как праздник
ЦВЗ в Краснодаре https://cvzcentr.ru место, где пациентов внимательно выслушивают, проводят глубокую диагностику и составляют эффективный план улучшения состояния при вегетативных расстройствах.
Explore a true elephant sanctuary where welfare comes first. No chains or performances — only open landscapes, gentle care, rehabilitation programs and meaningful visitor experiences.
La Rome Espresso https://laromeespresso.es es un lugar donde la cultura del cafe se convierte en arte. Descubre el camino del grano a la taza: el sabor profundo, las tecnicas precisas y los rituales que crean la bebida perfecta.
La infraestructura https://novo-sancti-petri.es y la tecnologia vial europeas equilibran la innovacion y la sostenibilidad. Semaforos inteligentes, carreteras verdes, centros de transporte seguros y proyectos que marcan la pauta para la industria global.
Fully Insured for Both Commercial and Residential Properties: https://ecocleaningcompany.ie/
Do you love excitement? roulettino delights players with high-quality slots, live tables, tournaments, and ongoing promotions. The gameplay is smooth and dynamic.
Rodaballo al Horno https://rodaballoalhorno.es es un viaje a las raices musicales del mundo, donde los sabores de las culturas se entrelazan con sus melodias. Exploramos los ritmos de las naciones, los sonidos de las tradiciones y como diferentes historias se fusionan en un solo sonido armonioso.
Un portal sobre videojuegos https://tejadospontevedra.es, noticias y tendencias para quienes viven y respiran videojuegos: resenas, guias, parches, anuncios, analisis de tecnologia y torneos de esports. Todo para gamers y quienes quieran mantenerse informados.
http://shop-stop.org/go/url=-aHR0cHM6Ly9ib29rcy5nb29nbGUuZnIvYm9va3M/aWQ9LVNHYkVRQUFRQkFK
В условиях частых отключений света автономные решения становятся актуальными. Хорошо зарекомендовала себя зарядная станция, способная поддерживать работу техники. Она компактна и удобна.
Для поддержания связи и освещения важно иметь резерв энергии. В этом случае полезна зарядная станция, обеспечивающая стабильность. Она надёжна.
При выборе резервного питания важна практичность. Этим отличается зарядная станция, удобная в использовании. Она не занимает много места.
При выборе автономного питания важно учитывать простоту использования. Именно зарядная станция отвечает этим требованиям. Она подходит для повседневных задач.
Для стабильной работы бытовых приборов важна автономность. Эту задачу решает зарядная станция, обеспечивая резерв энергии. Она надёжна.
Планируя резервное питание, стоит обратить внимание на универсальные решения. Одним из таких вариантов является зарядная станция, подходящая для разных сценариев. Это практичный выбор.
В условиях нестабильного электроснабжения важно быть готовым. Использование зарядная станция помогает сохранить доступ к свету и связи. Это разумный выбор.
В поездках и на даче автономность особенно важна. Здесь выручает зарядная станция, позволяющая подключать приборы. Она практична.
В условиях нестабильного электроснабжения важно быть подготовленным. Использование зарядная станция помогает сохранить комфорт. Это разумно.
В условиях нестабильной сети важно иметь альтернативу. С этим помогает зарядная станция, поддерживающая работу устройств. Она эффективна.
Для стабильной работы бытовых приборов нужен автономный источник. Эту роль выполняет зарядная станция, обеспечивая питание. Она универсальна.
При отключениях света важно не прерывать повседневные дела. С этим помогает зарядная станция, поддерживающая технику. Использование удобное.
Для сохранения связи и освещения нужен запас энергии. В этом случае актуальна зарядная станция, обеспечивающая автономность. Использование простое.
Для офиса идеально подходит зарядная станция, ведь позволяет заряжать несколько устройств одновременно. Это экономит время и нервы. Никто не остаётся без энергии.
В офисе полезна зарядная станция, чтобы сотрудники могли заряжать свои гаджеты одновременно. Все устройства всегда с зарядом. Это экономит время и нервы.
дивитися кіно онлайн онлайн трансляція фільмів ua-bay.net
Багато користувачів шукають універсальні рішення для електропостачання. У такому випадку зарядна станція стає оптимальним вибором. Вона поєднує мобільність і потужність.
Під час довготривалих знеструмлень комфорт стає особливо цінним. Його допомагає зберегти зарядна станція. Вона підтримує основні потреби.
Під час планування комфорту в домі важливо мислити наперед. У цьому допоможе зарядна станція. Вона стане корисним доповненням.
Під час планування енергонезалежності важливо обирати практичні рішення. Тут доречною буде зарядна станція. Вона підходить для різних сценаріїв.
Для тих, хто працює віддалено, автономність має велике значення. Надійна зарядна станція підтримує стабільну роботу техніки. Вона підвищує ефективність і комфорт.
Для поїздок на природу або у заміський будинок автономність необхідна. Саме зарядна станція забезпечує комфорт і енергію. Вона компактна і універсальна.
Натяжные потолки отлично сочетаются с современным светом и точечными светильниками, полотно с микротекстурой хорошо переносит перепады температуры в квартире; после монтажа вы получаете ровную поверхность и понятную гарантию https://potolki-decarat.ru/
плоская крыша под ключ цена москва https://montazh-ploskoj-kryshi.ru
оценка влияния нового строительства на инженерные коммуникации https://ocenka-vliyaniya-stroitelstva.ru
В спальне натяжной потолок улучшает восприятие интерьера, особенно с мягким светом, выбирайте тканевый потолок, оно дает идеально ровную плоскость по периметру, попросите образцы при дневном и теплым вечерним светом, в помещении станет уютнее за счет мягкой фактуры и света: https://natyazhnye-potolki-moskva.ru/
Must-Read Collection: https://t.me/s/blog_puzzlefreegame/7
Авто не на русском? translate-auto.ru комфортное управление без языкового барьера. Перевод мультимедийной системы, бортового компьютера и навигации. Подходит для новых и б/у авто. Профессиональная настройка, аккуратная установка и поддержка.
Нужны цветы доставка цветов пхукет мы предлагаем свежие и невероятно красивые букеты, которые порадуют любого получателя. Наша служба обеспечивает оперативную доставку по всему острову, а в ассортименте вы найдёте цветы и композиции на самый взыскательный вкус. При этом мы гордимся тем, что сохраняем лучшие цены на острове — красота теперь доступна без переплат!
Нужен детейлинг тюнинг авто кипр специализированный детейлинг центр на Кипре в Лимассоле, где заботятся о безупречном состоянии автомобилей, предлагая клиентам полный комплекс услуг по уходу за транспортными средствами. Мастера студии с вниманием относятся к каждой детали: они не только выполняют оклейку кузова защитными материалами, но и проводят тщательную обработку салона, возвращая автомобилю первозданный вид.
Do you want bonuses? CSGOFAST Promocode deposit bonuses, free cases, terms and conditions. A quick activation guide, FAQ, and the latest updates.
Делаешь документы? конструктор договора аренды позволяет существенно ускорить работу: с его помощью вы сможете готовить необходимые документы в десять раз быстрее и при этом гарантированно избегать ошибок. Инструмент предельно прост в освоении — специальное обучение не требуется. Все ваши данные надёжно защищены, а настройка индивидуальных шаблонов выполняется оперативно и без сложностей.
Продвижение сайтов https://team-black-top.ru под ключ: аудит, стратегия, семантика, техоптимизация, контент и ссылки. Улучшаем позиции в Google/Яндекс, увеличиваем трафик и заявки. Прозрачная отчетность, понятные KPI и работа на результат — от старта до стабильного роста.
Rebricek najlepsich kasin https://betrating.sk/casino-hry/automaty-online/golden-ticket/ na Slovensku: bezpecni prevadzkovatelia, lukrativne bonusy, hracie automaty a zive kasina, pohodlne platby a zakaznicka podpora. Cestne recenzie a aktualizovane zoznamy pre pohodlne online hranie.
Najlepsie online kasina https://betrating.sk/online-kasina/22bet/ na Slovensku – porovnajte licencie, bonusy, RTP, vyplaty a mobilne verzie. Pomozeme vam vybrat spolahlive kasino pre hru o skutocne peniaze a demo. Pravidelne aktualizujeme nase hodnotenia a propagacne akcie.
Продвижение сайтов https://team-black-top.ru под ключ: аудит, стратегия, семантика, техоптимизация, контент и ссылки. Улучшаем позиции в Google/Яндекс, увеличиваем трафик и заявки. Прозрачная отчетность, понятные KPI и работа на результат — от старта до стабильного роста.
SEO-продвижение сайта https://seo-topteam.ru в Москве с запуском от 1 дня. Экспресс-анализ, приоритетные правки, оптимизация под ключевые запросы и регион. Работаем на рост позиций, трафика и лидов. Подходит для бизнеса и услуг.
Тяговые аккумуляторные https://ab-resurs.ru батареи для складской техники: погрузчики, ричтраки, электротележки, штабелеры. Новые АКБ с гарантией, помощь в подборе, совместимость с популярными моделями, доставка и сервисное сопровождение.
Тяговые аккумуляторные https://ab-resurs.ru батареи для складской техники: погрузчики, ричтраки, электротележки, штабелеры. Новые АКБ с гарантией, помощь в подборе, совместимость с популярными моделями, доставка и сервисное сопровождение.
Продажа тяговых АКБ https://faamru.com для складской техники любого типа: вилочные погрузчики, ричтраки, электрические тележки и штабелеры. Качественные аккумуляторные батареи, долгий срок службы, гарантия и профессиональный подбор.
дивитися фільми безкоштовно найкращі серіали 2026 онлайн
Онлайн курсы психологии https://ilmacademy.com.ua удобный формат обучения для тех, кто хочет освоить профессию психолога, получить практические навыки и пройти профессиональное обучение дистанционно. Курсы подойдут для начинающих и специалистов, ориентированных на практику.
Нужна тара? мешки биг бэги Компания “МКР-Биг-Бэг” — производство и продажа биг-бэгов (МКР) оптом. Широкий ассортимент мягких контейнеров для сыпучих материалов. Индивидуальные заказы, доставка по России. Надежно, быстро, выгодно!
Белое SEO https://seomgroup.ru работает. Спустя год работ с уверенностью это говорю. Главное найти спецов, которые не обещают золотые горы за месяц. Нормальные результаты, это минимум 3-4 месяца работы. Зато теперь получаем стабильный органический трафик, не как с рекламы, где бюджет кончился и все.
Комиссионный центр https://skypka.tv специализируется на скупке самой разной техники — от смартфонов и телевизоров до фотоаппаратов и игровой электроники, так что выгодно избавиться можно практически от любых лишних устройств.
Свежие новости https://arguments.kyiv.ua Украины и мира: события в Киеве и регионах, экономика, общество, происшествия, спорт, технологии и культура. Оперативная лента 24/7, аналитика, комментарии, фото и видео.
Новостной портал https://dailynews.kyiv.ua Украины с проверкой фактов: важные заявления, решения властей, бизнес и финансы, жизнь городов и областей, погода, транспорт, культура. Удобные рубрики и поиск, обновления каждый час, коротко и по делу.
Главные новости https://novosti24.kyiv.ua Украины сегодня — быстро и понятно. Репортажи из регионов, интервью, разборы, инфографика, фото/видео. Следите за темами, сохраняйте материалы и делитесь. Лента обновляется 24/7, чтобы вы были в курсе событий.
Всё для женщин https://glamour.kyiv.ua в одном месте: тренды моды и бьюти, здоровье, питание, спорт, семья, дети, отношения и саморазвитие. Статьи, чек-листы, идеи и обзоры, которые помогают принимать решения и чувствовать себя увереннее.
Ежедневные новости https://useti.org.ua Украины: политика и экономика, общество и медицина, образование, технологии, спорт и шоу-бизнес. Мы собираем информацию из надежных источников и объясняем контекст. Читайте онлайн с телефона и компьютера — удобно и бесплатно.
Все о событиях https://ua-vestnik.com в Украине и вокруг: оперативные сводки, расследования, мнения экспертов, рынки и курс валют, происшествия и полезные сервисы. Подборки по темам, теги, уведомления, фото и видео — актуально в любое время.
Портал для женщин https://woman24.kyiv.ua про жизнь без лишнего: красота, женское здоровье, питание, рецепты, уютный дом, финансы, работа и отдых. Практичные советы, честные обзоры и вдохновляющие истории.
Женский онлайн-журнал https://womanlife.kyiv.ua бьюти-гайды, мода, психология, отношения, материнство и забота о себе. Подборки товаров, инструкции, рецепты и идеи для дома. Читайте коротко или глубоко — удобная навигация и свежие материалы каждый день.
Медицинский портал https://medicalanswers.com.ua для пациентов: здоровье, диагностика, лечение, профилактика и образ жизни. Экспертные статьи, справочник симптомов, советы специалистов и актуальные медицинские новости. Достоверная информация в одном месте.
Новости Украины https://news24.in.ua 24/7: Киев и регионы, экономика, общество, безопасность, технологии, спорт и культура. Короткие сводки, подробные материалы, объяснения контекста, фото и видео. Читайте главное за день и следите за обновлениями в удобной ленте.
Для домашніх потреб важливо мати альтернативне джерело енергії. Потужна зарядна станція підтримує роботу техніки. Вона дуже практична.
У періоди відключень світла важливо мати запас енергії. Потужна зарядна станція допомагає уникнути проблем. Вона ефективна.
У періоди нестабільної роботи мережі резервне живлення є необхідністю. Потужна зарядна станція дозволяє бути незалежним. Вона ефективна.
Під час подорожей і кемпінгу важливо мати власне джерело енергії. Компактна зарядна станція дозволяє заряджати всі пристрої. Вона зручна.
Під час нічного полювання складно помітити швидко рухому тварину. Завдяки тепловізор, можна точно визначати її місцезнаходження. Це підвищує шанси на успіх.
Для мисливця важливо мати надійний інструмент для спостереження. Застосування тепловізор дозволяє бачити ціль навіть у густому кущуванні. Це підвищує результативність.
Новостной портал https://ua-novosti.info Украины без лишнего: оперативная лента, репортажи из областей, интервью и разборы. Политика, финансы, социальные темы, медицина, образование, IT. Фото/видео, инфографика, уведомления и топ-материалы дня.
Современный женский https://storinka.com.ua портал: уход, макияж, тренировки, питание, стиль, любовь, семья и карьера. Экспертные советы, полезные подборки, идеи подарков и лайфхаки. Мы говорим простым языком о важном — заходите за вдохновением ежедневно.
Актуальные новости https://uapress.kyiv.ua Украины и мира: события, заявления, решения, рынки, курсы, происшествия и жизнь регионов. Факты и проверенные источники, аналитика и комментарии. Удобные рубрики, поиск, теги и подборки — всё, чтобы быстро находить нужное.
Всё о здоровье https://medfactor.com.ua на одном медицинском портале: болезни и их лечение, анализы, препараты, обследования и профилактика. Материалы подготовлены с опорой на клинические данные и врачебную практику. Читайте онлайн в любое время.
Главные события https://vesti.in.ua Украины — коротко и понятно. Мы собираем новости из Украины и мира, проверяем данные и даём ясные объяснения. Подборки по темам, новости городов, аналитика, мнения, видео. Обновления каждый час, удобно на смартфоне.
Онлайн-журнал https://love.zt.ua для женщин: мода, бьюти, психология, любовь, семья, дети, дом, карьера и финансы. Обзоры, лайфхаки, рецепты и инструкции — без «воды», с пользой. Удобные рубрики и свежие материалы ежедневно.
Электронные компоненты https://zener.ru с прямыми поставками от производителей: микросхемы, пассивные элементы, разъёмы и модули. Гарантия оригинальности, стабильные сроки, выгодные цены и подбор под ТЗ. Поставки для производства, сервиса и разработки.
Решил сделать ремонт? дизайн интерьера стоимость спб: квартиры, дома, апартаменты и офисы. Продуманные планировки, 3D-проекты, сопровождение ремонта и контроль реализации. Создаем интерьеры, отражающие ваш стиль и образ жизни.
Нужен дизайн? лучшие дизайн студии интерьера москвы создаем функциональные и стильные пространства для квартир, домов и офисов. Планировки, 3D-визуализации, подбор материалов и авторский надзор. Индивидуальный подход, реальные сроки и продуманные решения под ваш бюджет.
Женский портал https://replyua.net.ua про красоту и заботу о себе: уход, макияж, волосы, здоровье, питание, спорт, стиль и отношения. Практичные советы, чек-листы, подборки и вдохновляющие истории. Читайте онлайн и находите идеи на каждый день.
Онлайн-портал https://avian.org.ua для строительства и ремонта: от фундамента до отделки. Подбор материалов, пошаговые гайды, сравнение технологий, советы мастеров и актуальные цены. Полезно для застройщиков, подрядчиков и частных клиентов.
Строительный портал https://ateku.org.ua о ремонте и строительстве: технологии, материалы, сметы, проекты домов и квартир, инструкции и советы экспертов. Обзоры, калькуляторы, нормы и примеры работ — всё для частного и коммерческого строительства.
Украинские новости https://polonina.com.ua онлайн: всё важное о стране, регионах и мире — от экономики и инфраструктуры до культуры и спорта. Лента 24/7, материалы редакции, комментарии экспертов, фото и видео. Читайте, сохраняйте и делитесь — быстро и удобно.
Строительный портал https://domtut.com.ua с практикой: проекты, чертежи, СНиП и ГОСТ, инструменты, ошибки и решения. Ремонт квартир, строительство домов, инженерные системы и благоустройство. Понятно, по делу и с примерами.
Всё о строительстве https://hydromech.kiev.ua и ремонте в одном месте: материалы, технологии, дизайн, инженерия и безопасность. Экспертные статьи, инструкции, калькуляторы и кейсы. Помогаем планировать работы и экономить бюджет без потери качества.
Женский журнал https://asprofrutsc.org онлайн: тренды бьюти и моды, лайфхаки для дома, рецепты, материнство, карьера и финансы. Экспертные материалы, понятные инструкции и идеи, которые можно применить сразу. Обновления ежедневно, удобная навигация.
Портал для строителей https://inter-biz.com.ua и заказчиков: советы по ремонту, обзоры материалов, расчёты, сметы и технологии. Реальные кейсы, чек-листы и рекомендации специалистов для надежного результата на каждом этапе работ.
Строительный портал https://prezent-house.com.ua строительство домов и зданий, ремонт квартир, инженерные системы и отделка. Пошаговые инструкции, обзоры материалов, расчёты и советы экспертов для частных и коммерческих проектов.
Для мисливців теплове бачення відкриває нові можливості. Використання тепловізор дозволяє бачити здобич у темряві. Це робить полювання ефективнішим.
Для військових важливо зберігати контроль над обстановкою. Використання тепловізор дозволяє бачити рухи ворога. Це підвищує ефективність операцій.
Портал для женщин https://angela.org.ua о современном лайфстайле: бьюти-рутины, мода, здоровье, правильное питание, отношения, работа и отдых. Полезные подборки, честные обзоры, истории и советы экспертов — заходите за вдохновением 24/7.
Портал для женщин https://beautyrecipes.kyiv.ua про гармонию и результат: здоровье, красота, стиль, саморазвитие, семья и отношения. Обзоры косметики и процедур, планы питания, тренировки, советы по дому и вдохновляющие истории. Всё в одном месте, 24/7.
Всё, что важно https://inclub.lg.ua женщине: здоровье и гормоны, питание и фитнес, стиль и гардероб, отношения и самооценка, уют и рецепты. Экспертные статьи, тесты и подборки. Сохраняйте любимое и делитесь — удобно на телефоне.
Budget considerations lead users to buy instagram likes cheap during promotions. Cost-effective options from legitimate providers enable growth for creators with limited marketing budgets.
Verification standards on best sex hookup sites ensure authenticity. Photo verification, age confirmation, and identity checks reduce fake profiles creating safer environments for intimate encounter arrangements.
Multi-market expertise enables quality trading signals crypto coverage. Providers analyzing both cryptocurrency and traditional markets identify correlation opportunities and risk-off/risk-on transitions.
University speaking tours became available after reaching certain follower counts. Student organizations book speakers based partly on social media reach. If you buy twitter followers to build your platform, you create opportunities for paid speaking at educational institutions.
Content quality combined with strategic amplification delivers best results. I focus heavily on production value, storytelling, and trending audio, then buy likes tiktok style to ensure my high-quality content actually reaches the audience that will appreciate it most.
Туристический портал https://atrium.if.ua о путешествиях: направления, отели, экскурсии и маршруты. Гайды по городам и странам, советы туристам, визы, билеты и сезонность. Планируйте поездки удобно и вдохновляйтесь идеями круглый год.
Женский медиа-портал https://abuki.info про вдохновение и практику: тренды красоты, идеи образов, забота о теле, эмоциональное равновесие, материнство и быт. Подборки, гайды и понятные советы, которые легко применять каждый день.
Всё о строительстве https://buildportal.kyiv.ua и ремонте: от проектирования и фундамента до чистовой отделки. Статьи, гайды, калькуляторы и кейсы. Полезно для застройщиков, мастеров, дизайнеров и тех, кто строит для себя.
В умовах обмеженої видимості потрібні перевірені технології. Надійний тепловізор демонструє стабільну роботу. Це робить його актуальним для різних задач.
Під час виконання бойових завдань важлива точність. Використання тепловізор допомагає уникнути помилок. Це зберігає ресурси.
Мужской портал https://realman.com.ua про жизнь и эффективность: здоровье, сила и выносливость, карьера, инвестиции, стиль и отношения. Экспертные материалы, обзоры и чек-листы. Читайте онлайн и применяйте на практике.
Онлайн авто портал https://necin.com.ua о новых и подержанных автомобилях: каталоги моделей, рейтинги, отзывы владельцев и экспертные обзоры. Новости рынка, технологии, электромобили и полезные сервисы для выбора авто.
Авто портал https://bestsport.com.ua для водителей и автолюбителей: обзоры и тест-драйвы, сравнение моделей, характеристики, цены и новости автопрома. Советы по покупке, эксплуатации и обслуживанию автомобилей. Всё об авто — удобно и понятно.
У складних погодних умовах важливо мати перевірене обладнання. Саме тепловізор демонструє стабільність. Це робить його актуальним.
Військові чергування вночі потребують надійної техніки. Сучасний тепловізор відповідає цим вимогам. Це робить його актуальним.
Всё о туризме https://hotel-atlantika.com.ua и отдыхе в одном месте: направления, визы, транспорт, отели и развлечения. Путеводители, маршруты, обзоры и советы опытных путешественников. Удобно планировать поездки онлайн.
Онлайн-портал https://deluxtour.com.ua для путешественников: куда поехать, что посмотреть, где остановиться и как сэкономить. Маршруты, подборки, отзывы, карты и полезные сервисы. Актуальная информация для самостоятельных поездок и отдыха.
Портал для строителей https://rvps.kiev.ua и заказчиков: ремонт, строительство, сметы и проекты. Обзоры материалов, расчёты, чек-листы и советы специалистов, которые помогают планировать работы и экономить бюджет.
Ремонт помещений https://sinega.com.ua зданий и квартир: косметический и капитальный ремонт под ключ. Выравнивание стен, отделка, замена коммуникаций, дизайн-решения и контроль качества. Работаем по смете, в срок и с гарантией.
У нічний час важко оцінити обстановку без техніки. Надійний тепловізор дає чітке уявлення про ситуацію. Це допомагає приймати рішення.
Портал для туристов https://inhotel.com.ua и путешественников: гайды по странам, маршруты, достопримечательности и события. Практичные советы, карты, подборки и идеи для отпуска, выходных и активных путешествий.
Строительный портал https://techproduct.com.ua для практики и идей: технологии, материалы, инструменты, сметы и проекты. Разбираем ошибки, делимся решениями и помогаем выбрать оптимальные варианты для строительства и ремонта.
Для військових нічні завдання є звичними. Використання тепловізор допомагає виконувати їх ефективно. Це підвищує контроль.
Мене приємно здивувала швидкість підготовки пристрою до використання. У цьому допомагає зарядна станція для будинку зі зручним керуванням. Не потрібно витрачати час на складні налаштування.
У нашій квартирі мало місця для громіздкого обладнання. Саме зарядна станція для будинку відрізняється компактністю та ефективністю. Її легко розмістити навіть у невеликій кімнаті.
Авто портал https://autoblog.kyiv.ua о машинах и технологиях: обзоры, характеристики, цены, тюнинг и обслуживание. Помогаем выбрать автомобиль под бюджет и задачи, следить за новинками и принимать взвешенные решения.
Ландшафтный дизайн https://kinoranok.org.ua ремонт и строительство под ключ: проектирование участков, благоустройство, озеленение, дорожки, освещение и малые архитектурные формы. Комплексные роботы для частных и коммерческих объектов с гарантией качества.
Новинки технологий https://axioma-techno.com.ua искусственный интеллект, гаджеты, смартфоны, IT-решения и цифровые сервисы. Обзоры, сравнения, тренды и объяснения простым языком. Узнавайте первыми о технологиях, которые меняют бизнес и повседневную жизнь.
Автомобильный портал https://livecage.com.ua тест-драйвы, сравнения, комплектации, безопасность и экономичность. Актуальные новости, советы по ремонту и обслуживанию, рекомендации для начинающих и опытных водителей.
Всё про автомобили https://sedan.kyiv.ua в одном портале: каталог авто, обзоры и рейтинги, новости автопрома и советы экспертов. Покупка, эксплуатация, сервис и тренды — полезная информация для каждого водителя.
Проверенный стор маркетплейс аккаунтов рад приветствовать медиабайеров в нашем ассортименте расходников. Когда вы планируете купить Facebook-аккаунты, чаще всего важен не «просто доступе», а в контроле и порядке: ровная работа, разделение задач между участниками и ясные доступы. Мы оформили практичный чек-лист, чтобы вы без лишних вопросов понимали куда кликать до оплаты.Что внутри: что вы покупаете на практике. Важно: покупка — это только вход. Дальше решает порядок: кто имеет доступ, как вы меняете настройки без хаоса, как фиксируете изменения и как отделяете тесты от масштабирования. Ключевое преимущество нашего сервиса — заключается в наличии приватной базы знаний, в которой выложены актуальные статьи по работе с доступами. Тут вы найдете страницы Google, Twitter, Telegram под разные задачи: от простых комплектов и заканчивая командными пакетами с прозрачными доступами. Переходите в сообщество, изучайте обучающие материалы, наводите порядок и в итоге улучшайте контроль с помощью нашего сервиса прямо сейчас. Важно: действуйте в рамках закона и в соответствии с правилами платформ.