A smooth ride isn’t just a luxury—it’s a vital part of vehicle safety and performance. At the heart of that ride lies your suspension system, tirelessly absorbing bumps and keeping your wheels firmly on the road. But like any complex machinery, suspensions require regular care to stay in top shape. Whether you’re a seasoned gearhead or a weekend warrior, mastering some simple DIY suspension maintenance tips can save you time, money, and the hassle of unexpected repairs. In this article, we’ll guide you through practical steps to keep your suspension performing smoothly, helping your vehicle handle every twist and turn with confidence.
Table of Contents
- Essential Tools and Materials for Suspension Maintenance
- Identifying Common Suspension Wear and Tear Signs
- Step by Step Guide to Inspecting Shock Absorbers and Struts
- Lubrication Techniques for Smooth Suspension Performance
- Replacing Bushings and Mounts Without Professional Help
- Tips for Maintaining Suspension Alignment at Home
- Q&A
- To Wrap It Up

Essential Tools and Materials for Suspension Maintenance
For effective suspension maintenance, having the right tools at your disposal is crucial. A quality set of wrenches and sockets, preferably with metric and standard sizes, will cover most bolt and nut removals. A torque wrench ensures you tighten components to manufacturer specifications, preventing damage or safety hazards. Don’t forget a reliable floor jack and sturdy jack stands for safely lifting and securing your vehicle. Additionally, a spring compressor is indispensable when dealing with coil springs, allowing you to work safely without risking injury.
Besides tools, having the appropriate materials will streamline your maintenance process. High-quality grease is essential for lubricating moving suspension parts to reduce wear and tear. Replace worn-out bushings with durable rubber or polyurethane alternatives depending on your ride preference. Keep a shop rag handy for cleaning and a container for catching any fluids that may leak during disassembly. Here’s a quick overview of must-have items:
| Tools | Materials |
|---|---|
| Torque Wrench | High-Quality Grease |
| Spring Compressor | Replacement Bushings |
| Floor Jack & Jack Stands | Shop Rags |
| Socket & Wrench Set | Catch Pan/Container |

Identifying Common Suspension Wear and Tear Signs
Spotting signs of suspension wear early can save you from costly repairs down the road. Keep an eye out for unusual noises like clunks, rattles, or squeaks when driving over bumps or during turns. A noticeable rough or bouncy ride indicates worn-out shock absorbers or struts struggling to dampen vibrations. Excessive body roll while cornering or uneven tire wear are red flags signaling alignment or suspension component issues. Remember, these symptoms aren’t always obvious, so regularly checking your vehicle’s performance helps maintain a safe and smooth drive.
- Visible damage on shock absorbers or springs (cracks or leaks)
- Vehicle nose-diving during braking
- Steering wheel that vibrates, pulls to one side, or feels loose
- Uneven ride height on either side of the vehicle
| Symptom | Possible Cause | Quick Fix |
|---|---|---|
| Clunking noises | Worn bushings or mounts | Inspect & replace worn components |
| Uneven tire wear | Misalignment or damaged suspension | Realign wheels & check shocks |
| Excessive bouncing | Worn shock absorbers | Replace shocks or struts |

Step by Step Guide to Inspecting Shock Absorbers and Struts
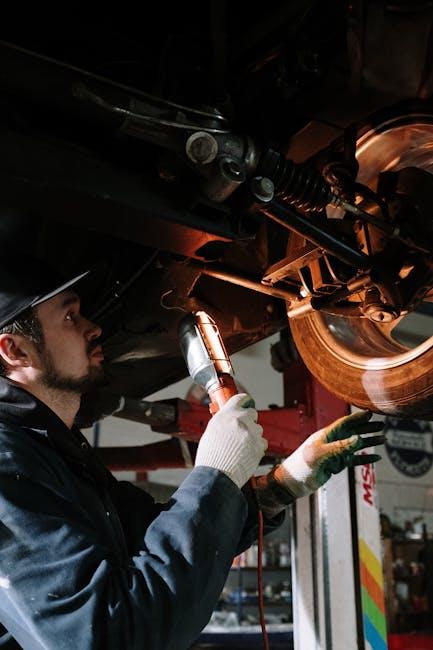
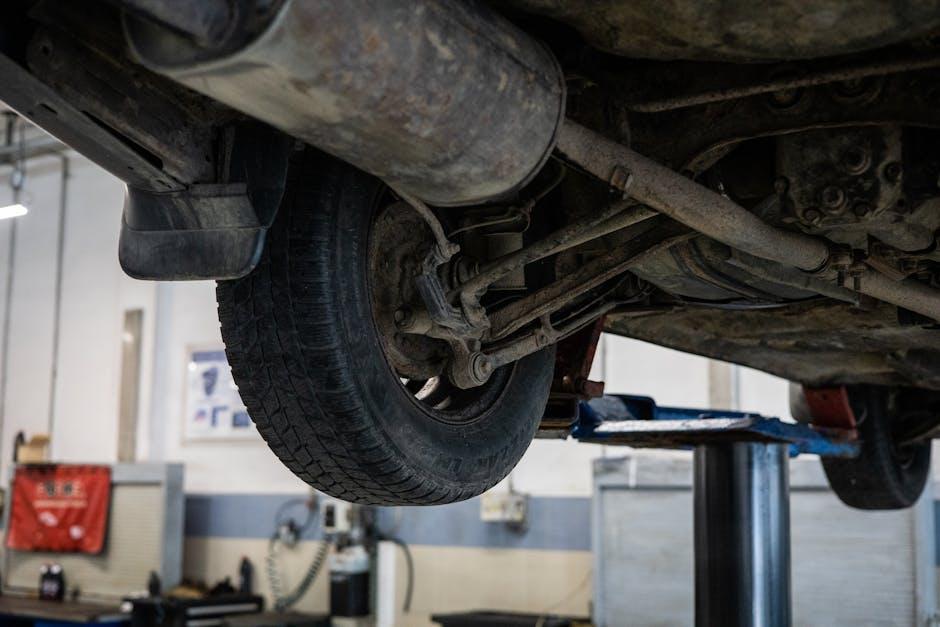
Begin by visually examining the shock absorbers and struts for any signs of oil leaks or physical damage like dents, cracks, or rust. Pay close attention to the areas where the components connect to the vehicle frame and wheel assembly, as these points often show early wear. Gently press down on each corner of your car and release; if it bounces more than twice, it may indicate worn-out shocks or struts. Also, listen for unusual noises such as clunking or squeaking when driving over bumps, which are red flags signaling potential failures.
Next, perform a tactile inspection by feeling for excessive looseness or play in the components. Use a flashlight to illuminate hard-to-see spots and ensure the rubber bushings are intact and flexible. To help you keep track, here’s a quick reference chart on common symptoms and their meanings:
| Symptom | Possible Issue | Action |
|---|---|---|
| Oil leakage | Damaged seals | Replace shock/strut |
| Excessive bouncing | Worn shock absorber | Test and replace if needed |
| Uneven tire wear | Misalignment or suspension damage | Check alignment and components |
| Knocking sounds | Loose mounts or broken parts | Tighten or replace mounts |
- Check tire wear patterns regularly as they can reveal hidden suspension issues early on.
- Inspect mounting hardware to ensure bolts and nuts are tight and free from corrosion.
- Perform bounce tests on all wheels to compare responsiveness and detect weak spots.

Lubrication Techniques for Smooth Suspension Performance
Maintaining the smoothness and responsiveness of your suspension starts with proper lubrication. Regularly applying high-quality grease to pivot points, bushings, and shock absorbers not only reduces friction but also extends the lifespan of the components. Before you start, always clean the area thoroughly to remove dirt and debris, which can cause abrasion if left in place during lubrication. Use a grease that’s specifically designed for suspension parts to ensure optimal performance under varying temperatures and pressures.
When lubricating, don’t forget these essential tips to get the best results:
- Use a precision applicator: This helps target hard-to-reach spots without wasting grease.
- Apply sparingly: Excess grease can attract grime and cause buildup.
- Check manufacturer recommendations: Some suspension components require specific lubricants or intervals.
| Suspension Part | Recommended Lubricant | Frequency |
|---|---|---|
| Shock Absorber Bushings | Silicone-based grease | Every 6 months |
| Control Arm Joints | Graphite grease | Annually |
| Pivot Points | Multi-purpose lithium grease | Every 3 months |

Replacing Bushings and Mounts Without Professional Help
When tackling the replacement of bushings and mounts without calling in a professional, the key is preparation and patience. Start by gathering all the necessary tools: a jack, jack stands, wrenches, and possibly a bushing press tool for stubborn components. Safety is paramount, so ensure your vehicle is securely supported before beginning. Carefully remove old bushings or mounts, noting their orientation and placement. Keep a clean workspace and label any bolts or parts as you detach them to avoid confusion during reassembly.
Here are a few tips to streamline the process:
- Clean the mounting area thoroughly before installing new components to ensure a snug fit.
- Apply lubricant sparingly to bushings or mounts to ease installation, but avoid excess which could degrade rubber parts.
- Use a torque wrench to tighten bolts to the manufacturer’s specifications to prevent premature wear or damage.
| Component | Estimated DIY Time | Difficulty Level |
|---|---|---|
| Control Arm Bushings | 2-3 hours | Moderate |
| Engine Mounts | 3-4 hours | Moderate |
| Suspension Mounts | 1-2 hours | Easy |

Tips for Maintaining Suspension Alignment at Home
Keeping your suspension alignment in check doesn’t always require a pricey trip to the mechanic. Begin with a visual inspection of your tires—uneven wear patterns can signal misalignment issues early on. Use a straightedge or a laser level tool to compare the wheel angles against the vehicle’s frame; even small deviations can impact handling and tire longevity. Remember, consistently verifying your ride height and ensuring it remains within manufacturer specifications is just as crucial. This preventive approach helps maintain comfort and safety on the road.
When it comes to fine-tuning your suspension, focus on accessible adjustments at home. Here’s a quick checklist to keep handy for routine alignment care:
- Check and tighten steering components like tie rods and ball joints.
- Verify wheel bearing play by rocking each tire—any lateral movement needs attention.
- Inspect shock absorbers for leaks or damage that can affect suspension performance.
- Measure toe angles with a tape measure to ensure wheels point straight ahead.
| Alignment Part | DIY Tip |
|---|---|
| Tie Rods | Check for looseness or bends |
| Control Arms | Inspect bushings for cracks |
| Wheel Bearings | Test for smooth rotation |
| Shock Absorbers | Look for oil leaks or damage |
Q&A
Q&A: DIY Suspension Maintenance Tips
Q1: Why is suspension maintenance important for my vehicle?
A1: Your suspension system absorbs shocks from the road, ensuring a smooth ride and keeping your tires firmly on the pavement. Proper maintenance prevents premature wear, improves handling, and enhances safety by maintaining optimal contact between your tires and the road.
Q2: What are the signs that my suspension needs attention?
A2: Look out for uneven tire wear, excessive bouncing after bumps, drifting or pulling during turns, strange noises like clunks or squeaks, and a generally rough or unstable ride. These symptoms often indicate worn shocks, struts, or other suspension components.
Q3: Can I safely perform suspension maintenance on my own?
A3: Yes, many basic suspension maintenance tasks are DIY-friendly if you have the right tools and follow safety precautions. Simple checks, cleaning, and minor replacements can be done at home, but complex repairs may require professional help.
Q4: What tools should I have for DIY suspension upkeep?
A4: A basic toolkit including jack stands, a hydraulic jack, a socket set, wrenches, a torque wrench, and penetrating oil will cover most tasks. For inspections, a flashlight and pry bar come in handy.
Q5: How do I inspect my shocks and struts?
A5: First, check for visible leaks or dents on the shock body. Next, push down on each corner of your vehicle—if it bounces more than once or twice, the shocks may be worn. Listen for unusual noises during the bounce test and inspect mounting points for rust or damage.
Q6: How often should suspension components be checked or replaced?
A6: Inspection every 12,000 miles or annually is a good rule of thumb. Replacement intervals vary but shocks and struts often last around 50,000 miles. Consult your vehicle manual for manufacturer recommendations.
Q7: Can I improve suspension performance with DIY upgrades?
A7: Absolutely! Upgrading bushings, installing heavier-duty shocks, or adding sway bars can enhance handling and durability. Ensure compatibility with your vehicle and be confident in installation techniques to avoid compromising safety.
Q8: What maintenance tips help extend suspension life?
A8: Keep components clean and free of debris, lubricate bushings as needed, avoid overloading your vehicle, and drive carefully over potholes and rough terrain. Regular inspections catch issues before they escalate.
Q9: How does proper tire maintenance affect suspension health?
A9: Balanced, aligned, and properly inflated tires reduce stress on suspension parts. Uneven tire wear often signals suspension problems, so treating suspension and tires as a system ensures longevity for both.
Q10: When should I consult a professional mechanic?
A10: If you encounter complex problems like broken springs, hydraulic leaks, or if you’re unsure about any step, it’s wise to seek expert assistance. Suspension safety is crucial, and professional diagnostics can save time and money in the long run.
This Q&A provides a clear, practical overview for readers looking to maintain their suspension systems themselves while emphasizing safety and knowing when to seek help.
To Wrap It Up
Maintaining your suspension doesn’t have to be a daunting task reserved for the pros. With a little know-how and some regular attention, you can keep your ride smooth, safe, and ready for whatever the road throws your way. Remember, suspension health is more than just comfort—it’s about control and confidence behind the wheel. So roll up your sleeves, grab your tools, and embrace the satisfaction of doing it yourself. After all, every successful DIY project is one step closer to mastering your machine and enjoying the journey ahead.

