

When it comes to maintaining the smooth operation of your vehicle, few tasks are as essential—and as overlooked—as bleeding the brakes. Over time, air can sneak into your brake lines, turning your once reliable pedal into a soft, spongy warning sign. While the idea of working on brakes may sound daunting, bleeding your car’s brakes at home is a manageable project with the right tools, technique, and patience. In this guide, we’ll walk you through the step-by-step process to safely and effectively bleed your brakes, restoring that firm pedal feel and helping you drive with confidence once again. Whether you’re a seasoned DIYer or just curious about car care, read on to unlock the secrets behind a critical brake maintenance task.
Table of Contents
- Preparing Your Workspace and Gathering Essential Tools
- Understanding the Brake System and Identifying Air Pockets
- Step-by-Step Guide to Manual Brake Bleeding Procedures
- Tips for Using a Brake Bleeding Kit Effectively
- Common Challenges and How to Troubleshoot Them
- Ensuring Safety and Performing a Final Brake Test
- Q&A
- Wrapping Up

Preparing Your Workspace and Gathering Essential Tools
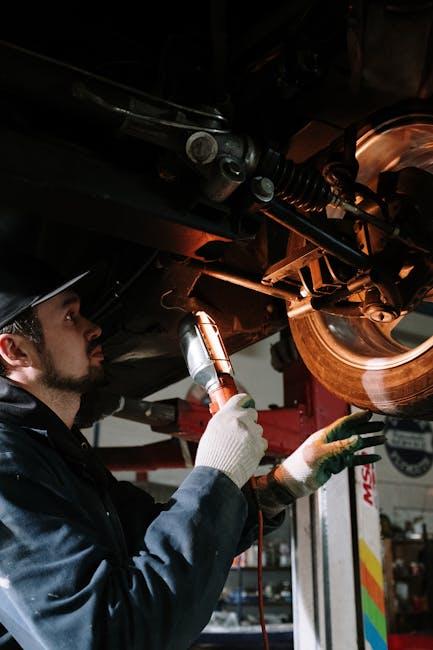
Before diving into the brake bleeding process, it’s crucial to transform your garage or driveway into a clean, safe, and organized spot for the job ahead. Start by ensuring the vehicle is parked on a flat surface and securely lifted with jack stands. Adequate lighting is a must-have to clearly spot any leaks or air bubbles in the brake lines. Keep a large container nearby to catch any brake fluid spills, as it’s corrosive and can damage painted surfaces. With safety gear like gloves and goggles, you’ll protect yourself from the hazardous fluid while working.
Gathering the right tools will streamline the procedure and avoid frustrating interruptions. Here’s a handy checklist of essentials:
- Brake fluid (consult your vehicle’s manual for the correct type)
- Clear plastic tubing to fit the bleeder screw
- Wrench set, preferably a flare nut wrench for better grip
- Brake bleeder kit or a vacuum pump (optional but helpful)
- Clean rags for wiping excess fluid
| Item | Purpose |
|---|---|
| Brake Fluid | Maintains hydraulic pressure in the brake system |
| Wrench | Loosens and tightens bleeder valves |
| Clear Tubing | Guides fluid into a container without air exposure |
| Clean Rags | Prevents fluid damage and keeps the area tidy |

Understanding the Brake System and Identifying Air Pockets
The brake system in your vehicle operates through a network of hydraulic fluid that transfers force from the brake pedal to the brake pads, slowing down or stopping your car. When air enters this system, it disrupts the fluid’s ability to transmit pressure effectively, causing a spongy or soft brake pedal feel. These air pockets, or bubbles, compress under pressure instead of transferring it, leading to reduced braking performance and potential danger on the road. Recognizing the signs of air in the brake lines is crucial for maintaining vehicle safety.
Common symptoms of air pockets in the brake system include:
- Brake pedal feels soft or sinks to the floor
- Increased stopping distance despite normal brake pad condition
- Unusual noise when pressing the brake pedal
- Vibrations or pulsations felt in the brake pedal
| Component | Role in Brake System | Effect of Air Pockets |
|---|---|---|
| Master Cylinder | Generates hydraulic pressure | Pressure loss, ineffective force transfer |
| Brake Lines | Carry fluid to brakes | Compressibility reduces pressure |
| Brake Calipers | Apply pressure to pads | Delayed or weak response |
Identifying and addressing air pockets early by bleeding the brakes not only restores firm pedal feel but also enhances your vehicle’s safety and control. Properly maintained brake systems ensure reliable stopping power when it counts most.

Step-by-Step Guide to Manual Brake Bleeding Procedures
Begin by gathering all necessary tools: a clear plastic tube, a catch container, a wrench compatible with your vehicle’s bleeder valves, fresh brake fluid, and safety gloves. Before starting, ensure your car is on a flat surface and securely supported on jack stands. Start at the wheel farthest from the master cylinder—typically the passenger rear—then work your way closer. Remove the cap from the brake fluid reservoir and keep it open but clean. Attach the plastic tube tightly over the bleeder valve and place the other end into your catch container to collect old fluid and avoid mess.
With a helper seated inside, instruct them to pump the brake pedal several times and then hold it down firmly. Using your wrench, carefully open the bleeder valve just enough to allow fluid and air bubbles to escape; be mindful not to loosen it too far to prevent damage. When the flow slows, tighten the valve securely before your helper slowly releases the pedal. Repeat this process until clear, bubble-free brake fluid flows through the tube. Remember to frequently check and top off the reservoir with fresh fluid to prevent air entering the system. This methodical approach ensures a safe, effective bleed and restores your braking power.

Tips for Using a Brake Bleeding Kit Effectively
Mastering the art of brake bleeding begins with familiarizing yourself thoroughly with your kit’s components. Before starting, ensure you have a clean workspace and keep a container ready to catch expelled brake fluid — spills can damage paint and surfaces. When connecting hoses and adapters, a snug fit is crucial to prevent air from sneaking back into the system. Always keep the master cylinder topped up with fresh brake fluid throughout the process to avoid introducing new air bubbles.
For best results, keep these pointers in mind:
- Work systematically from the brake farthest from the master cylinder to the closest.
- Use slow, deliberate brake pedal presses to maintain steady fluid flow.
- Avoid pumping the brake pedal too fast, as it can create air turbulence inside the lines.
- Rinse and reuse hoses between sessions to keep the system clean.
Common Challenges and How to Troubleshoot Them
Air bubbles trapped in the brake lines are the primary culprit when your brakes feel spongy after bleeding. To tackle this, ensure that the brake fluid reservoir is always topped up throughout the process. Maintaining the correct fluid level prevents air from being sucked back into the system. Another tip is to have a steady and gradual pedal pumping rhythm—abrupt or fast pumping can reintroduce air, defeating your efforts.
Sometimes, the bleeder valves might be stuck or stripped, making it hard to open or close them properly. If you encounter resistance, apply a penetrating lubricant beforehand and use the correct wrench size to avoid damage. Additionally, when multiple brakes are being bled, always follow the manufacturer’s recommended sequence—usually starting with the wheel farthest from the master cylinder—to ensure thorough air removal.
Ensuring Safety and Performing a Final Brake Test
Before hitting the road, it’s crucial to verify that your brake system is operating flawlessly. Start by visually inspecting all brake lines and connections for leaks or signs of wear. Then, with the engine off, pump the brake pedal several times to build pressure and confirm that it feels firm and responsive. A spongy or sinking pedal is a clear signal that air may still be present in the system, necessitating further bleeding. Never compromise on safety—if anything feels off, revisit the bleeding process or seek professional help.
When it’s time for the final brake test, perform it in a safe, open area away from traffic. Gradually apply pressure to the brakes at low speeds to ensure consistent stopping power. Keep these tips in mind:
- Verify the brake fluid reservoir is full and capped tightly.
- Check for any unusual noises or vibrations when braking.
- Test brakes on varied surfaces like dry pavement and a slight incline.
- Avoid aggressive stops until you’re confident in the system’s reliability.
| Test Condition | Expected Result |
|---|---|
| Brake Pedal Pressure | Firm and steady |
| Stopping Distance (Low Speed) | Short and consistent |
| Brake Fluid Level | At or near max line |
| Pedal Response Time | Immediate without delay |
Q&A
Q&A: How to Bleed Car Brakes at Home
Q: Why do I need to bleed my car brakes?
A: Bleeding your car brakes removes trapped air from the brake lines, which ensures a firm and responsive brake pedal. Air in the system can cause spongy brakes and reduce your vehicle’s stopping power, making it unsafe to drive.
Q: What tools will I need to bleed my brakes at home?
A: You’ll need a few basics: a wrench or brake bleeder wrench, clear tubing, a container to catch brake fluid, fresh brake fluid (check your vehicle’s manual for the correct type), a helper, gloves, and safety goggles.
Q: Can I bleed brakes by myself, or do I need a helper?
A: While some DIYers master solo brake bleeding using vacuum or pressure bleeders, the traditional method is much easier and safer with a helper. One person pumps the brake pedal, while the other opens and closes the bleeder valves to release air and fluid.
Q: How do I know which brake bleeder valve to open first?
A: The general rule is to start from the brake farthest from the master cylinder and work your way closer. Typically, this means starting with the passenger-side rear brake, then driver-side rear, passenger-side front, and finally driver-side front.
Q: What can happen if I don’t properly bleed my brakes?
A: Improperly bled brakes can lead to air pockets in the lines, causing brake failure or a dangerously soft pedal. This can increase stopping distances and risk accidents.
Q: How often should I bleed my brakes?
A: Bleeding is usually necessary after replacing brake components like calipers, lines, or the master cylinder. Routine maintenance might recommend bleeding every 2-3 years or whenever you suspect air has entered the system.
Q: Can I use any brake fluid for bleeding?
A: No! Brake fluids come in different types (DOT 3, DOT 4, DOT 5, etc.). Always use the type specified in your owner’s manual. Mixing fluids or using the wrong type can damage your brake system.
Q: Is it messy or dangerous to bleed brakes at home?
A: Brake fluid is corrosive and can damage paint, skin, and eyes. Always wear gloves and eye protection, and work in a well-ventilated area. Protect your workspace with rags or plastic sheets to avoid stains.
Q: How will I know when the bleeding process is complete?
A: When you open the bleeder valve, steady, bubble-free fluid should flow through the tubing. Also, the brake pedal should feel firm and consistent when pressed.
Q: What if bleeding doesn’t improve my brake pedal feel?
A: If the brakes still feel spongy after bleeding, there may be other issues like a faulty master cylinder, damaged brake lines, or malfunctioning calipers that require professional inspection.
Bleeding car brakes at home takes patience, care, and the right tools—but it can save you a trip to the mechanic and teach you valuable vehicle maintenance skills. Safety first, and happy bleeding!
Wrapping Up
Bleeding your car brakes at home might seem like a daunting task, but with patience and the right steps, it transforms into a manageable and rewarding DIY project. Taking the time to ensure your brake system is free of air bubbles not only enhances your vehicle’s safety but also deepens your understanding of how your car functions. So next time your brakes feel a little spongy, remember that with some basic tools and a bit of know-how, you’ve got the power to keep your ride smooth and secure—right in your own garage. Safe driving!