

Imagine starting your day only to find your car won’t roar to life — a silent reminder that your battery might be waving a few warning signs. Your car’s battery is the heart of its electrical system, silently powering everything from the ignition to the dashboard lights. But how can you tell when this vital component is losing its charge or nearing the end of its life without stepping into a mechanic’s garage? Fortunately, checking your car battery’s health at home is easier than you might think. In this guide, we’ll explore simple and effective ways to assess your battery’s condition, helping you stay ahead of unexpected breakdowns and keep your vehicle running smoothly.
Table of Contents
- Understanding the Basics of Car Battery Health
- Tools Needed for Effective At-Home Battery Testing
- Visual Inspection Tips for Early Battery Trouble Signs
- Step-by-Step Guide to Using a Multimeter on Your Battery
- Interpreting Voltage Readings and What They Mean
- Maintenance Practices to Extend Your Battery’s Lifespan
- Q&A
- The Conclusion

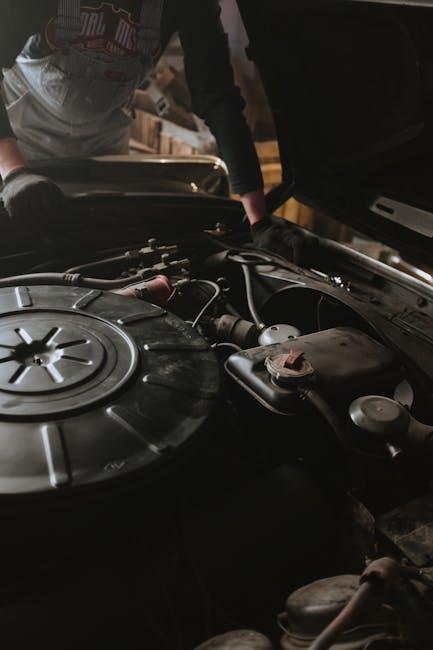
Understanding the Basics of Car Battery Health
Keeping your car battery in prime condition is essential for reliable starts and optimal vehicle performance. At its core, a car battery stores electrical energy and supplies power to start the engine and run accessories. Over time, however, factors like temperature fluctuations, frequent short trips, and age can diminish its ability to hold a charge. Understanding the basic signs of battery health involves observing voltage levels, checking for physical corrosion on terminals, and recognizing the warning symptoms of a weakening battery, such as slow engine cranking or dim headlights.
Regular home checks can extend the life of your battery and help you anticipate replacement needs before emergencies strike. Tools like a digital multimeter are invaluable for measuring voltage, where a healthy battery typically reads between 12.6 to 12.8 volts when fully charged. Additionally, a visual inspection can reveal corrosion deposits or damaged cables, both of which hinder electrical flow. Below is a quick reference table for interpreting battery voltage readings at rest:
| Voltage | Battery Health Status |
|---|---|
| 12.6 – 12.8 V | Fully Charged & Healthy |
| 12.4 – 12.6 V | Moderate Charge – Check Soon |
| < 12.4 V | Low Charge – Recharge or Replace |
- Inspect terminals: Clean off corrosion with a mixture of baking soda and water.
- Test voltage: Use a voltmeter or multimeter to verify charge levels.
- Monitor performance: Note how the vehicle starts and if electrical components behave oddly.

Tools Needed for Effective At-Home Battery Testing
Before diving into the process, it’s essential to gather the right gear that ensures accurate and safe battery testing. Among the essentials, a multimeter stands out as the most versatile tool, allowing you to measure voltage, current, and resistance quickly. For enthusiasts seeking a deeper insight, a battery load tester provides a realistic simulation of engine cranking, revealing the battery’s ability to perform under stress. Don’t forget protective gear like insulated gloves and safety glasses — safety should always come first when handling automotive batteries.
In addition to these, having a few handy accessories can make your testing more efficient and less messy. Keep a set of battery terminal cleaners to remove any corrosion, ensuring that your connections are spot on. A simple battery hydrometer can help test the electrolyte’s specific gravity in traditional lead-acid batteries, giving a clear indication of the battery’s health state. Here’s a quick overview to help you organize your toolkit:
| Tool | Purpose |
|---|---|
| Multimeter | Measures voltage and overall battery health |
| Load Tester | Simulates engine start load to test battery under stress |
| Battery Hydrometer | Checks electrolyte specific gravity in acid batteries |
| Terminal Cleaner | Removes corrosion for better connections |
| Safety Gloves & Glasses | Protects from acid and electrical hazards |
Visual Inspection Tips for Early Battery Trouble Signs
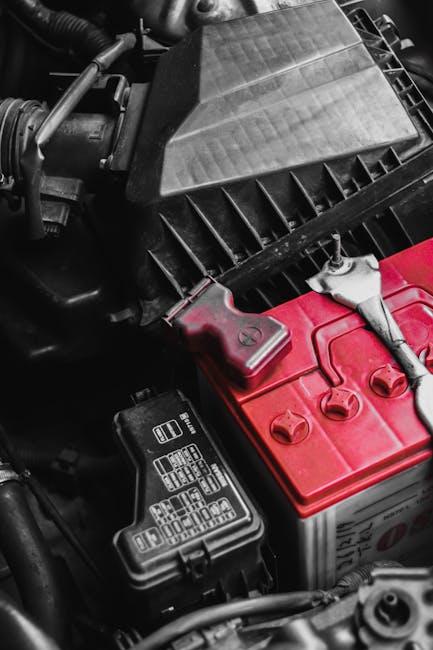
Begin your inspection by examining the battery case for any signs of damage or swelling. A slightly bloated or cracked battery shell can indicate internal issues, often caused by overheating or gas buildup, which compromises performance and safety. Keep an eye out for corrosion around the terminals, usually a white or greenish powder that can impede electrical flow and reduce battery efficiency. Cleaning this buildup gently with a mixture of baking soda and water can help maintain good contact, but persistent corrosion may signal an underlying problem needing attention.
Also, check for any loose or frayed connecting cables that might disrupt the electrical circuit. Pay attention to the battery’s color-coded indicator if available—a green or blue dot generally means the battery is in good health, while yellow or red often signals trouble. To visualize, here’s a quick reference for common visual cues:
| Visual Sign | What it Means | Recommended Action |
|---|---|---|
| Battery swelling | Internal damage or overheating | Immediate replacement |
| Terminal corrosion | Impeded electrical connection | Clean terminals & inspect cables |
| Discolored indicator | Battery charge status | Further testing advised |
Step-by-Step Guide to Using a Multimeter on Your Battery
Begin by ensuring your vehicle is off and the keys are removed from the ignition. Locate the battery under the hood and visually inspect it for any corrosion or damage. Next, grab your multimeter and set it to measure voltage (usually indicated by “V” with a straight line for DC voltage). Attach the red probe to the positive terminal and the black probe to the negative terminal. A healthy, fully charged car battery should read between 12.6 and 12.8 volts. Readings below 12.4 volts may indicate the battery is partially discharged, while anything under 12 volts is a clear sign your battery needs attention or replacement.
For a quick reference, here’s a simple guide to what your multimeter readings mean:
| Multimeter Reading (Volts) | Battery Health Status |
|---|---|
| 12.6 – 12.8 | Fully charged and healthy |
| 12.4 – 12.6 | Slightly discharged, but generally okay |
| 12.0 – 12.4 | Needs charging soon |
| Below 12.0 | Battery failing or dead |
After testing voltage, you can switch your multimeter to the amperage or resistance mode to check for further diagnostics, but voltage is the quickest and most effective way to evaluate battery health at home. Always remember to wear safety gloves and glasses when handling batteries, as they contain corrosive acid and can deliver a powerful shock if mishandled.
Interpreting Voltage Readings and What They Mean
When you measure your car battery’s voltage with a multimeter, the numbers you see offer valuable insights into its overall condition. A fully charged battery typically reads around 12.6 volts or higher. Values dipping to around 12.4 volts suggest a moderately charged battery, which might still operate effectively but could benefit from a recharge soon. Anything below 12.0 volts generally indicates a significantly discharged battery that requires immediate attention, potentially signaling a failing battery or charging system issues.
To help you quickly interpret these readings, refer to the table below that summarizes common voltage levels and their meanings:
| Voltage Range | Battery Condition | Recommended Action |
|---|---|---|
| 12.6 V – 12.8 V | Fully Charged | Normal Use |
| 12.4 V – 12.6 V | Partially Charged | Recharge Soon |
| 12.0 V – 12.4 V | Low Charge | Recharge Immediately |
| Below 12.0 V | Discharged or Faulty | Test and Possibly Replace |
Keep in mind that voltage readings should be taken when the engine is off and the battery has rested for at least a few hours to get the most accurate picture. Additionally, a voltage within normal range doesn’t always guarantee a healthy battery—checking for capacity under load can reveal hidden issues that mere voltage cannot detect.
Maintenance Practices to Extend Your Battery’s Lifespan
To maximize the longevity of your car battery, regular upkeep is essential. Start by ensuring the terminals are clean and free of corrosion, as buildup can disrupt electrical flow and reduce efficiency. Use a mixture of baking soda and water with a soft brush to gently scrub off any deposits. Additionally, keep an eye on the battery casing for any signs of damage or swelling, which could indicate internal issues. Parking in shaded areas or garages not only protects the battery from extreme temperatures but also minimizes thermal stress, which can degrade battery chemicals over time.
Consistent monitoring of your battery’s charge level can prevent unexpected failures. Consider the following maintenance tips for optimal performance:
- Check electrolyte levels: For non-sealed batteries, top off with distilled water when necessary to maintain balance.
- Avoid short trips: Frequent short drives don’t allow your alternator enough time to fully recharge the battery.
- Secure connections: Tighten clamps and ensure all cables are firmly attached to prevent voltage drops.
- Use a battery maintainer: When the vehicle is not in use for long periods, these devices help keep the battery charged without overcharging.
| Maintenance Task | Frequency | Benefits |
|---|---|---|
| Clean terminals | Every 3 months | Improves electrical contact |
| Check electrolyte levels | Monthly (if applicable) | Prevents battery drying out |
| Charge battery fully | As needed | Extends cycle life |
| Inspect battery casing | Every 6 months | Detects physical damage early |
Q&A
Q&A: How to Check Car Battery Health at Home
Q1: Why is it important to check my car battery health?
A1: Your car battery is the electrical heart of your vehicle, powering everything from the starter motor to your lights and infotainment system. Regularly checking its health helps prevent unexpected breakdowns and extends the battery’s lifespan.
Q2: What signs indicate my car battery might be failing?
A2: Common warning signs include slow engine crank when starting, dim headlights, the check engine light illuminating, and corrosion around battery terminals. If your car struggles to start or electronics act sluggish, it’s a clue your battery could be on the decline.
Q3: Do I need special tools to check my car battery at home?
A3: You can perform basic checks with no tools at all! For a more accurate health check, a digital multimeter or a battery tester (available at most auto stores) comes in handy.
Q4: How can I visually inspect my battery?
A4: Start by looking for corrosion—white, ashy deposits—on the terminals. Ensure the battery casing isn’t cracked or swollen. Also, check that the battery is securely fastened to avoid vibrations that can cause damage.
Q5: How do I use a multimeter to test my battery voltage?
A5: Set your multimeter to DC voltage (20V range). Connect the red probe to the positive terminal and black probe to the negative terminal. A healthy, fully charged battery should read around 12.6 volts or higher when the car is off. Anything below 12.4 volts signals some level of discharge.
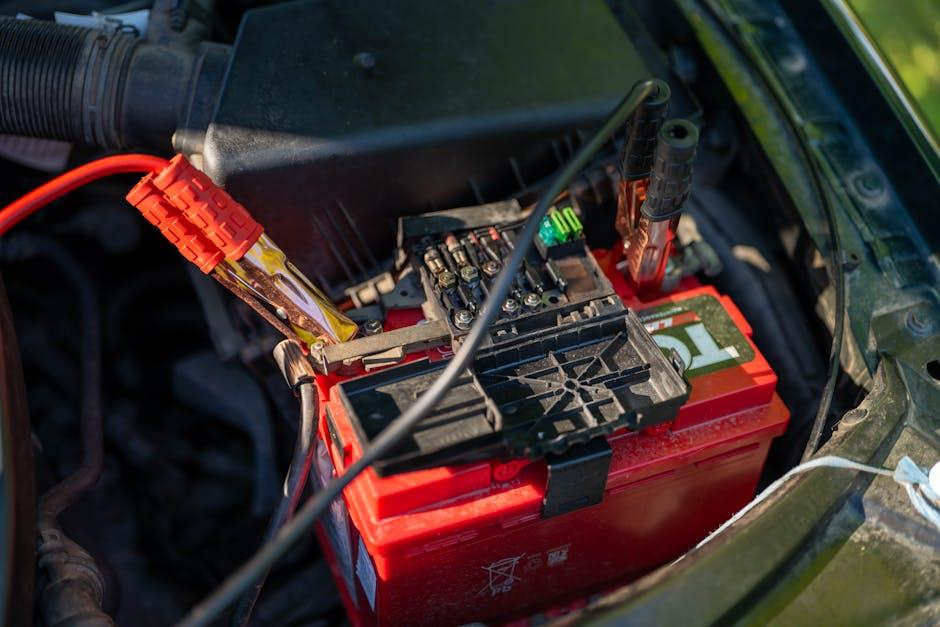
Q6: What’s a quick “jump start” test I can try?
A6: Turn on the headlights without starting the engine. Note their brightness, then try to start the car. If the headlights dim dramatically or the engine cranks slowly, the battery may be weak.
Q7: Can temperature affect battery health readings?
A7: Absolutely. Cold weather reduces battery efficiency and voltage readings. Take this into account if you’re testing on a chilly morning—the battery might read slightly lower than usual.
Q8: What should I do if I find my battery voltage is low?
A8: Try charging the battery fully with a home charger if you have one. If the battery doesn’t hold charge or voltage drops quickly, it’s time for a replacement.
Q9: Is it safe to perform these checks on my own?
A9: Yes, with caution. Avoid sparks and open flames near the battery, wear safety glasses, and handle terminals carefully. If you’re unsure, seeking professional assistance is always wise.
Q10: How often should I check my car battery health at home?
A10: Ideally, check your battery every 3-6 months, especially before winter or long trips. Regular monitoring keeps surprises at bay and your car ready to roll.
The Conclusion
Checking your car battery’s health at home doesn’t have to be a mystery wrapped in a hood. With a little know-how and some simple tools, you can take charge of your vehicle’s power source—catching problems early and saving yourself from unexpected roadside surprises. Remember, a healthy battery is the heart of a reliable ride, so making this quick check a regular habit keeps you confidently on the road. Whether you’re a seasoned gearhead or a curious beginner, these steps empower you to drive smarter and stay prepared—because sometimes, the biggest breakthroughs start with the smallest checks.
664 Comments
https://shorturl.fm/y2EYO
https://shorturl.fm/sEBnq
https://shorturl.fm/AX4ng
https://shorturl.fm/Kr911
https://shorturl.fm/hsTtw
https://shorturl.fm/RdxEV
https://shorturl.fm/2PD9Q
https://shorturl.fm/q6QJ9
https://shorturl.fm/CeNxK
p42gwa
https://shorturl.fm/dKXYY
https://shorturl.fm/Z2SCK
https://shorturl.fm/yqMS5
https://shorturl.fm/juYgM
https://shorturl.fm/L7bnt
https://shorturl.fm/NSthv
https://shorturl.fm/TTJ7a
https://shorturl.fm/kclSg
https://shorturl.fm/ULVjD
https://shorturl.fm/E930d
https://shorturl.fm/AvuoS
https://shorturl.fm/RP9ex
https://shorturl.fm/2PHqQ
https://shorturl.fm/PMpo3
https://shorturl.fm/VeO6j
mg20zk
https://shorturl.fm/M8Ul5
https://shorturl.fm/EWMIa
https://shorturl.fm/9VaeT
f7lvee
https://shorturl.fm/ekD45
https://shorturl.fm/zc8Nv
https://shorturl.fm/Amn3c
https://shorturl.fm/YIL4b
https://shorturl.fm/lmuFU
https://shorturl.fm/fGFBv
https://shorturl.fm/iZILl
https://shorturl.fm/lNm2c
https://shorturl.fm/K1JUV
https://shorturl.fm/w0vQ3
https://shorturl.fm/p4Lma
https://shorturl.fm/Gppcp
https://shorturl.fm/2XCy8
5j29qh
https://shorturl.fm/8HjSI
https://shorturl.fm/cAWQu
https://shorturl.fm/D63n6
https://shorturl.fm/JunL3
https://shorturl.fm/OJdzn
cj7tyv
https://shorturl.fm/6guLd
https://shorturl.fm/gBsqu
https://shorturl.fm/alTwT
i7rtdl
https://shorturl.fm/Zqfl9
https://shorturl.fm/nzTvc
https://shorturl.fm/hW1T2
https://shorturl.fm/WC69C
https://shorturl.fm/QgAQn
https://shorturl.fm/GYY3S
https://shorturl.fm/maIJw
https://shorturl.fm/3VOqY
https://shorturl.fm/iA3KB
https://shorturl.fm/vEMCv
https://shorturl.fm/O1bPf
https://shorturl.fm/iOl7S
https://shorturl.fm/uKBil
https://shorturl.fm/OYiz0
https://shorturl.fm/ONNQs
https://shorturl.fm/SRB7e
https://shorturl.fm/7Fdg3
https://shorturl.fm/isUFe
https://shorturl.fm/zMiCD
https://shorturl.fm/JKyiM
https://shorturl.fm/ckM7d
https://shorturl.fm/eNrDr
https://shorturl.fm/1jTZa
https://shorturl.fm/j2NA3
https://shorturl.fm/zZHPJ
https://shorturl.fm/yIWpB
https://shorturl.fm/rkSvY
https://shorturl.fm/ifph7
https://shorturl.fm/zFQr7
https://shorturl.fm/5JJHu
7w5tj3
https://shorturl.fm/hPGn0
https://shorturl.fm/OPq3J
https://shorturl.fm/rRLQR
https://shorturl.fm/I4qH4
https://shorturl.fm/tlKIH
https://t.me/s/Online_1_xbet/750
https://shorturl.fm/XF9Vf
https://shorturl.fm/yee6a
https://t.me/s/Online_1_xbet/2899
https://t.me/s/Official_1xbet_1xbet
https://t.me/rating_online/5
https://shorturl.fm/9POAH
https://t.me/rating_online/3
https://t.me/s/rating_online
https://t.me/s/rating_online/2
https://t.me/s/rating_online/5
https://t.me/s/rating_online/13
https://shorturl.fm/Y2zjn
https://t.me/Online_1_xbet/2558
https://t.me/Online_1_xbet/2488
https://t.me/Online_1_xbet/3066
a76132
https://t.me/Online_1_xbet/1992
https://t.me/Online_1_xbet/2793
https://t.me/Online_1_xbet/3194
https://t.me/Online_1_xbet/3220
https://t.me/Online_1_xbet/2371
https://t.me/Online_1_xbet/2082
https://t.me/Online_1_xbet/3207
https://shorturl.fm/auaNk
https://t.me/Online_1_xbet/2804
https://t.me/Official_1xbet_1xbet/s/361
https://t.me/Official_1xbet_1xbet/s/1401
https://t.me/Official_1xbet_1xbet/s/1067
https://t.me/Official_1xbet_1xbet/s/1156
https://t.me/Official_1xbet_1xbet/s/52
https://t.me/Official_1xbet_1xbet/s/1171
https://t.me/Official_1xbet_1xbet/s/791
https://t.me/Official_1xbet_1xbet/s/380
https://t.me/Official_1xbet_1xbet/s/873
https://t.me/Official_1xbet_1xbet/s/756
https://t.me/Official_1xbet_1xbet/s/1237
https://t.me/Official_1xbet_1xbet/s/269
https://t.me/Official_1xbet_1xbet/s/324
https://t.me/Official_1xbet_1xbet/s/1066
https://t.me/Official_1xbet_1xbet/s/207
https://shorturl.fm/HRDPg
https://t.me/Official_1xbet_1xbet/s/725
https://t.me/Official_1xbet_1xbet/s/1287
https://t.me/Official_1xbet_1xbet/s/93
https://t.me/Official_1xbet_1xbet/s/534
https://t.me/Official_1xbet_1xbet/s/1496
https://t.me/Official_1xbet_1xbet/s/266
https://t.me/Official_1xbet_1xbet/s/546
https://t.me/Official_1xbet_1xbet/s/929
https://t.me/Official_1xbet_1xbet/s/538
https://t.me/Official_1xbet_1xbet/s/58
https://t.me/Official_1xbet_1xbet/s/1439
https://t.me/Official_1xbet_1xbet/s/249
https://t.me/Official_1xbet_1xbet/s/478
https://t.me/Official_1xbet_1xbet/s/396
https://t.me/Official_1xbet_1xbet/s/1495
https://t.me/Official_1xbet_1xbet/s/891
https://t.me/Official_1xbet_1xbet/s/779
https://t.me/Official_1xbet_1xbet/s/533
https://t.me/Official_1xbet_1xbet/s/78
https://t.me/Official_1xbet_1xbet/s/665
https://t.me/Official_1xbet_1xbet/s/780
https://t.me/Official_1xbet_1xbet/s/540
https://t.me/Official_1xbet_1xbet/s/448
https://t.me/Official_1xbet_1xbet/s/122
https://t.me/Official_1xbet_1xbet/s/271
https://t.me/Official_1xbet_1xbet/s/339
https://t.me/Official_1xbet_1xbet/s/728
https://t.me/Official_1xbet_1xbet/s/981
https://t.me/Official_1xbet_1xbet/s/247
https://t.me/Official_1xbet_1xbet/s/1269
https://t.me/s/Official_1xbet_1xbet/1716
https://t.me/s/Official_1xbet_1xbet/1855
https://t.me/Official_1xbet_1xbet/1762
https://t.me/Official_1xbet_1xbet/1819
https://t.me/Official_1xbet_1xbet/1698
https://t.me/Official_1xbet_1xbet/1770
https://t.me/s/Official_1xbet_1xbet/1810
https://t.me/s/Official_1xbet_1xbet/1650
https://shorturl.fm/pel6z
https://t.me/Official_1xbet_1xbet/1779
https://t.me/s/Official_1xbet_1xbet/1777
https://t.me/s/Official_1xbet_1xbet/1773
https://t.me/s/Official_1xbet_1xbet/1720
https://t.me/Official_1xbet_1xbet/1665
https://t.me/Official_1xbet_1xbet/1858
https://t.me/Official_1xbet_1xbet/1784
https://t.me/s/Official_1xbet_1xbet/1771
https://t.me/s/Official_1xbet_1xbet/1785
https://t.me/Official_1xbet_1xbet/1613
https://t.me/Official_1xbet_1xbet/1837
https://shorturl.fm/DHJZB
https://t.me/s/Official_1xbet_1xbet/1597
https://t.me/Official_1xbet_1xbet/1641
https://t.me/s/Official_1xbet_1xbet/1853
https://t.me/s/Official_1xbet_1xbet/1704
https://t.me/s/Official_1xbet_1xbet/1840
https://t.me/Official_1xbet_1xbet/1767
https://t.me/Official_1xbet_1xbet/1744
https://t.me/Official_1xbet_1xbet/1796
https://t.me/s/Official_1xbet_1xbet/1827
https://t.me/s/Official_1xbet_1xbet/1764
https://t.me/s/Official_1xbet_1xbet/1707
https://t.me/s/Official_1xbet_1xbet/1712
https://shorturl.fm/1kWuW
https://t.me/Official_1xbet_1xbet/1730
https://t.me/Official_1xbet_1xbet/1734
https://t.me/s/Official_1xbet_1xbet/1821
https://t.me/s/Official_1xbet_1xbet/1667
https://t.me/s/Official_1xbet_1xbet/1833
https://shorturl.fm/6I3gN
https://t.me/Official_1xbet_1xbet/1765
https://shorturl.fm/pdDkW
https://t.me/Official_1xbet_1xbet/1690
https://t.me/s/Official_1xbet_1xbet/1789
https://t.me/s/Official_1xbet_1xbet/1779
https://t.me/Official_1xbet_1xbet/1803
https://t.me/Official_1xbet_1xbet/1782
https://t.me/s/Official_1xbet_1xbet/1642
https://t.me/Official_1xbet_1xbet/1636
https://t.me/Official_1xbet_1xbet/1855
https://t.me/s/Official_1xbet_1xbet/1797
https://t.me/s/Official_1xbet_1xbet/1721
https://t.me/Official_1xbet_1xbet/1839
https://t.me/Official_1xbet_1xbet/1848
https://t.me/Official_1xbet_1xbet/1777
https://t.me/s/Official_1xbet_1xbet/1728
https://t.me/Official_1xbet_1xbet/1833
https://t.me/Official_1xbet_1xbet/1774
https://t.me/s/Official_1xbet_1xbet/1664
https://t.me/s/Official_1xbet_1xbet/1689
https://t.me/s/Official_1xbet_1xbet/1710
https://t.me/s/Official_1xbet_1xbet/1814
https://t.me/s/Official_1xbet_1xbet/1832
https://t.me/Official_1xbet_1xbet/1668
https://t.me/Official_1xbet_1xbet/1823
https://t.me/Official_1xbet_1xbet/1780
https://t.me/Official_1xbet_1xbet/1811
https://t.me/s/Official_1xbet_1xbet/1778
https://t.me/Official_1xbet_1xbet/1787
https://t.me/Official_1xbet_1xbet/1611
https://t.me/s/topslotov
https://shorturl.fm/RTnie
pbrya7
[https://t.me/s/official_1win_aviator](https://t.me/s/official_1win_aviator)
https://shorturl.fm/lSKKS
https://t.me/reiting_top10_casino/5
https://t.me/reiting_top10_casino/9
https://t.me/s/reiting_top10_casino/3
https://t.me/reiting_top10_casino/3
https://t.me/reiting_top10_casino/4
https://t.me/s/reiting_top10_casino/4
https://t.me/reiting_top10_casino/8
https://t.me/reiting_top10_casino
https://t.me/s/reiting_top10_casino/10
https://t.me/reiting_top10_casino/2
https://shorturl.fm/pZ63j
https://t.me/reiting_top10_casino/10
https://t.me/s/reiting_top10_casino/8
https://t.me/s/reiting_top10_casino
https://t.me/s/reiting_top10_casino/7
https://shorturl.fm/t17G2
https://shorturl.fm/0GQ8A
https://shorturl.fm/t17G2
https://shorturl.fm/WBeOw
https://t.me/s/reiting_top10_casino/6
https://shorturl.fm/B0hqi
https://t.me/reiting_top10_casino/6
https://t.me/s/reiting_top10_casino/9
https://shorturl.fm/6nIwY
https://t.me/reiting_top10_casino/7
https://t.me/s/reiting_top10_casino/2
https://shorturl.fm/NUpZw
https://shorturl.fm/NfjwC
https://t.me/s/Gaming_1xbet
https://t.me/s/PlayCasino_1xbet
https://t.me/s/PlayCasino_1win
https://t.me/s/PlayCasino_1win
https://t.me/s/PlayCasino_1xbet
https://shorturl.fm/XJbsa
https://shorturl.fm/XJbsa
https://shorturl.fm/tesa4
https://shorturl.fm/OZDTd
https://t.me/s/ofitsialniy_1win/33/evith
https://t.me/s/iw_1xbet
https://t.me/s/ofitsialniy_1win
https://t.me/s/Official_beefcasino
a3nyxl
https://t.me/bs_1xbet/17
https://t.me/s/bs_1xbet/48
https://t.me/s/bs_1xbet/42
https://t.me/bs_1xbet/8
https://t.me/bs_1xbet/42
https://t.me/bs_1xbet/7
https://t.me/s/bs_1xbet/38
https://t.me/s/bs_1xbet/46
https://t.me/s/bs_1xbet/40
https://t.me/bs_1xbet/15
https://t.me/s/bs_1xbet/3
https://t.me/s/bs_1xbet/40
https://t.me/bs_1xbet/29
https://t.me/bs_1xbet/38
https://t.me/s/bs_1xbet/48
https://t.me/bs_1xbet/22
https://t.me/bs_1xbet/24
https://t.me/s/bs_1xbet/28
https://t.me/s/bs_1xbet/17
https://t.me/s/bs_1xbet/26
https://t.me/bs_1xbet/29
https://t.me/s/bs_1xbet/47
https://t.me/bs_1xbet/3
https://t.me/bs_1xbet/48
https://t.me/s/bs_1xbet/45
https://t.me/s/bs_1xbet/49
https://t.me/s/bs_1xbet/7
https://t.me/bs_1xbet/50
https://t.me/s/bs_1xbet/44
https://t.me/s/bs_1xbet/48
https://t.me/s/bs_1xbet/25
https://t.me/bs_1xbet/15
https://t.me/bs_1xbet/19
https://t.me/s/bs_1xbet/48
https://t.me/s/bs_1xbet/42
https://t.me/bs_1xbet/24
https://t.me/s/bs_1xbet/36
https://t.me/bs_1xbet/20
https://t.me/s/bs_1xbet/26
https://t.me/bs_1xbet/48
https://t.me/s/bs_1xbet/19
https://shorturl.fm/BWEAT
https://shorturl.fm/Yt1NA
https://shorturl.fm/tDrpx
https://shorturl.fm/OMki9
https://t.me/s/jw_1xbet/612
https://t.me/s/jw_1xbet/301
https://shorturl.fm/koFrI
https://t.me/jw_1xbet/682
https://t.me/s/jw_1xbet/540
https://t.me/jw_1xbet/921
https://shorturl.fm/DxL8Z
https://t.me/s/bs_1Win/1261
https://t.me/bs_1Win/1045
https://t.me/s/bs_1Win/466
https://t.me/s/bs_1Win/574
https://t.me/bs_1Win/631
https://t.me/s/bs_1Win/912
https://t.me/bs_1Win/1168
https://t.me/bs_1Win/1229
https://t.me/bs_1Win/351
https://t.me/s/bs_1Win/1068
https://t.me/bs_1Win/463
https://t.me/bs_1Win/368
https://t.me/Official_mellstroy_casino/11
https://t.me/Official_mellstroy_casino/29
https://t.me/Official_mellstroy_casino/48
https://t.me/Beefcasino_rus/7
https://t.me/s/Official_mellstroy_casino/34
https://t.me/s/Official_mellstroy_casino/42
https://t.me/Official_mellstroy_casino/35
https://t.me/Official_mellstroy_casino/15
https://t.me/s/Official_mellstroy_casino/50
https://t.me/Official_mellstroy_casino/10
https://t.me/Official_mellstroy_casino/39
https://t.me/Official_mellstroy_casino/7
https://shorturl.fm/IfzZR
https://shorturl.fm/dlpbz
https://t.me/Best_promocode_rus/1923
https://t.me/s/Best_promocode_rus/58
https://shorturl.fm/NgjzK
https://shorturl.fm/e3yDn
https://shorturl.fm/rsQh1
https://t.me/Beefcasino_rus/57
https://t.me/ud_Booi/57
https://t.me/s/ud_Pinco/48
https://t.me/ud_Gama/62
https://t.me/s/ud_Martin/47
https://t.me/ud_1xSlots/47
https://t.me/?ud_1Go/50
https://t.me/ud_Legzo/46
https://t.me/ud_Sol/46
https://t.me/s/ud_1xSlots/51
https://t.me/ud_Casino_X/61
https://t.me/s/ud_JoyCasino/63
https://t.me/ud_Legzo/64
https://t.me/ud_Casino_X/64
https://t.me/ud_Casino_X/53
https://t.me/s/ud_Riobet/59
https://t.me/ud_Booi/62
https://shorturl.fm/8x6X6
https://t.me/ud_Drip/59
https://t.me/s/Beefcasino_rus/59
https://t.me/s/ud_Fresh/46
https://t.me/s/ud_DragonMoney/61
https://t.me/ud_1xSlots/60
https://t.me/ud_PlayFortuna/52
https://t.me/ud_Vodka/53
https://t.me/ud_Rox/54
https://t.me/s/ud_MrBit/49
https://t.me/s/ud_Fresh/57
https://t.me/ud_Kent/57
https://t.me/s/ud_Vodka/37
https://t.me/s/ud_Vodka/30
https://t.me/s/uD_dRagonMOneY
https://t.me/s/Ud_IZZI
https://t.me/s/uD_MOSTBEt
https://t.me/s/Beefcasino_rus
https://t.me/s/Ud_GiZbo
https://t.me/s/uD_ggbET
https://shorturl.fm/juEvW
https://t.me/s/UD_LegzO
https://t.me/official_1win_aviator/71
https://t.me/s/UD_BOoI
https://t.me/s/uD_1XBET
https://t.me/s/Ud_pIn_up
https://t.me/official_1win_aviator/102
https://t.me/s/ud_1Go
https://shorturl.fm/D7lTq
https://t.me/s/ud_1XsLOtS
https://t.me/s/UD_ROX
https://t.me/s/ud_JoycaSino
https://t.me/s/Ud_catcasINo
https://t.me/s/tf_1win
https://t.me/s/Top_bk_ru
https://t.me/s/Top_bk_ru
https://t.me/s/tf_1win
https://t.me/s/kfo_1win
https://t.me/official_1win_aviator/82
https://t.me/s/ud_keNT
https://t.me/s/UD_sOL
https://t.me/s/ud_IRwiN
https://t.me/s/ud_gIZbo
https://t.me/s/ud_1Go
https://t.me/s/uD_Izzi
https://shorturl.fm/sSSgE
https://t.me/s/Ud_CatCasINo
https://t.me/s/ud_riObet
https://t.me/s/uD_fLAgmAn
https://t.me/s/UD_VODKA
https://t.me/s/ud_DRagoNmonEY
https://shorturl.fm/ozqHn
https://t.me/s/ke_Gama
https://t.me/s/ke_Pokerdom
https://shorturl.fm/Idfb1
https://t.me/s/ke_Jet
https://t.me/s/official_1win_aviator/73
https://t.me/s/ke_Riobet
https://t.me/s/ke_Booi
https://t.me/s/kef_Rox
https://t.me/s/ke_Flagman
https://t.me/s/ke_1Win
https://t.me/s/ke_Daddy
https://t.me/s/ke_Monro
https://t.me/s/ke_Pinco
https://shorturl.fm/vj8ds
https://t.me/s/ke_Fresh
https://t.me/s/kef_beef
https://t.me/s/ke_CatCasino
https://t.me/s/ke_1xSlots
https://t.me/s/ke_Irwin
https://t.me/s/ke_mellstroy
https://t.me/s/ke_Gizbo
https://t.me/s/ke_Martin
https://t.me/s/ke_MostBet
https://t.me/s/ke_Pin_Up
https://t.me/s/ke_Drip
https://t.me/s/ke_Kometa
https://t.me/s/kef_Lex
https://t.me/s/ke_Legzo
https://t.me/s/ke_Volna
https://t.me/s/ke_Leon
https://t.me/s/ke_Stake
https://t.me/s/ke_Vulkan
https://shorturl.fm/tGCvM
https://t.me/official_1win_aviator/127
https://t.me/s/ke_PlayFortuna
https://t.me/s/ke_Starda
https://t.me/s/official_1win_aviator/398
https://t.me/s/ke_GGBet
https://shorturl.fm/bUfOK
https://t.me/s/ke_Vodka
https://t.me/s/ke_Sol
https://t.me/s/ke_DragonMoney
https://shorturl.fm/13oYG
https://shorturl.fm/9CDV1
https://t.me/s/topcasino_v_rossii
https://t.me/s/top_kazino_z
https://t.me/s/a_Top_onlinecasino/11
https://t.me/s/a_Top_onlinecasino/4
https://t.me/s/a_Top_onlinecasino/3
https://t.me/a_Top_onlinecasino/13
https://t.me/s/a_Top_onlinecasino/2
https://t.me/s/a_Top_onlinecasino/8
https://t.me/a_Top_onlinecasino/18
https://t.me/a_Top_onlinecasino/15
https://t.me/topcasino_rus/
https://shorturl.fm/6MIKg
https://shorturl.fm/ZRRpz
https://t.me/s/official_Flagman_es
https://t.me/s/official_Drip_es
https://t.me/s/official_Irwin_ed
https://shorturl.fm/ugjbw
https://t.me/s/official_MostBet_es
https://t.me/s/official_CatCasino_ed
https://t.me/s/official_Booi_ed
https://t.me/s/official_Daddy_es
https://t.me/s/official_Izzi_ed
https://t.me/s/official_1xSlots_ed
https://t.me/s/official_Gizbo_es
https://t.me/s/official_Vulkan_es
https://t.me/s/official_DragonMoney_es
https://t.me/s/official_Volna_es
https://t.me/s/official_Lex_es
https://t.me/s/official_Starda_es
https://t.me/s/official_GGBet_ed
https://t.me/s/official_Lex_ed
https://shorturl.fm/UWYtv
https://t.me/s/official_MrBit_ed
https://t.me/s/official_Sol_es
https://shorturl.fm/CTAMz
https://t.me/s/official_Leon_es
https://t.me/s/official_JoyCasino_ed
https://t.me/s/official_Kometa_es
https://t.me/s/official_Sol_ed
https://shorturl.fm/83bR1
https://t.me/s/official_Stake_ed
https://t.me/Izzi_egs/6
https://t.me/s/CatCasino_egs/13
https://t.me/Monro_egs/7
https://t.me/s/iGaming_live/4557
https://t.me/Jet_egs/22
https://t.me/s/Booi_egs/5
https://t.me/s/Sol_egs/12
https://t.me/Pinco_egs/21
https://t.me/s/Stake_egs/22
https://t.me/s/Daddy_egs/15
https://t.me/MostBet_egs/13
https://t.me/s/JoyCasino_egs/9
https://t.me/GGBet_egs/7
https://t.me/Irwin_egs/11
https://t.me/s/Daddy_egs/5
https://t.me/CasinoX_egs/20
https://t.me/s/Starda_egs/22
https://t.me/Vulkan_egs/20
https://t.me/Flagman_egs/3
https://t.me/MrBit_egs/6
https://t.me/CatCasino_egs/17
https://t.me/s/Izzi_egs/15
https://t.me/s/Flagman_egs/12
https://t.me/s/va_1xbet/15
https://t.me/s/iGaming_live/4640
https://t.me/s/va_1xbet/14
https://t.me/va_1xbet/22
https://t.me/va_1xbet/24
https://t.me/va_1xbet/11
https://t.me/s/va_1xbet
https://t.me/s/va_1xbet/18
https://t.me/va_1xbet/10
https://t.me/s/va_1xbet/17
https://t.me/s/va_1xbet/12
https://shorturl.fm/QjBAF
https://t.me/s/va_1xbet/3
https://t.me/va_1xbet/15
https://t.me/va_1xbet/19
https://t.me/s/surgut_narashchivaniye_nogtey/8
https://t.me/surgut_narashchivaniye_nogtey/6
https://t.me/surgut_narashchivaniye_nogtey
https://t.me/s/ah_1xbet/18
https://t.me/ah_1xbet/16
https://t.me/s/ah_1xbet/4
https://t.me/ah_1xbet/18
https://t.me/s/ah_1xbet/15
https://t.me/ah_1xbet/10
https://t.me/s/ah_1xbet/22
https://t.me/s/ah_1xbet/8
https://t.me/s/ah_1xbet/5
https://t.me/ah_1xbet/9
https://t.me/s/ah_1xbet/21
https://shorturl.fm/LaSrp
https://t.me/s/Best_rating_casino
https://shorturl.fm/nfN69
https://shorturl.fm/U1LUW
https://shorturl.fm/OTrB0
https://shorturl.fm/ROpMY
https://t.me/reyting_topcazino/15
https://shorturl.fm/iZc90
https://t.me/topcasino_rus/
https://shorturl.fm/5RxUw
https://t.me/top_ratingcasino/5
https://t.me/top_ratingcasino/8
https://t.me/top_ratingcasino/9
https://t.me/a_Topcasino/9
https://shorturl.fm/fGaJi
https://t.me/a_Topcasino/2
https://t.me/top_ratingcasino/10
https://t.me/top_ratingcasino/7
https://telegra.ph/Top-kazino-11-14-2
https://t.me/s/kazino_bez_filtrov
https://t.me/kazino_bez_filtrov
https://t.me/da_1xbet/9
https://t.me/da_1xbet/11
https://t.me/da_1xbet/2
https://t.me/da_1xbet/6
https://t.me/da_1xbet/13
https://t.me/da_1xbet/7
https://shorturl.fm/ZPdwD
https://t.me/da_1xbet/4
https://t.me/Best_promocode_rus/442
https://t.me/da_1xbet/8
https://t.me/da_1xbet/15
https://shorturl.fm/nGuRg
https://shorturl.fm/iAB3l
https://t.me/rq_1xbet/711
https://t.me/rq_1xbet/1324
https://t.me/rq_1xbet/1403
https://t.me/s/rq_1xbet/627
https://t.me/s/rq_1xbet/1293
https://t.me/s/rq_1xbet/965
https://t.me/s/rq_1xbet/883
https://t.me/Official_1xbet1/363
https://t.me/Official_1xbet1/500
https://t.me/Official_1xbet1/244
https://t.me/Official_1xbet1/635
https://t.me/s/Official_1xbet1/1078
https://t.me/Official_1xbet1/312
https://t.me/Official_1xbet1/88
https://t.me/Official_1xbet1/797
https://shorturl.fm/y1Nch
https://shorturl.fm/66vaK
https://shorturl.fm/sQLDH
https://shorturl.fm/jal1d
https://shorturl.fm/EsGsc
https://shorturl.fm/LvJxO
https://shorturl.fm/6KTDk
https://shorturl.fm/rZCbJ
https://shorturl.fm/zbxUP
That’s a fascinating point about blending tradition with modern tech! It reminds me of bigbunny game – they’re really leaning into Filipino culture, even with registration! A unique approach to online gaming, for sure. 🤔
That’s a fascinating point about blending tradition with modern tech! It reminds me of bigbunny game – they’re really leaning into Filipino culture, even with registration! A unique approach to online gaming, for sure. 🤔
https://shorturl.fm/LjJ07
https://shorturl.fm/utV5c
https://shorturl.fm/Lbxkd
https://shorturl.fm/5xcAq
https://shorturl.fm/0DpeG
https://shorturl.fm/Pz11I
I every time emailed this blog post page to all my associates, because if like to read it next my links will too.
I am sure this paragraph has touched all the internet people, its really really good paragraph on building up new weblog.
Claim 5% Rebate and Exclusive Bonuses on AsterDEX https://is.gd/CGTnqR
https://t.me/s/it_EZCasH
Fast indexing of website pages and backlinks on Google https://is.gd/r7kPlC
I am always looking online for posts that can assist me. Thank you!
Become our partner and turn referrals into revenue—join now!
You are my inhalation, I own few blogs and occasionally run out from post :). “Follow your inclinations with due regard to the policeman round the corner.” by W. Somerset Maugham.
В мире игр, где каждый площадка пытается заманить гарантиями быстрых выигрышей, казино рейтинг лучших
становится той самой картой, что ведет мимо заросли рисков. Тем профи плюс начинающих, кто устал с пустых обещаний, он помощник, чтобы увидеть настоящую rtp, будто ощущение золотой монеты на руке. Обходя лишней ерунды, только реальные клубы, где выигрыш не лишь число, а ощутимая везение.Составлено по гугловых трендов, словно паутина, что захватывает самые горячие веяния на рунете. Здесь нет роли про стандартных приёмов, любой элемент словно ставка в столе, там блеф выявляется сразу. Хайроллеры видят: по стране тон письма и подтекстом, в котором юмор притворяется под рекомендацию, позволяет миновать рисков.В http://www.don8play.ru такой список ждёт будто открытая раздача, готовый на старту. Загляни, коли желаешь увидеть ритм настоящей азарта, без мифов да провалов. Тем что знает вес выигрыша, такое словно держать карты в пальцах, вместо глядеть по монитор.
https://t.me/ta_1win/1468
https://t.me/s/Russia_Casino_1win
Join our affiliate community and maximize your profits!
This is a topic that’s near to my heart… Many thanks! Where are your contact details though?
Hi https://is.gd/9PLRLO
Hello https://is.gd/tvHMGJ
Ahaa, its nice discussion about this piece of writing at this place at this blog, I have read all that, so at this time me also commenting at this place.
AI Girls Video
1609bp
Wow, this paragraph is fastidious, my younger sister is analyzing these things, thus I am going to convey her.
Wonderful beat ! I would like to apprentice at the same time as you amend your web site, how could i subscribe for a weblog site? The account helped me a appropriate deal. I had been tiny bit familiar of this your broadcast offered shiny clear concept
Turn referrals into revenue—sign up for our affiliate program today!
Be rewarded for every click—join our affiliate program today!
Be rewarded for every click—join our affiliate program today!
Get rewarded for every recommendation—join our affiliate network!
Maximize your earnings with top-tier offers—apply now!
I am sure this piece of writing has touched all the internet users, its really really good post on building up new web site.
Everyone loves what you guys are usually up too. This type of clever work and reporting! Keep up the excellent works guys I’ve incorporated you guys to my personal blogroll.
Share our offers and watch your wallet grow—become an affiliate!
I will immediately grasp your rss feed as I can’t to find your email subscription hyperlink or newsletter service. Do you’ve any? Kindly permit me understand so that I may subscribe. Thanks.
Share your unique link and cash in—join now!