

Beneath the gleaming surface of your car lies an intricate web of wires—silent conductors that keep everything from your headlights to your dashboard indicators humming smoothly. Yet, when these vital pathways falter, even the simplest drive can turn into a frustrating puzzle. Knowing how to check your car’s wiring system isn’t just for mechanics; it’s a skill that empowers every driver to spot potential issues early and keep their vehicle running safely. In this article, we’ll unravel the basics of automotive wiring inspection, guiding you through the steps to understand, troubleshoot, and maintain this electrical lifeline with confidence.
Table of Contents
- Understanding the Basics of Your Car’s Wiring System
- Identifying Common Wiring Issues and Their Symptoms
- Tools and Equipment You Need for Effective Wiring Inspection
- Step-by-Step Guide to Visually Inspecting Your Car’s Wiring
- Testing Electrical Connections Safely and Accurately
- Maintenance Tips to Prevent Future Wiring Problems
- Q&A
- To Wrap It Up
Understanding the Basics of Your Car’s Wiring System
Your car’s wiring system is essentially its nervous system, responsible for transmitting electricity to all essential components. At its core, it consists of a network of cables, connectors, and fuses designed to power everything from your headlights to the dashboard controls. Understanding the layout and function of these wires can help you spot issues before they escalate. Typically, wires are color-coded to indicate their purpose, such as red for power supply and black for grounding. Familiarizing yourself with your car’s wiring diagram, which you can usually find in the owner’s manual, will give you a clear map to navigate this intricate web.
When inspecting the wiring system, focus on several key areas to ensure everything is in proper working order:
- Check for worn or frayed wires: Damaged insulation can cause shorts or expose live wires.
- Test connection points: Loose or corroded connectors often disrupt electrical flow.
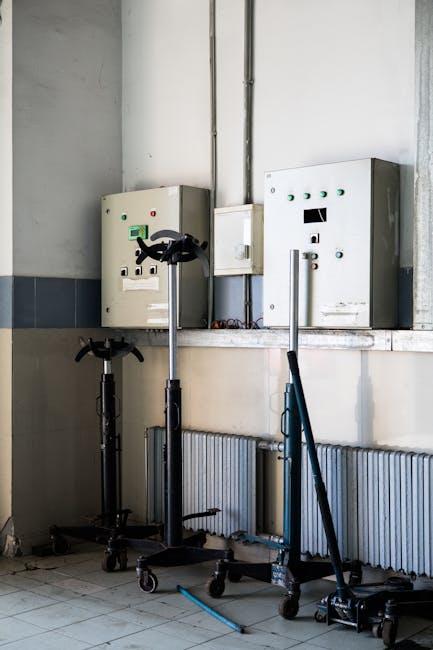
- Inspect fuse boxes: Blown fuses can signal underlying electrical problems.
- Look for signs of overheating: Melted wires or connectors may indicate excessive current load.
| Wire Color | Function | Common Issues |
|---|---|---|
| Red | Power supply | Short circuits from damaged insulation |
| Black | Ground connection | Loose connections causing intermittent failures |
| Yellow | Ignition system | Corroded connectors affecting startup |
Identifying Common Wiring Issues and Their Symptoms
When it comes to your car’s wiring, subtle signs often point to deeper electrical problems. Flickering dashboard lights or intermittent issues with power windows and locks frequently signal loose or corroded connections. Another common symptom is a burning smell, which might indicate overheated wires due to poor insulation or overloaded circuits. These wiring issues don’t just cause annoyances—they can lead to expensive repairs or safety hazards if ignored. Keep an eye out for unusual odors, flickering lights, and inconsistent electrical performance as early warning signs.
Below is a quick guide to some typical wiring glitches and their telltale symptoms:
| Wiring Problem | Common Symptoms |
|---|---|
| Frayed Wires | Intermittent electrical failures, exposed bare wires |
| Corroded Connectors | Dim headlights, slow power accessories |
| Short Circuits | Blown fuses, sparking, system shutdowns |
| Loose Connections | Flickering electronics, unexpected shutdowns |
Tools and Equipment You Need for Effective Wiring Inspection
To thoroughly inspect your car’s wiring system, having the right set of tools is crucial. A reliable multimeter will allow you to measure voltage, resistance, and current, making it easier to detect faulty circuits or broken wires. Pair it with a test light for quick checks of power flow in key wiring points. Don’t forget a set of wire strippers and crimpers for preparing your wiring and making secure connections. Additionally, a wiring diagram specific to your car model is indispensable for tracing circuits and understanding the complex layout beneath your dashboard.
Aside from these essentials, having some auxiliary tools can significantly streamline your inspection process. A digital inspection camera helps in visualizing hard-to-reach wiring areas without disassembling large parts of your car. Keep a circuit breaker finder handy to quickly identify circuits under load, and a selection of electrical tapes and heat shrink tubes ensures safe and professional repairs. Below is a simple guide to essential tools categorized by function:
| Tool | Purpose | Tip |
|---|---|---|
| Multimeter | Measure voltage, resistance, current | Choose a model with auto-ranging for ease |
| Test Light | Quick power flow diagnosis | Use before multimeter to save time |
| Wire Strippers & Crimpers | Prepare and secure wire connections | Match size to wire gauge for clean cuts |
| Inspection Camera | View inaccessible wiring areas | Go for waterproof and flexible heads |
| Electrical Tape & Heat Shrink Tubes | Insulate and protect wiring | Use heat shrink for longer-lasting repairs |
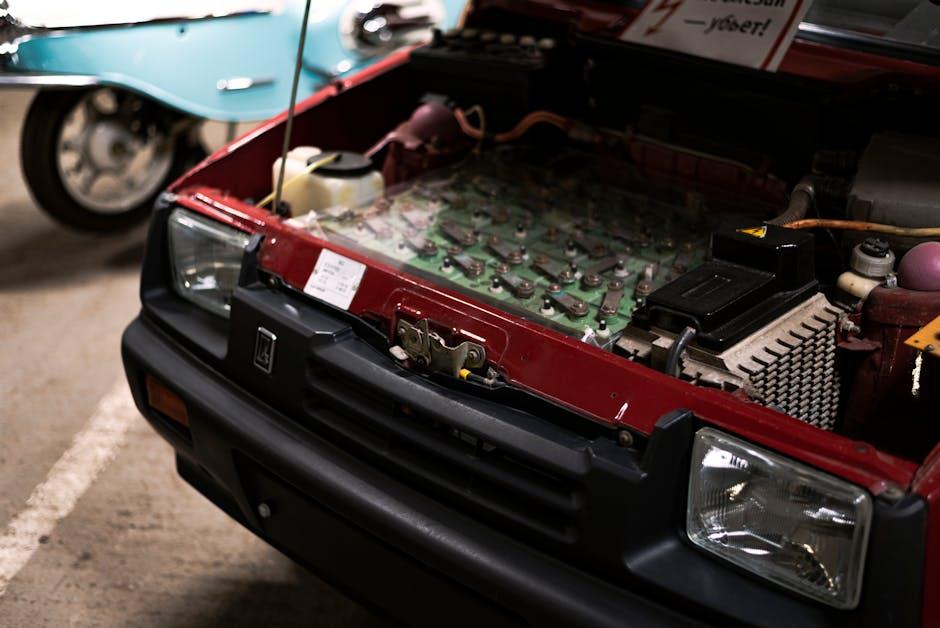
Step-by-Step Guide to Visually Inspecting Your Car’s Wiring
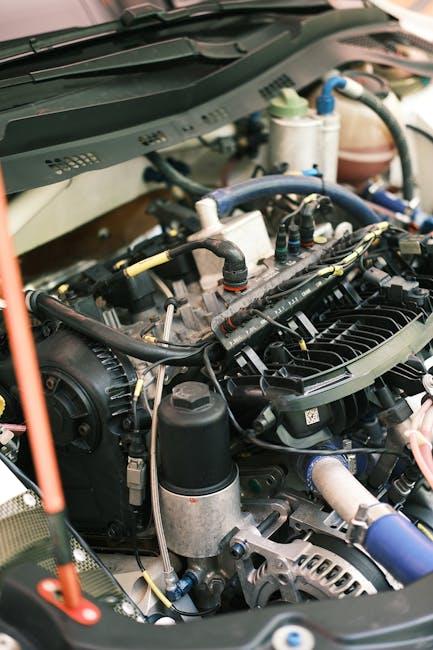
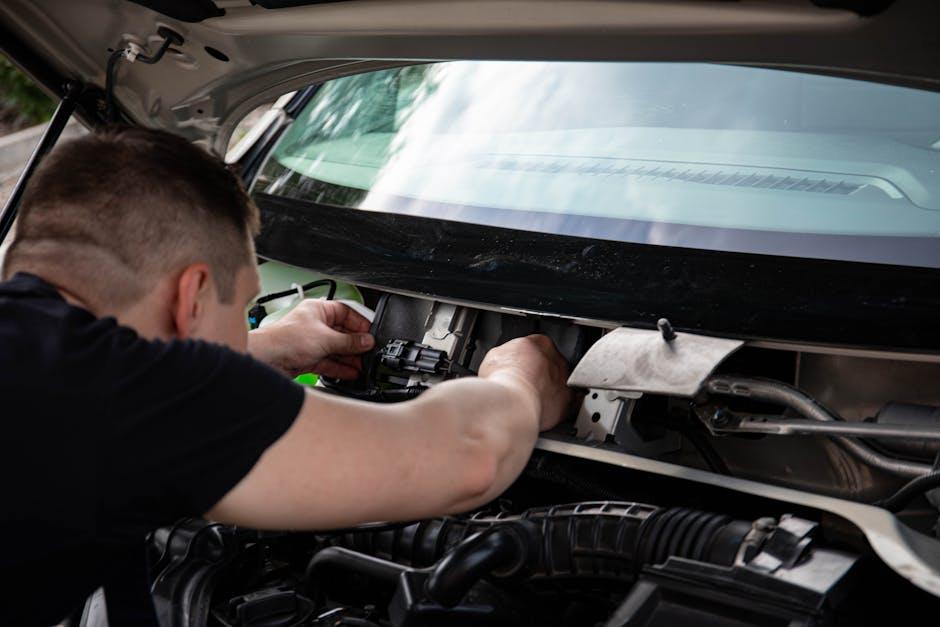
Begin by safely opening the hood and disconnecting the car battery to avoid any electrical hazards. Use a flashlight to get a clear view of your wiring system, paying close attention to the main harnesses running along the engine and firewall. Look for any signs of damage such as frayed insulation, exposed wires, and melted connectors. It’s important to gently feel along the wires as well, checking for areas that feel brittle or unusually soft, which can indicate internal damage or corrosion.
Next, focus on the connectors and junction points. These can often be a hotspot for issues due to moisture buildup or dirt. Clean these areas with electrical contact cleaner if needed, and check for secure connections. Be on the lookout for discoloration or burnt marks that may hint at short circuits. As you inspect, consider using this quick reference table to identify symptoms of common wiring problems:
| Symptom | Possible Wiring Issue |
|---|---|
| Flickering dashboard lights | Loose or corroded connections |
| Burning smell near fuse box | Overheated wires or shorts |
| Non-functioning headlights | Broken or frayed wires |
| Intermittent engine stalls | Damaged wiring harness |

Testing Electrical Connections Safely and Accurately
Ensuring the safety and precision of your electrical inspections begins with the right approach and tools. Always disconnect the vehicle’s battery before engaging with any wiring to prevent accidental shorts or shocks. Use a digital multimeter set to the correct voltage or continuity mode, and handle all probes with steady hands to avoid damaging delicate wires or components. It’s crucial to identify and label each circuit, especially in complex harnesses, to keep track of your testing process without confusion.
Developing a systematic routine enhances accuracy and reduces errors. Consider the checklist below to maintain consistency:
- Check for visible damage such as corrosion or frayed wires
- Test voltage supply at each connection point
- Verify grounding connections with continuity tests
- Confirm the integrity of fuses and relays associated with the wiring
| Test Type | Purpose | Recommended Setting |
|---|---|---|
| Voltage Test | Check power supply in circuits | DC Voltage (20V) |
| Continuity Test | Detect breaks or poor connections | Continuity/Ohms |
| Resistance Test | Measure wire or component resistance | Ohms (Ω) |
Following these techniques will ensure your wiring system is assessed both safely and with accuracy, giving you confidence in your car’s electrical health.
Maintenance Tips to Prevent Future Wiring Problems
Consistent care can save you from unexpected electrical failures. Start by periodically inspecting the wiring harnesses for any signs of chafing or cracks in the insulation. Dirt, moisture, and heat are relentless foes; keeping the engine bay clean and dry will drastically reduce corrosion risks. Use dielectric grease on connectors to ward off oxidation, ensuring a steady flow of electricity without interruptions. Remember, even the smallest amount of debris can cause a short circuit, so attention to detail is paramount.
Implementing a maintenance log can help in tracking the health of your car’s wiring. Below is a simple checklist you can follow to stay ahead of any issues:
- Check battery terminals for corrosion and tight connections
- Inspect fuses and replace blown ones promptly
- Look for loose or exposed wires under the dashboard and near the fuse box
- Test lights and electronic components regularly
- Consult your vehicle’s service manual for wiring diagrams during inspections
| Maintenance Task | Recommended Frequency | Tools Needed |
|---|---|---|
| Wiring Inspection | Every 6 months | Flashlight, insulated gloves |
| Connector Cleaning | Annually | Dielectric grease, contact cleaner |
| Fuse Check | Quarterly | Fuse puller, multi-meter |
Q&A
Q: Why should I check my car’s wiring system?
A: Your car’s wiring system is like its nervous system—it sends signals to make everything work, from lights to the engine. Checking it regularly helps prevent electrical failures, avoid costly repairs, and keep you safe on the road.
Q: How often should I inspect my car’s wiring?
A: It’s good to give your wiring a quick look during routine maintenance—about every 6 months or whenever you notice electrical issues like flickering lights or malfunctioning gadgets.
Q: What tools do I need to check my car’s wiring?
A: Basic tools include a multimeter to test voltage and continuity, a flashlight for better visibility, wire strippers, electrical tape, and possibly a wiring diagram for your specific car model.
Q: Where should I start when checking the wiring system?
A: Begin with the battery and its terminals, ensuring a clean and tight connection. Then inspect fuses and relays, followed by visible wires and connectors for signs of wear, corrosion, or damage.
Q: What are common signs of wiring problems?
A: Look out for burnt smells, melted insulation, exposed wires, intermittent electrical faults, or dashboard warning lights. These symptoms often indicate wiring issues that need attention.
Q: How do I test a wire’s integrity?
A: Use a multimeter set to continuity mode. Disconnect the power, touch the probes to each end of the wire, and listen for a beep or see a reading indicating the wire is intact.
Q: Can I fix wiring issues myself?
A: Minor repairs like replacing a blown fuse, tightening loose connections, or wrapping frayed wires with electrical tape are doable. However, complex issues should be handled by a professional to avoid risks.
Q: What precautions should I take while inspecting wiring?
A: Always disconnect the battery before working on electrical components to prevent shocks or shorts. Work in a well-lit area and avoid touching metal parts that could cause sparks.
Q: When should I see a professional?
A: If you encounter melted wires, burnt smells, persistent electrical problems, or if you’re unsure about any step, consult a certified mechanic or auto electrician to ensure safety and proper repair.
Q: How can I prevent wiring problems in the future?
A: Keep battery terminals clean, avoid overloading circuits with aftermarket electronics, protect wiring from moisture and rodents, and schedule regular vehicle check-ups. Preventing issues is easier than fixing them!
To Wrap It Up
In the intricate dance of wires beneath your car’s hood, knowledge is your most reliable tool. By understanding how to check your car’s wiring system, you not only ensure smooth rides but also safeguard your vehicle’s longevity and your peace of mind. So next time your dashboard flickers or your headlights dim, you’ll know exactly where to look—and what steps to take. After all, a well-wired car isn’t just a machine; it’s a trusted companion on every journey.
806 Comments
https://shorturl.fm/byc60
https://shorturl.fm/ZFTAS
https://shorturl.fm/TpCbC
https://shorturl.fm/TBpdX
https://shorturl.fm/l8U7A
https://shorturl.fm/VGicX
https://shorturl.fm/CG1sX
https://shorturl.fm/N80mP
https://shorturl.fm/0TbYs
w247t8
https://shorturl.fm/zMDbo
https://shorturl.fm/XXfUm
https://shorturl.fm/U7IEP
https://shorturl.fm/u2G2n
https://shorturl.fm/2EsdW
https://shorturl.fm/WMHNC
https://shorturl.fm/E930d
https://shorturl.fm/tGsiI
https://shorturl.fm/AvuoS
https://shorturl.fm/9osYc
https://shorturl.fm/TaDwY
https://shorturl.fm/VRYon
https://shorturl.fm/eyKHN
https://shorturl.fm/XVIKG
https://shorturl.fm/IeZBM
r8bbye
https://shorturl.fm/T997O
https://shorturl.fm/MfGvK
https://shorturl.fm/8yQvT
i2jia1
https://shorturl.fm/0SUSk
https://shorturl.fm/qu33p
https://shorturl.fm/qONQo
https://shorturl.fm/xzeLw
https://shorturl.fm/7IyXf
https://shorturl.fm/FB6Lc
https://shorturl.fm/LnFJt
https://shorturl.fm/6cl6D
https://shorturl.fm/51e9F
https://shorturl.fm/MpBLU
https://shorturl.fm/UU8cE
https://shorturl.fm/aPOkg
https://shorturl.fm/7neDC
486kvp
https://shorturl.fm/HgHWY
https://shorturl.fm/7N9rn
https://shorturl.fm/1ug14
https://shorturl.fm/qtD7D
https://shorturl.fm/VdWXr
https://shorturl.fm/plixS
https://shorturl.fm/3C6sq
https://shorturl.fm/GCtJU
https://shorturl.fm/Fzxbn
bhkr9s
https://shorturl.fm/bkkPb
https://shorturl.fm/xaopZ
ko2z0l
https://shorturl.fm/R9GGM
https://shorturl.fm/Z0c7k
https://shorturl.fm/KT818
https://shorturl.fm/KCrDO
https://shorturl.fm/hW1T2
https://shorturl.fm/Udvz6
https://shorturl.fm/tzfFL
https://shorturl.fm/FZJap
https://shorturl.fm/z7yFm
https://shorturl.fm/Tncwf
https://shorturl.fm/rlIS1
https://shorturl.fm/VPvLQ
https://shorturl.fm/lua2o
https://shorturl.fm/xYJrJ
4oev1h
https://shorturl.fm/WD6T3
https://shorturl.fm/G6iWb
https://shorturl.fm/WlCQK
https://shorturl.fm/1B7Rt
https://shorturl.fm/Ej6I8
https://shorturl.fm/jUKMa
https://shorturl.fm/uM1Cg
https://shorturl.fm/GkTeH
https://shorturl.fm/ntd7Q
https://shorturl.fm/jKd0W
https://shorturl.fm/ESpjT
https://shorturl.fm/kHCWo
https://shorturl.fm/C5jxe
https://shorturl.fm/u6mpl
https://shorturl.fm/e7KHA
https://shorturl.fm/vrfnB
https://shorturl.fm/50FlZ
https://shorturl.fm/UGsHZ
zrpwmd
https://shorturl.fm/xk3i7
https://shorturl.fm/gNijr
https://shorturl.fm/0Ji03
https://shorturl.fm/GABN6
https://shorturl.fm/U4sLe
https://t.me/s/Online_1_xbet/571
https://shorturl.fm/90RnV
https://shorturl.fm/ZECjZ
https://t.me/s/Online_1_xbet/3134
https://t.me/s/Official_1xbet_1xbet
https://t.me/s/rating_online/6
https://t.me/s/rating_online/9
https://shorturl.fm/6CD1B
https://t.me/rating_online/2
https://t.me/s/rating_online/1
https://t.me/s/rating_online/4
https://t.me/s/rating_online/7
https://t.me/rating_online/6
https://t.me/rating_online/8
https://shorturl.fm/geO9x
https://t.me/Online_1_xbet/2298
https://t.me/Online_1_xbet/2561
https://t.me/Online_1_xbet/3553
https://t.me/Online_1_xbet/2551
vu0hln
https://t.me/Online_1_xbet/1825
https://t.me/Online_1_xbet/2430
https://t.me/Online_1_xbet/3407
https://t.me/Online_1_xbet/3012
https://t.me/Online_1_xbet/3036
https://t.me/Online_1_xbet/3183
https://shorturl.fm/60Qno
https://t.me/Online_1_xbet/2582
https://t.me/Online_1_xbet/3146
https://t.me/Official_1xbet_1xbet/s/1389
https://t.me/Official_1xbet_1xbet/s/1540
https://t.me/Official_1xbet_1xbet/s/160
https://t.me/Official_1xbet_1xbet/s/636
https://t.me/Official_1xbet_1xbet/s/939
https://t.me/Official_1xbet_1xbet/s/1450
https://t.me/Official_1xbet_1xbet/s/1303
https://t.me/Official_1xbet_1xbet/s/1485
https://t.me/Official_1xbet_1xbet/s/1100
https://t.me/Official_1xbet_1xbet/s/1031
https://t.me/Official_1xbet_1xbet/s/111
https://t.me/Official_1xbet_1xbet/s/1331
https://t.me/Official_1xbet_1xbet/s/639
https://t.me/Official_1xbet_1xbet/s/1551
https://t.me/Official_1xbet_1xbet/s/857
https://t.me/Official_1xbet_1xbet/s/85
https://t.me/Official_1xbet_1xbet/s/402
https://t.me/Official_1xbet_1xbet/s/779
https://t.me/Official_1xbet_1xbet/s/919
https://t.me/Official_1xbet_1xbet/s/1417
https://t.me/Official_1xbet_1xbet/s/852
https://t.me/Official_1xbet_1xbet/s/922
https://t.me/Official_1xbet_1xbet/s/1181
https://t.me/Official_1xbet_1xbet/s/135
https://t.me/Official_1xbet_1xbet/s/669
https://t.me/Official_1xbet_1xbet/s/1437
https://t.me/Official_1xbet_1xbet/s/736
https://t.me/Official_1xbet_1xbet/s/362
https://t.me/Official_1xbet_1xbet/s/156
https://t.me/Official_1xbet_1xbet/s/365
https://t.me/Official_1xbet_1xbet/s/678
https://t.me/Official_1xbet_1xbet/s/675
https://t.me/Official_1xbet_1xbet/s/1333
https://t.me/Official_1xbet_1xbet/s/940
https://t.me/Official_1xbet_1xbet/s/838
https://t.me/Official_1xbet_1xbet/s/536
https://t.me/Official_1xbet_1xbet/s/1552
https://t.me/Official_1xbet_1xbet/s/602
https://t.me/Official_1xbet_1xbet/s/540
https://t.me/Official_1xbet_1xbet/s/1242
https://t.me/Official_1xbet_1xbet/s/1051
https://t.me/Official_1xbet_1xbet/s/471
https://t.me/Official_1xbet_1xbet/s/238
https://t.me/Official_1xbet_1xbet/s/996
https://t.me/Official_1xbet_1xbet/s/1504
https://t.me/Official_1xbet_1xbet/1735
https://t.me/Official_1xbet_1xbet/1745
https://t.me/Official_1xbet_1xbet/1619
https://t.me/s/Official_1xbet_1xbet/1657
https://t.me/s/Official_1xbet_1xbet/1776
https://t.me/s/Official_1xbet_1xbet/1825
https://t.me/Official_1xbet_1xbet/1818
https://shorturl.fm/2LqbI
https://t.me/Official_1xbet_1xbet/1769
https://t.me/Official_1xbet_1xbet/1596
https://shorturl.fm/Vj3py
https://t.me/s/Official_1xbet_1xbet/1700
https://t.me/s/Official_1xbet_1xbet/1701
https://t.me/s/Official_1xbet_1xbet/1732
https://t.me/Official_1xbet_1xbet/1693
https://t.me/s/Official_1xbet_1xbet/1756
https://t.me/s/Official_1xbet_1xbet/1658
https://t.me/Official_1xbet_1xbet/1668
https://t.me/s/Official_1xbet_1xbet/1644
https://t.me/s/Official_1xbet_1xbet/1750
https://t.me/s/Official_1xbet_1xbet/1806
https://t.me/Official_1xbet_1xbet/1852
https://t.me/Official_1xbet_1xbet/1731
https://t.me/Official_1xbet_1xbet/1599
https://t.me/Official_1xbet_1xbet/1766
https://t.me/s/Official_1xbet_1xbet/1697
https://t.me/Official_1xbet_1xbet/1609
https://t.me/Official_1xbet_1xbet/1726
https://t.me/s/Official_1xbet_1xbet/1693
https://t.me/Official_1xbet_1xbet/1685
https://t.me/Official_1xbet_1xbet/1787
https://t.me/s/Official_1xbet_1xbet/1622
https://t.me/s/Official_1xbet_1xbet/1681
https://t.me/Official_1xbet_1xbet/1847
https://t.me/Official_1xbet_1xbet/1739
https://t.me/s/Official_1xbet_1xbet/1843
https://t.me/s/Official_1xbet_1xbet/1674
https://shorturl.fm/pdDkW
https://t.me/Official_1xbet_1xbet/1762
https://shorturl.fm/X33ox
https://t.me/s/Official_1xbet_1xbet/1646
https://t.me/s/Official_1xbet_1xbet/1676
https://t.me/Official_1xbet_1xbet/1629
https://t.me/Official_1xbet_1xbet/1641
https://t.me/Official_1xbet_1xbet/1834
https://t.me/s/Official_1xbet_1xbet/1652
https://t.me/s/Official_1xbet_1xbet/1603
https://t.me/Official_1xbet_1xbet/1757
https://t.me/Official_1xbet_1xbet/1627
https://t.me/Official_1xbet_1xbet/1740
https://t.me/s/Official_1xbet_1xbet/1721
https://t.me/Official_1xbet_1xbet/1781
https://t.me/s/Official_1xbet_1xbet/1663
https://t.me/Official_1xbet_1xbet/1747
https://t.me/Official_1xbet_1xbet/1648
https://t.me/Official_1xbet_1xbet/1676
https://t.me/s/Official_1xbet_1xbet/1737
https://t.me/s/Official_1xbet_1xbet/1795
https://t.me/s/Official_1xbet_1xbet/1739
https://t.me/s/Official_1xbet_1xbet/1686
https://t.me/Official_1xbet_1xbet/1643
https://t.me/s/Official_1xbet_1xbet/1755
https://t.me/s/Official_1xbet_1xbet/1751
https://t.me/Official_1xbet_1xbet/1610
https://t.me/s/Official_1xbet_1xbet/1807
https://t.me/Official_1xbet_1xbet/1749
https://t.me/Official_1xbet_1xbet/1850
https://t.me/s/Official_1xbet_1xbet/1722
https://t.me/Official_1xbet_1xbet/1705
https://t.me/s/Official_1xbet_1xbet/1694
https://t.me/s/topslotov
https://shorturl.fm/ZIV7x
uceqgf
https://t.me/s/official_1win_aviator
https://shorturl.fm/svx1a
https://t.me/s/reiting_top10_casino/5
https://t.me/s/reiting_top10_casino/4
https://t.me/reiting_top10_casino
https://t.me/reiting_top10_casino/6
https://t.me/reiting_top10_casino/2
https://t.me/s/reiting_top10_casino/2
https://t.me/s/reiting_top10_casino/10
https://t.me/reiting_top10_casino/10
https://t.me/reiting_top10_casino/9
https://t.me/reiting_top10_casino/5
https://t.me/s/reiting_top10_casino/9
https://t.me/s/reiting_top10_casino/7
https://shorturl.fm/GL5oJ
https://t.me/s/reiting_top10_casino
https://t.me/s/reiting_top10_casino/3
https://t.me/reiting_top10_casino/7
https://shorturl.fm/VME0m
https://shorturl.fm/NQuzY
https://shorturl.fm/wrP6B
https://shorturl.fm/VME0m
https://t.me/reiting_top10_casino/4
https://t.me/reiting_top10_casino/8
https://t.me/s/reiting_top10_casino/8
https://t.me/s/reiting_top10_casino/6
https://shorturl.fm/0oqKH
https://shorturl.fm/iBe2L
https://shorturl.fm/Jn05Y
https://shorturl.fm/XMzof
https://t.me/s/Gaming_1xbet
https://t.me/s/PlayCasino_1xbet
https://t.me/s/PlayCasino_1win
https://t.me/s/PlayCasino_1win
https://t.me/s/PlayCasino_1xbet
https://shorturl.fm/zu2CA
https://shorturl.fm/j5JP3
https://shorturl.fm/iYS2s
https://t.me/s/ofitsialniy_1win/33/evith
https://t.me/s/ofitsialniy_1win
https://t.me/s/Official_beefcasino
https://t.me/s/iw_1xbet
y5ya87
https://shorturl.fm/LjDHG
https://t.me/bs_1xbet/2
https://t.me/bs_1xbet/46
https://t.me/bs_1xbet/15
https://t.me/s/bs_1xbet/20
https://t.me/s/bs_1xbet/42
https://t.me/s/bs_1xbet/25
https://t.me/bs_1xbet/39
https://t.me/s/bs_1xbet/25
https://t.me/bs_1xbet/32
https://t.me/s/bs_1xbet/36
https://t.me/bs_1xbet/9
https://t.me/s/bs_1xbet/6
https://t.me/bs_1xbet/37
https://t.me/bs_1xbet/42
https://t.me/bs_1xbet/45
https://t.me/s/bs_1xbet/19
https://t.me/bs_1xbet/28
https://t.me/s/bs_1xbet/46
https://t.me/bs_1xbet/36
https://t.me/s/bs_1xbet/3
https://t.me/s/bs_1xbet/43
https://t.me/s/bs_1xbet/31
https://t.me/s/bs_1xbet/4
https://t.me/s/bs_1xbet/23
https://t.me/bs_1xbet/41
https://t.me/s/bs_1xbet/29
https://t.me/s/bs_1xbet/31
https://t.me/bs_1xbet/34
https://t.me/s/bs_1xbet/33
https://t.me/bs_1xbet/11
https://t.me/s/bs_1xbet/21
https://t.me/s/bs_1xbet/23
https://t.me/s/bs_1xbet/18
https://t.me/s/bs_1xbet/9
https://t.me/s/bs_1xbet/13
https://t.me/bs_1xbet/47
https://shorturl.fm/FxTUi
https://shorturl.fm/CWoE8
https://shorturl.fm/mOukW
https://t.me/s/jw_1xbet/354
https://t.me/jw_1xbet/251
https://t.me/s/jw_1xbet/886
https://shorturl.fm/k30TY
https://t.me/s/jw_1xbet/755
https://t.me/jw_1xbet/227
https://t.me/jw_1xbet/623
https://shorturl.fm/JlspO
https://t.me/bs_1Win/1081
https://t.me/s/bs_1Win/1079
https://t.me/bs_1Win/824
https://t.me/s/bs_1Win/624
https://t.me/s/bs_1Win/736
https://t.me/bs_1Win/552
https://t.me/bs_1Win/761
https://t.me/s/bs_1Win/673
https://t.me/bs_1Win/878
https://t.me/bs_1Win/693
https://t.me/s/bs_1Win/631
https://t.me/s/bs_1Win/469
https://t.me/s/bs_1Win/561
https://t.me/Official_mellstroy_casino/32
https://t.me/s/Official_mellstroy_casino/53
https://t.me/s/Beefcasino_rus/54
https://t.me/Official_mellstroy_casino/51
https://t.me/s/Official_mellstroy_casino/32
https://t.me/Official_mellstroy_casino/15
https://t.me/Official_mellstroy_casino/28
https://t.me/s/Official_mellstroy_casino/29
https://t.me/Official_mellstroy_casino/48
https://t.me/Official_mellstroy_casino/24
https://t.me/Official_mellstroy_casino/19
https://t.me/Official_mellstroy_casino/18
https://shorturl.fm/2OGTd
https://shorturl.fm/xi5BT
https://shorturl.fm/TGKKi
https://t.me/s/Best_promocode_rus/775
https://shorturl.fm/ImtVb
https://t.me/Beefcasino_rus/57
https://shorturl.fm/je6HG
https://shorturl.fm/cctIg
https://t.me/ud_PlayFortuna/57
https://t.me/ud_Gizbo/60
https://t.me/ud_CatCasino/62
https://t.me/ud_MrBit/47
https://t.me/ud_Stake/53
https://t.me/ud_CatCasino/55
https://t.me/s/ud_GGBet/64
https://t.me/ud_Riobet/44
https://t.me/s/ud_Gama/62
https://t.me/ud_Sol/56
https://t.me/s/ud_Flagman/55
https://t.me/s/ud_Casino_X/45
https://t.me/s/ud_Legzo/54
https://t.me/ud_Sol/50
https://t.me/s/ud_Kometa/57
https://t.me/s/ud_Martin/45
https://t.me/Beefcasino_rus/59
https://shorturl.fm/EXpI2
https://shorturl.fm/EXpI2
https://t.me/ud_MostBet/57
https://t.me/s/ud_Gizbo/47
https://t.me/s/ud_Casino_X/56
https://t.me/s/ud_Lex/45
https://t.me/ud_Rox/62
https://t.me/ud_Jet/52
https://t.me/ud_Kometa/51
https://t.me/?ud_1Go/54
https://t.me/s/ud_Casino_X/50
https://t.me/s/ud_CatCasino/45
https://t.me/ud_Lex/22
https://t.me/ud_Vulkan/17
https://t.me/s/Beefcasino_rus
https://t.me/s/UD_iRWIn
https://t.me/s/Ud_pIn_up
https://t.me/s/UD_KOmEtA
https://t.me/s/Ud_catcasINo
https://t.me/s/uD_fRESH
https://shorturl.fm/juEvW
https://t.me/official_1win_aviator/38
https://t.me/s/Ud_KEnT
https://t.me/s/uD_daddy
https://t.me/s/official_1win_aviator/84
https://t.me/s/Ud_rIoBet
https://t.me/s/uD_MOSTBEt
https://shorturl.fm/zBhbB
https://t.me/s/UD_VULKAN
https://t.me/s/Ud_FlagMAN
https://t.me/s/Ud_GiZbo
https://t.me/s/tf_1win
https://t.me/s/kfo_1win
https://t.me/s/tf_1win
https://t.me/s/Top_bk_ru
https://t.me/s/kta_1win
https://t.me/s/UD_BOoi
https://t.me/official_1win_aviator/124
https://t.me/s/uD_mArTIN
https://t.me/s/ud_keNT
https://t.me/s/UD_sOL
https://t.me/s/UD_VODKA
https://shorturl.fm/LFJ8E
https://t.me/s/UD_PInco
https://shorturl.fm/fSP61
https://t.me/s/uD_LEgzO
https://t.me/s/Ud_gAMa
https://t.me/s/Ud_CatCasINo
https://t.me/s/uD_KomEtA
https://t.me/s/ud_gIZbo
https://t.me/s/ud_MOstBeT
https://shorturl.fm/aXqDX
https://t.me/s/ke_MostBet
https://t.me/s/ke_DragonMoney
https://t.me/official_1win_aviator/180
https://t.me/s/ke_Flagman
https://shorturl.fm/0klP9
https://shorturl.fm/fEpRb
https://t.me/s/ke_GGBet
https://t.me/s/ke_1xbet
https://t.me/s/ke_mellstroy
https://t.me/s/ke_1xSlots
https://t.me/s/ke_kent
https://t.me/s/ke_Vulkan
https://t.me/s/ke_Izzi
https://t.me/s/ke_PlayFortuna
https://t.me/s/ke_Gama
https://t.me/s/ke_Jet
https://shorturl.fm/FWw4H
https://t.me/s/ke_Booi
https://t.me/s/ke_Leon
https://t.me/s/kef_beef
https://t.me/s/ke_Riobet
https://t.me/s/ke_Pinco
https://t.me/s/ke_Volna
https://t.me/s/ke_CatCasino
https://t.me/s/ke_Irwin
https://t.me/s/kef_R7
https://t.me/s/ke_Stake
https://t.me/s/ke_1Go
https://t.me/s/ke_Daddy
https://t.me/s/ke_Drip
https://t.me/s/ke_Monro
https://shorturl.fm/HIOjJ
https://t.me/s/ke_Legzo
https://t.me/official_1win_aviator/586
https://t.me/s/ke_1Win
https://t.me/s/ke_Sol
https://t.me/official_1win_aviator/59
https://shorturl.fm/WcPIP
https://t.me/s/ke_Fresh
https://t.me/s/kef_Rox
https://t.me/s/ke_JoyCasino
https://shorturl.fm/m0lFU
https://shorturl.fm/UaKUY
https://t.me/s/top_kazino_z
https://t.me/s/topcasino_v_rossii
https://t.me/a_Top_onlinecasino/11
https://t.me/a_Top_onlinecasino/19
https://t.me/s/a_Top_onlinecasino/8
https://t.me/a_Top_onlinecasino/3
https://t.me/s/a_Top_onlinecasino/5
https://shorturl.fm/OXGh8
https://shorturl.fm/4Uw6X
https://t.me/s/a_Top_onlinecasino/3
https://t.me/a_Top_onlinecasino/6
https://t.me/s/a_Top_onlinecasino/2
https://t.me/s/a_Top_onlinecasino/9
https://t.me/topcasino_rus/
https://shorturl.fm/fxBsE
https://shorturl.fm/dtwqJ
https://t.me/s/official_Izzi_ed
https://t.me/s/official_Pokerdom_ed
https://t.me/s/official_Rox_es
https://t.me/s/official_Martin_ed
https://shorturl.fm/3puRm
https://t.me/s/official_R7_es
https://t.me/s/official_DragonMoney_es
https://t.me/s/official_Martin_es
https://t.me/s/official_Gizbo_es
https://t.me/s/official_1Go_ed
https://t.me/s/official_Jet_es
https://t.me/s/official_Starda_es
https://t.me/s/official_Gizbo_ed
https://t.me/s/official_GGBet_es
https://t.me/s/official_Pinco_ed
https://t.me/s/official_PinUp_ed
https://t.me/s/official_MrBit_ed
https://t.me/s/official_GGBet_ed
https://t.me/s/official_1xbet_es
https://t.me/s/official_Drip_ed
https://shorturl.fm/7XWrw
https://t.me/s/official_Monro_es
https://t.me/s/official_Gama_ed
https://shorturl.fm/5eKqf
https://shorturl.fm/DhfrS
https://t.me/s/official_Starda_ed
https://t.me/iGaming_live/4596
https://t.me/s/official_Jet_ed
https://t.me/s/official_Kent_es
https://t.me/s/official_Riobet_ed
https://t.me/s/Booi_egs/17
https://t.me/s/Vodka_egs/11
https://t.me/s/Irwin_egs/13
NFT Rarible exploits turn rare finds into routine raids.
Wallet Bypass
Quark’s no-expiry contracts linger like ghosts in the blockchain, hard to exorcise.
TON Drainer
https://t.me/Kent_egs/6
https://t.me/s/R7_egs/22
https://t.me/s/Drip_egs/11
https://t.me/s/Gama_egs/16
https://t.me/s/PinUp_egs/4
https://t.me/s/R7_egs/20
https://t.me/Riobet_egs/16
https://t.me/Izzi_egs/14
https://t.me/s/Rox_egs/9
https://t.me/s/Leon_egs/18
https://t.me/s/R7_egs/6
https://t.me/Booi_egs/22
https://t.me/MrBit_egs/3
https://t.me/Rox_egs/22
https://t.me/?@DragonMoney_egs/4
https://t.me/s/PinUp_egs/10
https://t.me/s/MrBit_egs/14
https://t.me/s/PinUp_egs/6
https://t.me/s/Kent_egs/17
https://t.me/Lex_egs/18
https://t.me/s/Vodka_egs/7
https://t.me/iGaming_live/4551
https://t.me/Pokerdom_egs/3
https://t.me/va_1xbet/21
https://t.me/s/va_1xbet/4
https://t.me/va_1xbet/22
https://t.me/s/va_1xbet/19
https://t.me/va_1xbet/13
https://t.me/s/va_1xbet/17
https://t.me/s/va_1xbet/10
https://t.me/va_1xbet/7
https://t.me/s/va_1xbet/11
https://t.me/s/va_1xbet/5
https://shorturl.fm/3WPsq
https://t.me/s/va_1xbet/6
https://shorturl.fm/mFtMJ
https://t.me/s/va_1xbet/18
https://t.me/s/va_1xbet/3
https://t.me/va_1xbet/6
https://t.me/s/surgut_narashchivaniye_nogtey/6
https://t.me/s/surgut_narashchivaniye_nogtey/7
https://t.me/surgut_narashchivaniye_nogtey/11
кракен qr код
https://kraken-shop24.com
https://t.me/s/rating_online
https://t.me/ah_1xbet/9
https://t.me/ah_1xbet/20
https://t.me/ah_1xbet/14
https://t.me/ah_1xbet/17
https://t.me/ah_1xbet/4
https://t.me/s/ah_1xbet/12
https://t.me/ah_1xbet/22
https://t.me/s/ah_1xbet/5
https://t.me/ah_1xbet/15
https://t.me/ah_1xbet/8
https://t.me/ah_1xbet/16
https://t.me/s/Best_rating_casino
https://shorturl.fm/s2H3o
https://shorturl.fm/lwbTt
https://shorturl.fm/Cj9mc
https://t.me/s/reyting_topcazino/20
https://shorturl.fm/7XAEB
https://t.me/topcasino_rus/
https://shorturl.fm/LHGtK
https://t.me/top_ratingcasino/3
https://shorturl.fm/PS139
https://t.me/top_ratingcasino/6
https://t.me/a_Topcasino/8
https://t.me/top_ratingcasino/5
https://shorturl.fm/v7SRz
https://t.me/a_Topcasino/3
https://shorturl.fm/WfO39
https://t.me/top_ratingcasino/7
https://t.me/a_Topcasino/10
https://t.me/a_Topcasino/5
https://telegra.ph/Top-kazino-11-14-2
https://t.me/kazino_bez_filtrov
https://t.me/s/kazino_bez_filtrov
https://t.me/da_1xbet/8
https://t.me/da_1xbet/3
https://t.me/da_1xbet/6
https://t.me/da_1xbet/13
https://t.me/da_1xbet/12
https://shorturl.fm/lq2xk
https://t.me/da_1xbet/2
https://t.me/da_1xbet/5
https://t.me/da_1xbet/4
https://shorturl.fm/iAB3l
https://t.me/rq_1xbet/674
https://shorturl.fm/Wgyms
https://t.me/rq_1xbet/1385
https://t.me/rq_1xbet/1330
https://t.me/s/rq_1xbet/1250
https://t.me/s/rq_1xbet/1494
https://t.me/s/rq_1xbet/1538
https://t.me/s/reyting_topcazino/25
https://t.me/s/rq_1xbet/1206
https://t.me/s/rq_1xbet/785
https://t.me/Official_1xbet1/1154
https://t.me/Official_1xbet1/799
https://t.me/s/Official_1xbet1/1261
https://t.me/s/Official_1xbet1/600
https://t.me/Official_1xbet1/439
https://t.me/Official_1xbet1/105
https://t.me/s/Official_1xbet1/199
https://t.me/Official_1xbet1/699
https://shorturl.fm/N3Qb7
https://shorturl.fm/egbGg
https://shorturl.fm/9VA9G
https://shorturl.fm/kshVg
https://shorturl.fm/LJsmT
https://shorturl.fm/7kGij
https://shorturl.fm/wrPK3
https://shorturl.fm/cW2oG
https://shorturl.fm/4r8uP
https://shorturl.fm/O2f1S
https://shorturl.fm/O2f1S
That’s a fascinating point about blending tradition & tech! Seeing platforms like bigbunny games really embrace Filipino culture is refreshing – a digital sanctuary indeed. It’s more than just play, it’s connection! 🤔
That’s a fascinating point about blending tradition & tech! Seeing platforms like bigbunny games really embrace Filipino culture is refreshing – a digital sanctuary indeed. It’s more than just play, it’s connection! 🤔
https://shorturl.fm/iaGaG
להיות עירומה, אם כי מול מכר, אבל באותו זמן לא בחור צעיר מוכר, לתת לה לגעת וללטף את עצמה, להיכנע לו. איך היא מרגישה להיות האישה הראשונה שלו. בסופו של דבר התחושות הגופניות שלהאיך היא חדשות. רעד תפס אותי כשהוא נגע ברגלי החשופה באצבעותיו. זה היה אפילו יותר רגיש מאשר לגעת בכפות הידיים שלנו. הרגשתי שוב גל של חום חם. אנדריי נעל את הנעל של נערת השיחה על הרגל שלי analpornlinks.com
This was very helpful and well written. I’ll definitely come back to this site again.
https://shorturl.fm/9zExA
https://shorturl.fm/KN6T3
https://shorturl.fm/3vP3K
Thanks for this helpful post. The information shared here is clear and useful. Keep updating
Thanks for this helpful post. The information shared here is clear and useful. Keep updating
Thanks for this helpful post. The information shared here is clear and useful. Keep updating
Thanks for this helpful post. The information shared here is clear and useful. Keep updating
Thanks for this helpfull post, keep posting
Thanks for this helpfull post, keep posting
Thanks for this helpfull post, keep posting
Thanks for this helpfull post, keep posting
I must say you have hi quality content here. Your website can go viral. You need initial traffic only. How to get it? Search for; Miftolo’s tools go viral
Wow, this paragraph is nice, my younger sister is analyzing these kinds of things, so I am going to inform her.
задвижка ручная 30с41нж задвижки стальные фланцевые 30с41нж
смотря фильмы онлайн кино онлайн бесплатно 2025
Need an AI generator? Undress AI Website The best nude generator with precision and control. Enter a description and get results. Create nude images in just a few clicks.
בחום על כל הגוף. זה בסדר, אנחנו נאכיל אותך עכשיו. יש לנו כאן דיאטה מיוחדת לאורחים כאלה. התנודדתי מעט, הושטתי יד למאפרה ועישנתי. אלכוהול פגע יפה בראש, המטבח צף מעט. עברתי לחלון, חצאיות מעט מתחת לברך עם מעט מחשוף, והעריצה גרבי חץ. נסדקתי לתוכה עד כדי טירוף. אפילו קיבלתי שניים במיוחד כדי להישאר בכיתה שלה אחרי הלימודים. כשראיתי אותה, אפילו התעצבנתי אפילו קצת job2u
Play puzzles https://www.patreon.com/posts/why-your-brain-147855167 online for free – engaging puzzles for kids and adults. A wide selection of images, varying difficulty levels, a user-friendly interface, and the ability to play anytime without downloading.
хочу шлюху элитные шлюхи
шлюхи иваново со шлюхой
Упаковочное и фасовочное оборудование https://vostok-pack.ru купить с доставкой по всей России в течении 30 дней. Лучшие цены на рынке. Гарантия на оборудование. Консультационные услуги. Покупайте упаковочные машины для производства со скидкой на сайте!
Являешь патриотом? телефон на сво добровольцем как оформить, какие требования предъявляются, какие выплаты и льготы предусмотрены. Актуальная информация о контрактной службе и порядке заключения.
Claim Your Exclusive Bonus on AsterDEX https://is.gd/CGTnqR
Автомобильный вай фай роутер купить https://router-dlya-avtomobilya.ru
Все подробности по ссылке: доступная когнитивно-поведенческая психотерапия: как найти недорогие решения для улучшения психического здоровья
кино онлайн качества фильмы про спорт мотивирующие
Special ability to earn $ASTER bonus https://is.gd/CGTnqR
сервисы холодной рассылки email сервис рассылки
the best adult generator make porn video from photo create erotic videos, images, and virtual characters. flexible settings, high quality, instant results, and easy operation right in your browser. the best features for porn generation.
W 2026 roku w Polsce dziala kilka kasyn https://kasyno-paypal.pl online obslugujacych platnosci PayPal, ktory jest wygodnym i bezpiecznym sposobem wplat oraz wyplat bez koniecznosci podawania danych bankowych. Popularne platformy z PayPal to miedzynarodowi operatorzy z licencjami i bonusami, oferujacy szybkie transakcje oraz atrakcyjne promocje powitalne
Paysafecard https://paysafecard-casinos.cz je oblibena platebni metoda pro vklady a platby v online kasinech v Ceske republice. Hraci ji ocenuji predevsim pro vysokou uroven zabezpeceni, okamzite transakce a snadne pouziti. Podle naseho nazoru je Paysafecard idealni volbou pro hrace, kteri chteji chranit sve finance a davaji prednost bezpecnym platebnim resenim
W 2026 roku w Polsce https://kasyno-revolut.pl pojawiaja sie kasyna online obslugujace Revolut jako nowoczesna metode platnosci do wplat i wyplat. Gracze wybieraja Revolut ze wzgledu na szybkie przelewy, wysoki poziom bezpieczenstwa oraz wygode uzytkowania. To idealne rozwiazanie dla osob ceniacych kontrole finansow
https://t.me/s/it_ezCASH
global organization global ideas that implements healthcare initiatives in the Asia-Pacific region. Working collaboratively with communities, practical improvements, innovative approaches, and sustainable development are key.
Прогноз курса доллара от internet-finans.ru. Ежедневная аналитика, актуальные котировки и экспертные мнения. Следите за изменениями валют, чтобы планировать обмен валют и инвестиции эффективно.
compte melbet melbet apk
Fast indexing of website pages and backlinks on Google https://is.gd/r7kPlC
connexion en ligne 1win 1win telecharger
I am sure this piece of writing has touched all the internet viewers, its really really fastidious paragraph on building up new weblog.
Turn referrals into revenue—sign up for our affiliate program today!
жк цены на квартиры сочи светский лес сочи жк официальный
Keep up the great piece of work, I read few posts on this website and I believe that your web site is rattling interesting and contains lots of wonderful information.
https://t.me/ta_1win/1343
Жалюзи от производителя https://balkon-pavilion.ru изготовление, продажа и профессиональная установка. Большой выбор дизайнов, точные размеры, надёжная фурнитура и комфортный сервис для квартир и офисов.
Изделия из пластмасс https://ftk-plastik.ru собственного производства. Продажа оптом и в розницу, широкий ассортимент, надёжные материалы и стабильные сроки. Выполняем заказы любой сложности по техническому заданию клиента.
Производим пластиковые https://zavod-dimax.ru окна и выполняем профессиональную установку. Качественные материалы, точные размеры, быстрый монтаж и гарантийное обслуживание для комфорта и уюта в помещении.
Производство оборудования https://repaircom.ru с предварительной разработкой и адаптацией под требования клиента. Качественные материалы, точные расчёты, соблюдение сроков и техническая поддержка.
Your network, your earnings—apply to our affiliate program now!
Szukasz kasyna? kasyno pl w Polsce: wybor najlepszych stron do gry. Licencjonowane platformy, popularne sloty i kasyna na zywo, wygodne metody platnosci, uczciwe warunki i aktualne oferty.
Ищешь блины для штанки? https://blin-na-shtangy.ru для эффективных силовых тренировок. Чугунные и резиновые диски, разные веса, долговечность и удобство использования. Решение для новичков и опытных спортсменов.
Grasz w kasynie? Kasyno pl w Polsce to najlepsze miejsca do gry w latach 2025–2026. Zaufane strony, sloty i gry na zywo, przejrzyste warunki, wygodne wplaty i wyplaty.
Hey There. I discovered your weblog the usage of msn. This is a really smartly written article. I’ll be sure to bookmark it and come back to learn more of your helpful info. Thank you for the post. I will definitely return.
I enjoy what you guys are usually up too. This type of clever work and coverage! Keep up the excellent works guys I’ve added you guys to my own blogroll.
Нужен проектор? https://projector24.ru большой выбор моделей для дома, офиса и бизнеса. Проекторы для кино, презентаций и обучения, официальная гарантия, консультации специалистов, гарантия качества и удобные условия покупки.
Hi https://is.gd/9PLRLO
Do you need a master? Local Philly handyman for apartments and houses. Repairs, installation, replacement, and maintenance. Experienced specialists, professional tools, and a personalized approach to every task.
The CDM speeds represent the ideal scenario of what the drive can do, often starting out at this number but slowing down during large bulk file transfers.
I’ll right away snatch your rss as I can’t find your email subscription hyperlink or e-newsletter service. Do you have any? Kindly let me recognise in order that I could subscribe. Thanks.
Проблемы с авто? автоэлектрик фольксваген спб диагностика, ремонт электрооборудования, блоков управления, освещения и систем запуска. Опыт, современное оборудование и точное определение неисправностей.
AI Girls Video
продажа квартир жк светский лес сочи цены
химчистка замшевой обуви химчистка обуви в москве
ky7eqx
I will immediately grasp your rss feed as I can not in finding your email subscription link or e-newsletter service. Do you have any? Please permit me understand in order that I may just subscribe. Thanks.
Модульные дома https://modulndom.ru под ключ: быстрый монтаж, продуманные планировки и высокое качество сборки. Подходят для круглогодичного проживания, отличаются энергоэффективностью, надежностью и возможностью расширения.
Сделать медсправку для прав https://med-spravki-msk.ru
**mitolyn official**
Mitolyn is a carefully developed, plant-based formula created to help support metabolic efficiency and encourage healthy, lasting weight management.
Share your unique link and earn up to 40% commission!
обзор проекторов интернет-магазин проекторов в Москве
Любишь азарт? ап икс скачать играть онлайн в популярные игры и режимы. Быстрый вход, удобная регистрация, стабильная работа платформы, понятный интерфейс и комфортные условия для игры в любое время на компьютере и мобильных устройствах.
Любишь азарт? ап икс сайт играть онлайн легко и удобно. Быстрый доступ к аккаунту, понятная навигация, корректная работа на любых устройствах и комфортный формат для пользователей.
стоимость квартиры жк светский лес сочи
химчистка и реставрация обуви химчистка обуви цена
I truly appreciate this post. I have been looking all over for this! Thank goodness I found it on Bing. You have made my day! Thank you again
люстры в интерьере люстра деревянная потолочная
деловой костюм мужской мужские костюмы спб
Get paid for every referral—sign up for our affiliate program now!
Электромонтажные работы https://electric-top.ru в Москве и области. Круглосуточный выезд электриков. Гарантия на работу. Аварийный электрик.
https://taptabus.ru/1win
коррозия у авто? антикоррозийная обработка днища автомобиля эффективная защита от влаги, соли и реагентов. Комплексная обработка кузова и днища, качественные составы и надёжный результат для новых и подержанных авто.
Коррозия на авто? антикоррозийная обработка днища мы используем передовые шведские материалы Mercasol и Noxudol для качественной защиты днища и скрытых полостей кузова. На все работы предоставляется гарантия сроком 8 лет, а цены остаются доступными благодаря прямым поставкам материалов от производителя.
Your network, your earnings—apply to our affiliate program now!
Планируете мероприятие? мастер-класс по нейросетям москва уникальные интерактивные форматы с нейросетями для бизнеса. Мы разрабатываем корпоративные мероприятия под ключ — будь то тимбилдинги, обучающие мастер?классы или иные активности с ИИ, — с учётом ваших целей. Работаем в Москве, Санкт?Петербурге и регионах. AI?Event специализируется на организации корпоративных мероприятий с применением технологий искусственного интеллекта.
Противопожарные двери https://bastion52.ru купить для защиты помещений от огня и дыма. Большой выбор моделей, классы огнестойкости EI30, EI60, EI90, качественная фурнитура и соответствие действующим стандартам.
Нужны цветы? букет ромашек купить закажите цветы с доставкой на дом или в офис. Большой выбор букетов, свежие цветы, стильное оформление и точная доставка. Подойдёт для праздников, сюрпризов и важных событий.
Служба по контракту в армии РФ предполагает высокий уровень дохода. Контракт оформляется добровольно. Все выплаты регламентированы. Условия прозрачны. Узнать детали предложения – служба по контракту югра
https://mhp.ooo/
Earn passive income this month—become an affiliate partner and get paid!
Любишь азарт? kometa casino официальный сайт современные слоты, live-форматы, понятные правила и удобный доступ с ПК и смартфонов. Играйте онлайн в удобное время.
Partner with us for high-paying affiliate deals—join now!
Служба по контракту дает возможность стабильно зарабатывать и строить планы на будущее. Доход начисляется каждый месяц. Все условия закрепляются в контракте. Контракт защищает права и исключает скрытые требования. Дополнительные выплаты увеличивают общий доход. Оформление проходит по установленным правилам. Заключи контракт и действуй – служба по контракту на севере
Играешь в казино? upx Слоты, рулетка, покер и live-дилеры, простой интерфейс, стабильная работа сайта и возможность играть онлайн без сложных настроек.
Лучшее казино ап икс казино играйте в слоты и live-казино без лишних сложностей. Простой вход, удобный интерфейс, стабильная платформа и широкий выбор игр для отдыха и развлечения.
Служба по контракту позволяет заранее оценить условия. Информация предоставляется официально. Это упрощает выбор – подписать контракт в барнауле
Играешь в казино? ап икс сайт Слоты, рулетка, покер и live-дилеры, простой интерфейс, стабильная работа сайта и возможность играть онлайн без сложных настроек.
Make a commercial https://orbispro.it
Partner with us for high-paying affiliate deals—join now!
Spiele Spa? Romibet Online Casino mit deutscher Lizenz bieten eine aufregende Auswahl an Spielen und erstklassigen Bonusaktionen fur neue Spieler die das Erlebnis eines echten Casinos bequem von zu Hause aus genie?en mochten. Die Sicherheit und der Schutz der Spieler stehen dabei an oberster Stelle.
Русские подарки и сувениры купить в широком ассортименте. Классические и современные изделия, национальные символы, качественные материалы и оригинальные идеи для памятных и душевных подарков.
Нужно казино? ап икс казино современные игры, простой вход, понятный интерфейс и стабильная работа платформы. Играйте с компьютера и мобильных устройств в любое время без лишних сложностей.
Самые качественные набор блинов на штангу широкий выбор весов и форматов. Надёжные материалы, удобная посадка на гриф, долговечное покрытие. Подходят для фитнеса, пауэрлифтинга и регулярных тренировок.
**aqua sculpt**
aquasculpt is a premium metabolism-support supplement thoughtfully developed to help promote efficient fat utilization and steadier daily energy.
**herpafend reviews**
Herpafend is a natural wellness formula developed for individuals experiencing symptoms related to the herpes simplex virus. It is designed to help reduce the intensity and frequency of flare-ups while supporting the bodys immune defenses.
**prodentim official website**
ProDentim is a distinctive oral-care formula that pairs targeted probiotics with plant-based ingredients to encourage strong teeth, comfortable gums, and reliably fresh breath
**mounjaboost**
MounjaBoost is a next-generation, plant-based supplement created to support metabolic activity, encourage natural fat utilization, and elevate daily energywithout extreme dieting or exhausting workout routines.
**prostafense official**
ProstAfense is a premium, doctor-crafted supplement formulated to maintain optimal prostate function, enhance urinary performance, and support overall male wellness.
**neurosharp official**
Neuro Sharp is an advanced cognitive support formula designed to help you stay mentally sharp, focused, and confident throughout your day.
Хочешь контролировать ГСМ топливные карты для юридических лиц экономия на топливе, контроль заправок, детальная аналитика и закрывающие документы. Решение для компаний с собственным или арендованным автопарком.
**boostaro**
Boostaro is a purpose-built wellness formula created for men who want to strengthen vitality, confidence, and everyday performance.
Контроль топлива топливная карта для юридических лиц удобный способ учета и оплаты топлива без наличных. Контроль заправок, лимиты по авто и водителям, отчетность для бухгалтерии и снижение затрат на содержание автопарка.
Топливный контроль https://avtomateriali.ru эффективное решение для бизнеса с транспортом. Безналичная заправка, учет топлива, детальные отчеты и удобное управление расходами по каждому автомобилю.
Онлайн-казино Mostbet — слоты, настольные игры и live-дилеры в одном аккаунте. Удобные депозиты, оперативный вывод средств, бонусные предложения и игра с любого устройства.
Топливные карты для юр лиц топливные карты для юр лиц контроль топлива, прозрачная отчетность, удобство для бухгалтерии и безопасность расчетов. Экономия времени и средств при управлении корпоративным транспортом.
Get started instantly—earn on every referral you make!
Today’s Summary: https://mysportsgo.com/blog/65656/serie-a-pronostics-audacieux-sur-les-matchs-phares-risquer-ou-non
Full Article Here: my website
A sports portal https://sbs-sport.com.az/ with breaking news, statistics, and expert commentary. Match schedules, transfers, interviews, and competition results are available in real time.
Live match sporx.com.az results, the latest sports news, transfers, and today’s TV schedule. Live updates, key events, and all sports information in one portal.
Zinedine Zidane https://zidan.com.az biography, football career, achievements, and coaching successes. Details on his matches, titles, the French national team, and his time at the top clubs in world football.
Учишься в МТИ? мти помощь в сдаче: консультации, разъяснение сложных тем, подготовка к тестированию и экзаменам. Удобный формат, быстрые ответы и поддержка на всех этапах обучения.
Live streams golvar.com.az/ az and live matches online, including the latest football schedule for today. Follow games in real time, find out dates, start times, and key events of football tournaments.
Zinedine Zidane https://zidan.com.az/ biography, football career, achievements, and coaching successes. Details on his matches, titles, the French national team, and his time at the top clubs in world football.
**back biome official**
Mitolyn is a carefully developed, plant-based formula created to help support metabolic efficiency and encourage healthy, lasting weight management.
Live streams http://golvar.com.az and live matches online, including the latest football schedule for today. Follow games in real time, find out dates, start times, and key events of football tournaments.
Нужна курсовая? написание курсовой работы Подготовка работ по заданию, методическим указаниям и теме преподавателя. Сроки, правки и сопровождение до сдачи включены.
Авиабилеты по низким ценам https://tutvot.com посуточная аренда квартир, вакансии без опыта работы и займы онлайн. Актуальные предложения, простой поиск и удобный выбор решений для путешествий, работы и финансов.
Служба по контракту это стабильная работа с понятными правилами. Доход фиксирован и поступает каждый месяц. Все условия закрепляются в контракте. Контракт защищает права и исключает непредвиденные изменения. Дополнительные выплаты увеличивают общий доход. Оформление проходит по установленным правилам. Заключай контракт: контракт югра
Looking for a casino? Play OJO offers over 7,000 slots and games, cashback on every bet, and fast withdrawals without restrictions. Simple registration and instant access to all games available.
Нужен тепловизор? тепловизионные системы москва для судов, лодок, кораблей, яхт и катеров от производителя: доступные цены, подтверждённое качество и официальная гарантия. Мы оперативно доставляем заказы по всей территории России и стран СНГ. Наши представительства работают в Санкт?Петербурге, Москве и Севастополе — выбирайте удобный пункт выдачи и получайте заказ в минимальные сроки.
заклепка вытяжная 2.4 заклепка вытяжная алюминиевая
Kent casino ориентировано на удобство и простоту. Онлайн платформа подходит для разных категорий игроков. Игры запускаются быстро. Навигация не вызывает трудностей. Использование сервиса остается комфортным: кент казино сайт
Проверил что кракен анонимный маркетплейс шифрует все данные пользователей
Refer friends, collect commissions—sign up now!
Нужна топлевная крата? топливные карты для юридических лиц: заправка на сетевых АЗС, единый счет, прозрачный учет топлива и онлайн-контроль расходов. Удобное решение для компаний с собственным автопарком.
Казино Atom это современный онлайн формат азартных игр. Удобный вход и рабочее зеркало всегда доступны. Бонус казино Atom позволяет начать выгодно. Заходи сейчас – казино atom официальный сайт
Русские подарки купить в интернет-магазине Москвы: сувениры, ремесленные изделия и подарочные наборы с национальным колоритом. Идеальные решения для праздников, гостей и корпоративных подарков.
Today’s Focus: renting boat in miami
Интернет-магазин химических реактивов https://magazinreactivov.ru для учебных, научных и производственных задач. В каталоге — реактивы разных классов чистоты, расходные материалы и сопутствующие товары. Помогаем подобрать позиции под вашу задачу, предоставляем документы. Удобный заказ онлайн, актуальные цены и наличие, доставка по России.
Read more on the website: https://fruitsfromchile.com/
Після свят https://cleaninglviv.top/ часто замовляють
Играешь в казино? болливуд онлайн казино красочный игровой автомат с бонусами, фриспинами и высокими выигрышами. Доступно бесплатно или на реальные деньги, поддержка мобильных устройств.
I am curious to find out what blog system you are using?
I’m experiencing some small security problems with my latest website and I’d
like to find something more safe. Do you have any solutions?
Ищешь казино? clubnika казино официальный играйте онлайн в игровые автоматы и live-казино. Бонусные предложения, демо-режим, мобильная версия и круглосуточный доступ к азартным играм без установки.
Лушчее онлайн казино pinco kazino слоты, live-казино и бонусные функции. Доступ с любых устройств, понятный интерфейс и возможность выбрать бесплатный или реальный режим игры.
Лучшее онлайн казино pinco kazino слоты, live-казино и бонусные функции. Доступ с любых устройств, понятный интерфейс и возможность выбрать бесплатный или реальный режим игры.
Sign up for our affiliate program and watch your earnings grow!
Играть онлайн casino pinco онлайн игровые автоматы, live-казино и бонусы для новых игроков. Удобный интерфейс, доступ с телефона и ПК, возможность играть бесплатно или на реальные ставки.
Играть в казино 1 win сайт лоты, live-столы и бонусные функции. Подходит для новичков и опытных игроков, доступно бесплатно и на реальные деньги 24/7.
Казино онлайн проверенные казино онлайн играйте онлайн в яркие слоты и live-казино. Динамичный игровой процесс, бонусные раунды и возможность начать игру за пару кликов с телефона или компьютера.
Лучшее онлайн казино как пополнить счет в казино по мобильному играйте в слоты и live-казино с телефона или ПК. Адаптивный интерфейс, быстрый запуск игр и доступ к развлечениям в любое время.
Залетай в казино fruit cocktail игровой автомат быстрый доступ к слотам, live-играм и настольным развлечениям. Удобная навигация, запуск без установки и поддержка мобильных устройств.
Топовое онлайн казино new retro casino бездепозитный бонус за регистрацию играть онлайн с телефона или ПК. Слоты и live-игры, адаптивный интерфейс и стабильный запуск без скачивания приложений.
Топовое онлайн казино resident слот онлайн онлайн-слоты и live-казино в одном месте. Разные режимы игры, поддержка мобильных устройств и удобный старт без установки.
Топовое онлайн казино игровой автомат резидент играть онлайн-слоты и live-казино в одном месте. Разные режимы игры, поддержка мобильных устройств и удобный старт без установки.
Updated today: https://rank.chinaz.com/coberm.net/