

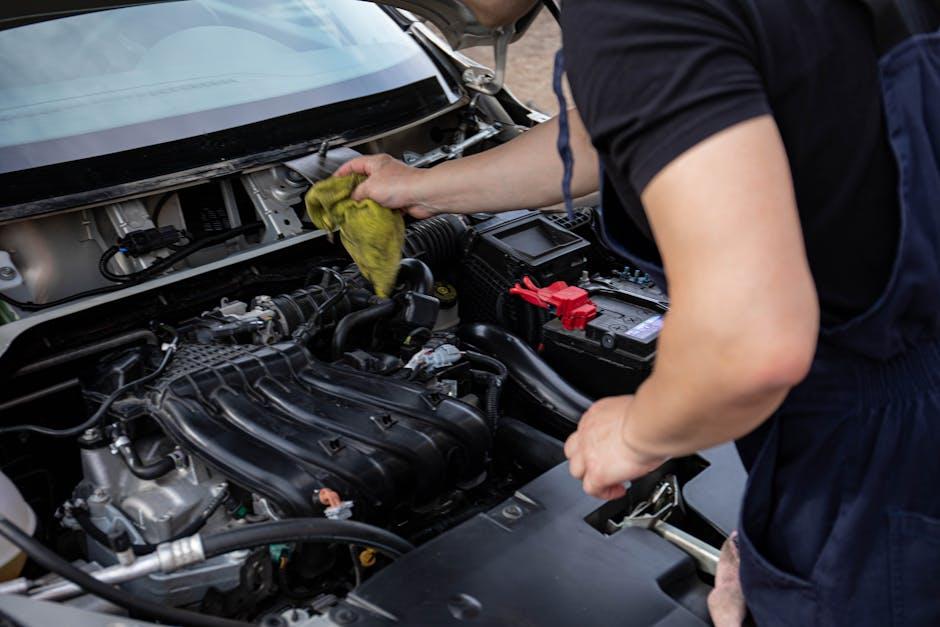
Beneath the hood of your car lies a world often overlooked—a complex engine bay that hums with power and precision. While cleaning this mechanical heart may seem daunting, a well-maintained engine bay not only boosts your vehicle’s appearance but can also help spot potential issues before they become costly problems. However, diving into this task without the right precautions can lead to damage or safety hazards. In this guide, we’ll explore how to clean your car engine bay safely, combining careful preparation with effective techniques to keep your engine looking sharp and running smoothly.
Table of Contents
- Preparing Your Engine Bay for a Thorough Cleaning
- Choosing the Right Cleaning Products for Optimal Safety
- Step-by-Step Guide to Protecting Sensitive Engine Components
- Effective Techniques for Removing Dirt and Grease
- Safe Drying Methods to Prevent Damage and Corrosion
- Post-Cleaning Inspection and Maintenance Tips for Longevity
- Q&A
- In Summary

Preparing Your Engine Bay for a Thorough Cleaning
Before diving into the cleaning process, it’s essential to secure and organize your engine bay to avoid any damage. Start by disconnecting the negative terminal on your battery to prevent accidental short circuits. Cover sensitive components such as the alternator, exposed wiring, and air intake with plastic bags or waterproof covers. This precautionary step will shield electrical parts from moisture and debris during the wash.
Next, clear away any loose dirt or large debris by using a soft brush or compressed air. This makes for a smoother cleaning experience and reduces the risk of scratching delicate surfaces. Having the right tools at hand is equally important. Consider stocking up on:
- Protective gloves for safe handling of chemicals
- Plastic bags for sealing electrical connectors
- Soft-bristle brushes to reach tight spots
- Microfiber cloths for gentle wiping
| Step | Action | Purpose |
|---|---|---|
| 1 | Disconnect battery terminal | Avoid electrical hazards |
| 2 | Cover sensitive components | Prevent moisture damage |
| 3 | Remove surface dirt | Ensure effective cleaning |
Choosing the Right Cleaning Products for Optimal Safety
When preparing to spruce up your car’s engine bay, selecting the right cleaning products is paramount to avoid unintended damage. Opt for engine-specific degreasers labeled as safe for electrical components, as these formulations are designed to break down grime without corroding delicate parts. Avoid harsh household cleaners like bleach or ammonia, which can strip protective coatings and cause long-term harm. Also, consider using biodegradable products that are environmentally friendly but still pack a punch against stubborn dirt and grease.
Here is a quick reference to help choose your cleaning agents wisely:
- Non-corrosive degreasers: Protect hoses and wires.
- Water-based cleaners: Easier rinsing with less residue.
- Foam applicators: Target grime while minimizing overspray.
- Protective sprays: Maintain clean surfaces post-wash.
| Product Type | Safe for Engine Components | Eco-Friendly |
|---|---|---|
| Water-Based Degreaser | Yes | Yes |
| Solvent-Based Cleaner | Use with caution | No |
| Foaming Brush Cleaner | Yes | Sometimes |
| Household Cleaners (Bleach, Ammonia) | No | No |

Step-by-Step Guide to Protecting Sensitive Engine Components
Before diving into the cleaning process, it’s crucial to shield the delicate parts that could be damaged by water or harsh cleaners. Begin by covering the battery terminals, exposed wiring, and sensitive sensors with clear plastic bags or aluminum foil — these materials create an effective barrier without trapping moisture underneath. Don’t forget to mask the air intake and distributor caps as well, since moisture infiltration here can cause major engine performance issues.
Another handy tip is to use painter’s tape to secure the plastic coverings firmly in place, preventing any accidental slips while you clean. If you’re unsure about which components need protection, here’s a simple checklist:
- Battery terminals
- Air intake vents
- Distributor caps
- Exposed wiring and connectors
- ECU (Engine Control Unit)
| Component | Protection Material | Reason |
|---|---|---|
| Battery Terminals | Plastic bags/Aluminum foil | Prevent corrosion and short circuits |
| Air Intake | Plastic wrap | Avoid water intake |
| Distributor Caps | Aluminum foil | Protect from moisture damage |
| Exposed Wires | Plastic bags with tape | Prevent electrical faults |
| ECU | Sealed plastic cover | Shield sensitive electronics |
Effective Techniques for Removing Dirt and Grease
To tackle stubborn dirt and grease effectively, start by choosing the right cleaning agent. Opt for a degreaser specifically formulated for automotive engines, as it breaks down grime without damaging sensitive components. Apply the degreaser generously to all greasy areas, allowing it to penetrate deeply for 5 to 10 minutes. Avoid using abrasive brushes initially; instead, use a soft-bristled brush or microfibre cloth to gently lift away loosened dirt. This approach helps protect delicate wiring and avoids dislodging any crucial engine parts.
Once the degreaser has done its job, rinse off with a low-pressure water spray—this is key to preventing water intrusion into electrical parts. Employ these essential techniques for optimal results:
- Shield electrical connectors with plastic bags or aluminum foil.
- Work in sections, rinsing one area at a time to control water flow.
- Use compressed air or a leaf blower to remove excess moisture quickly.
- Dry components thoroughly before restarting the engine.
| Cleaning Material | Best Use | Precautions |
|---|---|---|
| Automotive Degreaser | Removing engine grime | Avoid prolonged contact on painted surfaces |
| Soft Brush | Gently lifting dirt & grease | Do not scrub harshly to protect wires |
| Microfibre Cloth | Final wipe down for shine | Use clean cloth to prevent spreading dirt |
| Low-Pressure Water Spray | Rinsing off cleaning agents | Keep distance to avoid water ingress |

Safe Drying Methods to Prevent Damage and Corrosion
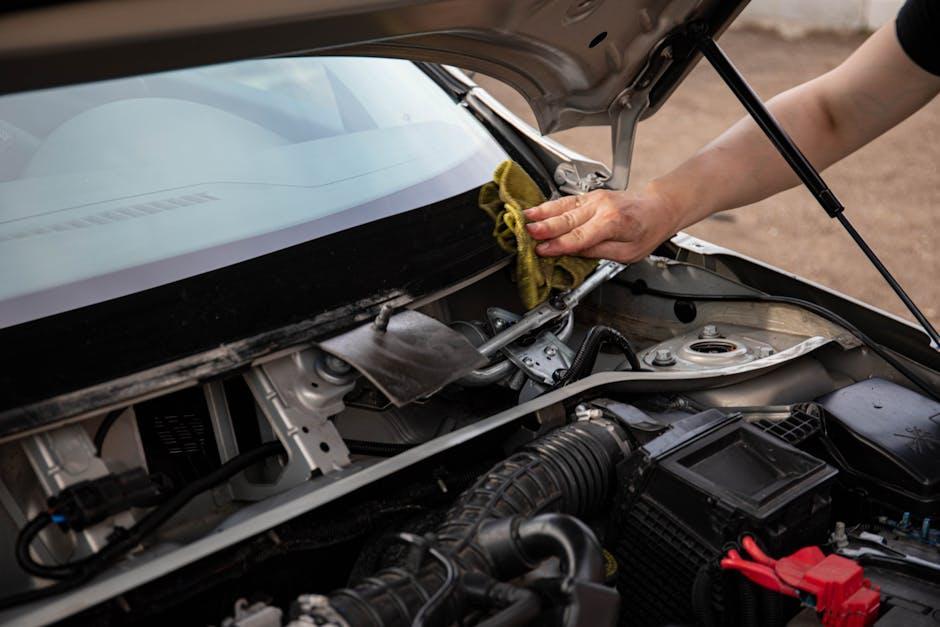
After thoroughly cleaning the engine bay, it’s crucial to dry the area efficiently to avoid water pooling that leads to corrosion or electrical malfunctions. One of the safest ways to dry your engine bay is by using a soft microfiber cloth to gently pat down the surfaces. Avoid aggressive rubbing, which can damage sensitive components or remove protective coatings. For tight spots, compressed air or a leaf blower on a cool setting works wonders to dislodge trapped moisture without introducing heat stress.
Employing natural air drying also presents advantages, especially when combined with proper precautions. Park your car in a dry, shaded area with good ventilation to allow moisture to evaporate naturally. Here are some key points to remember when drying your engine bay:
- Avoid direct sunlight: Excessive heat can cause rapid drying that may crack seals or plastic parts.
- Remove moisture from connectors: Use a soft brush or silicone spray for added protection against corrosion.
- Inspect for remaining wet spots: Address puddles early to prevent rust or electrical shorts.
| Drying Method | Benefits | Precautions |
|---|---|---|
| Microfiber Towel | Gentle, controlled drying | Use light pressure; avoid abrasive cloths |
| Compressed Air | Reaches crevices; quick evaporation | Use cool air; keep distance to avoid damage |
| Natural Air Drying | Non-invasive, cost-free | Avoid strong sunlight; ensure ventilation |
Post-Cleaning Inspection and Maintenance Tips for Longevity
Once your engine bay is sparkling clean, it’s crucial to perform a thorough inspection to catch any overlooked issues. Look for signs of wear, corrosion, or loose connections that could impact your car’s performance. Pay special attention to rubber hoses and wiring; clean surfaces can make cracks and frays more visible. Make sure all clips, bolts, and fasteners are tight to avoid any rattles or disconnections during driving.
Maintaining the fresh condition of your engine bay goes beyond cleaning. Regular upkeep involves:
- Periodic rinsing: Use damp cloths to remove accumulated dust monthly without soaking sensitive parts.
- Protecting surfaces: Apply a safe, non-greasy protectant on plastic and rubber components to prevent drying and cracking.
- Checking fluid levels: Cleanliness allows you to spot leaks or evaporations early, ensuring your car runs optimally.
| Maintenance Task | Frequency | Benefit |
|---|---|---|
| Visual inspection | Every 2 weeks | Detect wear and leaks early |
| Light dust cleaning | Monthly | Prevents dirt buildup |
| Protectant application | Every 3 months | Preserves rubber and plastic parts |
Q&A
Q&A: How to Clean Car Engine Bay Safely
Q1: Why should I clean my car’s engine bay?
A1: A clean engine bay not only looks great but also helps you spot potential leaks, corrosion, or worn-out parts early. It can improve engine performance by preventing dirt accumulation that might interfere with components.
Q2: Is it safe to wash the engine bay?
A2: Yes, it is safe if done correctly. Modern engines are built to handle some exposure to water, but you must avoid sensitive areas like exposed electrical connections and air intake systems by protecting or avoiding them.
Q3: What tools and materials do I need?
A3: Gather a gentle degreaser or engine cleaner, a soft brush, microfiber towels, plastic bags or cling wrap to cover sensitive components, a low-pressure water source (like a hose with a spray nozzle), and safety gloves.
Q4: How do I prepare the engine before cleaning?
A4: Make sure the engine is cool to avoid burns and damaging hot components. Remove loose debris with a brush or compressed air. Cover electrical parts, the battery terminal, and air intake with plastic bags to prevent water intrusion.
Q5: What’s the step-by-step process?
A5:
- Spray the degreaser generously across the engine bay, targeting oily spots.
- Let it sit for 5-10 minutes to break down grime.
- Gently scrub stubborn areas with the brush.
- Rinse lightly with a low-pressure water spray, avoiding electrical components.
- Use microfiber towels to dry accessible surfaces.
- Remove the coverings and let the engine air dry completely before starting.
Q6: Can I use a high-pressure washer?
A6: It’s best to avoid high-pressure washers as they can force water into sensitive areas, causing damage or electrical shorts. A gentle hose spray will suffice for safe cleaning.
Q7: How often should I clean my engine bay?
A7: Typically, an engine bay cleaning every 6 months to a year is adequate, depending on your driving conditions. If you frequently drive on muddy or salty roads, more frequent cleanings are beneficial.
Q8: Are there any warning signs after cleaning I should watch for?
A8: After cleaning, monitor for engine misfires, warning lights, or strange sounds. If any issues arise, check if water has reached electrical parts and consider consulting a mechanic.
Q9: Is professional cleaning better than DIY?
A9: Professional detailers have specialized tools and know-how to clean engine bays thoroughly and safely. However, with proper precautions, DIY cleaning is effective and rewarding.
Q10: Any final tips for engine bay cleaning newbies?
A10: Take your time, use gentle products, keep sensitive parts protected, and never clean a hot engine. A cautious approach ensures your engine stays spotless and healthy without any surprises.
In Summary
Cleaning your car’s engine bay might seem like a daunting task, but with the right approach and a little patience, it can become a straightforward part of your vehicle maintenance routine. By following safety tips, using appropriate tools, and taking care not to damage sensitive components, you’ll not only keep your engine looking sharp but also help it run cooler and more efficiently. Remember, a clean engine bay is a reflection of a well-cared-for car—and that extra bit of effort can pay off in both performance and pride. So roll up your sleeves, take your time, and enjoy the satisfying sparkle under the hood.