

In the intricate world beneath your car’s hood, a silent network of wires and circuits keeps your vehicle alive and humming. When those electrical systems falter, the symptoms can be as mysterious as a riddle—dim lights, stubborn starters, or erratic dashboard displays. Understanding how to diagnose car electrical problems is like unlocking a hidden code that bridges the gap between frustration and solution. This guide will illuminate the path through diagnostic tools, common issues, and step-by-step approaches, empowering you to decode the electrical whispers of your vehicle with confidence and clarity.
Table of Contents
- Understanding the Basics of Car Electrical Systems
- Identifying Common Signs of Electrical Issues
- Essential Tools for Diagnosing Electrical Problems
- Step-by-Step Guide to Testing Electrical Components
- Interpreting Diagnostic Codes and What They Mean
- Preventive Tips to Avoid Future Electrical Failures
- Q&A
- To Wrap It Up
Understanding the Basics of Car Electrical Systems
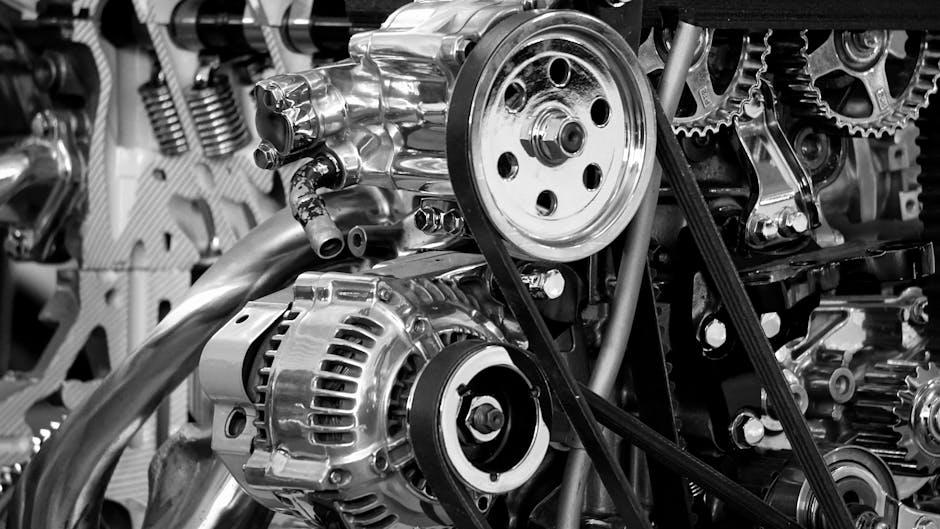
At the heart of every car lies an electrical system that powers everything from the ignition to the interior lights. This intricate network is made up of several key components, including the battery, alternator, starter motor, and a maze of wires and fuses. Understanding how these elements work together is essential for spotting where potential issues may arise. The battery acts as the energy reservoir, supplying power when the engine is off, while the alternator replenishes this energy during driving. Meanwhile, fuses protect circuits from overloads, preventing damage to sensitive electronics.
The complexity of modern vehicles means that electrical faults can stem from a variety of sources. To break down the fundamentals, consider these primary areas:
- Power source problems: Issues with the battery or alternator voltage output.
- Wiring and connections: Corrosion, breaks, or loose terminals disrupting current flow.
- Control modules: Faulty sensors or software glitches affecting system behavior.
| Component | Role | Common Issue |
|---|---|---|
| Battery | Stores and supplies electrical power | Discharge, corrosion |
| Alternator | Charges battery during operation | Faulty diode, belt slip |
| Starter Motor | Initiates engine cranking | Worn brushes, solenoid failure |
Identifying Common Signs of Electrical Issues
When your vehicle starts exhibiting electrical quirks, spotting the warning signs early can save you from costly repairs. Flickering dashboard lights, dim headlights, or an unresponsive power window can all hint at underlying electrical faults. Other red flags include the car’s engine stalling without a clear reason, repeated blown fuses, or a battery that drains unusually fast. Electrical issues often manifest subtly at first, so a keen eye toward irregularities in your vehicle’s electrical components can make all the difference.
Keep an eye out for these common symptoms, which often guide mechanics to the root cause:
- Intermittent electrical component operation – devices that work sometimes and not others.
- Unusual smells – burning or melting wiring can indicate short circuits.
- Warning lights – the battery or check engine light that flickers or stays on.
- Failing accessories – radios, seat heaters, or dashboard modules malfunctioning.
| Symptom | Possible Cause | What to Check |
|---|---|---|
| Dimming Headlights | Weak Alternator | Alternator Voltage Output |
| Engine Stalls | Faulty Ignition Switch | Ignition Wiring |
| Battery Drains Rapidly | Parasitic Draw | Electrical Load with Engine Off |
| Blown Fuses | Short Circuit | Wire Insulation & Connections |
Essential Tools for Diagnosing Electrical Problems
Diagnosing electrical issues in your car requires more than just guessing or replacing parts at random. To get to the root of the problem, you’ll need a reliable set of tools designed to measure and detect faults in your vehicle’s wiring and components. Multimeters are indispensable for checking voltage, current, and resistance, allowing you to pinpoint broken circuits or faulty connectors with precision. Additionally, a test light can quickly confirm the presence of voltage in your car’s electrical system, making it a handy tool for fast troubleshooting. Don’t overlook the importance of a good wire stripper and crimping tool, which can help you repair or replace damaged wiring safely and effectively.
For more advanced diagnostics, an OBD-II scanner unlocks access to your vehicle’s onboard computer systems, revealing error codes that can direct you to specific electrical or sensor issues. Pair this with a circuit tester to check fuses and relays, and you’ll have a comprehensive kit for almost any electrical troubleshooting task. Here’s a quick glance at essential tools and their primary uses:
| Tool | Primary Use | Best For |
|---|---|---|
| Multimeter | Measuring voltage, current, resistance | Testing circuits & sensors |
| Test Light | Checking presence of voltage | Quick fuse & wiring checks |
| OBD-II Scanner | Reading diagnostic codes | Engine & electrical system faults |
| Circuit Tester | Testing fuses and relays | Fuse box troubleshooting |
| Wire Stripper & Crimper | Stripping insulation & crimping connectors | Wire repair & replacement |
Step-by-Step Guide to Testing Electrical Components
Begin by gathering the essential tools: a digital multimeter, test light, and insulated gloves. Safety first—always disconnect the battery before testing to avoid shocks or shorts. Start with visual inspections of the wiring and connectors for any signs of wear, corrosion, or loose connections. Then, methodically test fuses by setting your multimeter to continuity mode—this quick check will help isolate blown fuses without dismantling anything complicated. With the car’s ignition off, place the multimeter probes on either side of the fuse; a beep or reading indicates an intact circuit.
Next, move on to testing larger components like the battery, alternator, and sensors. Use these guidelines for your multimeter settings and connections:
| Component | Multimeter Setting | Testing Tips |
|---|---|---|
| Battery | DC Voltage (20V range) | Measure voltage across terminals; 12.6V+ is healthy |
| Alternator | DC Voltage (20V range) | Test while engine runs; 13.7V to 14.7V indicates proper charging |
| Sensors | Resistance (Ω) | Compare readings with manufacturer specs |
By following these steps, you can quickly pinpoint problematic electrical parts with precision. Remember to consult your vehicle’s manual for model-specific values and to always reconnect all components properly after testing.

Interpreting Diagnostic Codes and What They Mean
Understanding the symbols and alphanumeric sequences coming from your car’s onboard diagnostics (OBD) system is a crucial step toward pinpointing electrical faults. These codes act as cryptic messengers, each representing a specific malfunction or sensor anomaly. By scanning your vehicle with an OBD-II reader, you’ll receive codes such as P0XXX or B1XXX, indicating issues ranging from engine sensor failures to body control system glitches. Rather than treating these codes as mere error messages, view them as clues that guide your troubleshooting process, helping you avoid unnecessary repairs.
Not all diagnostic codes are created equal, and interpreting them requires context. For example, a code related to a circuit voltage irregularity may hint at loose wiring, while another connected to sensor output might suggest a damaged component. The table below offers a quick reference for common OBD-II code ranges and their general system associations, streamlining your understanding:
| Code Range | System | Typical Issue |
|---|---|---|
| P0000-P0999 | Powertrain | Engine and transmission faults |
| B0000-B0999 | Body | Doors, windows, lighting, air conditioning |
| C0000-C0999 | Chassis | ABS, suspension, steering system faults |
| U0000-U0999 | Network | Communication between modules |
- Remember: Some codes may trigger false positives due to transient conditions. Always verify by retesting after fixes.
- Use trusted resources: Refer to your vehicle’s service manual or trusted online databases for precise coding definitions.
- Consider the whole system: Intermittent electrical problems might stem from grounding issues or wiring harness damage, not just the code-indicated part.
Preventive Tips to Avoid Future Electrical Failures
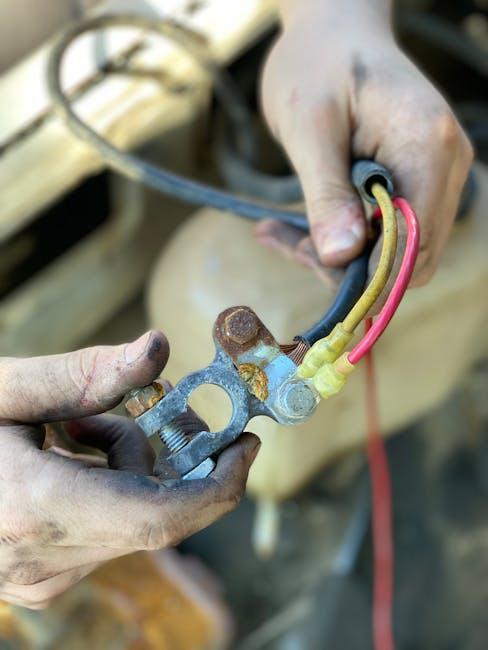
Maintaining your vehicle’s electrical system requires consistent attention to detail and a proactive approach. Regular inspections of wiring harnesses and connectors can help identify corrosion or wear before these issues impact performance. Ensure all connections are secure and free from dirt or moisture, which often cause short circuits or intermittent faults. Using dielectric grease on exposed terminals forms a protective barrier, reducing the risk of oxidation that can lead to future malfunctions. Additionally, keeping your battery terminals clean and ensuring your battery is fully charged helps stabilize voltage delivery throughout the electrical system.
Implementing a routine maintenance schedule can dramatically reduce unexpected breakdowns. Pay particular attention to these vital points:
- Inspect fuses and relays for signs of damage or fading
- Test alternator output to guarantee proper charging
- Monitor dashboard warning lights and address any alerts promptly
- Replace worn-out or cracked wires immediately
| Preventive Action | Recommended Frequency |
|---|---|
| Battery Terminal Cleaning | Every 6 months |
| Wiring Inspection | Annually |
| Alternator Testing | Every 12,000 miles |
| Fuse & Relay Check | During routine servicing |
Q&A
Q&A: How to Diagnose Car Electrical Problems
Q1: What are the common signs that indicate an electrical problem in a car?
A: Electrical issues often reveal themselves through flickering or dim headlights, a non-responsive dashboard, malfunctioning power windows or locks, and unusual sounds such as clicking when turning the key. Sometimes the car may fail to start entirely, or warning lights on the dashboard may illuminate sporadically.
Q2: Where should I begin diagnosing a suspected electrical problem?
A: Start with the basics—check the battery’s condition and connections. Ensure terminals are clean, tight, and corrosion-free. Next, inspect the fuses as a blown fuse often points directly to trouble. It’s helpful to have a wiring diagram of your car’s electrical system to trace potential issues.
Q3: How can I test the car battery effectively?
A: Use a multimeter to measure the battery voltage. A fully charged battery should read around 12.6 volts with the engine off. When the engine runs, voltage typically rises to 13.7–14.7 volts, indicating the alternator is charging the battery properly. Low or fluctuating readings suggest battery or charging system problems.
Q4: What role does the alternator play in the car’s electrical system?
A: The alternator recharges the battery while the engine is running and powers electrical components. If the alternator fails, the battery drains quickly, causing electrical accessories to falter. Signs of alternator problems include dim lights, dashboard warning lights, and difficulty starting the car.
Q5: How do I identify wiring issues or shorts?
A: Physical inspection is key—look for frayed, melted, or broken wires. Use a continuity tester or multimeter to check for breaks. If a fuse blows repeatedly, it points to a short circuit. Listening for unusual sounds like buzzing or crackling can also help pinpoint wiring faults.
Q6: Can faulty electrical components mimic other car problems?
A: Absolutely. For example, a bad ignition switch may prevent the engine from starting, mimicking mechanical failure. Similarly, a malfunctioning sensor can trigger check-engine lights, making an electrical issue appear as an engine problem.
Q7: When should I consult a professional mechanic?
A: If you’re uncomfortable working with electrical systems or after you’ve exhausted basic troubleshooting without success, it’s wise to seek professional help. Complex issues like computer module failures or intricate wiring harness problems require specialized diagnostic equipment and expertise.
Q8: What tools are essential for diagnosing car electrical problems at home?
A: A digital multimeter is indispensable for measuring voltage, current, and resistance. A test light helps quickly check power presence. Basic hand tools for removing panels and fuses, alongside a wiring diagram specific to your vehicle, will make the process smoother.
Q9: How can regular maintenance help prevent electrical failures?
A: Keeping battery terminals clean, regularly inspecting wiring for wear, and replacing aging components can stave off many electrical problems. Also, avoid overloading circuits with aftermarket devices and ensure proper fuse ratings for all accessories installed.
Q10: Is there any trick to understanding complex electrical systems in newer cars?
A: Modern vehicles often rely on computer-controlled systems, which can be daunting. Learning to read OBD-II scanner codes can provide valuable clues. Patience and a methodical approach—testing one system at a time—are your best allies in unraveling electronic mysteries under the hood.
To Wrap It Up
Navigating the maze of car electrical problems can feel daunting, but with patience, the right tools, and a methodical approach, even the most perplexing issues become manageable puzzles. By understanding the basic principles and trusting your diagnostic instincts, you empower yourself to keep your vehicle’s electrical system running smoothly. Remember, every flicker and every click tells a story—listen closely, and you’ll uncover the clues that lead to a well-lit, reliably charged drive ahead.
475 Comments
https://t.me/s/Online_1_xbet/1084
https://t.me/s/Online_1_xbet/2739
https://t.me/s/Official_1xbet_1xbet
https://t.me/s/rating_online/13
https://t.me/rating_online/7
https://t.me/rating_online/2
https://t.me/rating_online/9
https://t.me/rating_online/4
https://t.me/rating_online/1
https://t.me/s/rating_online/1
https://t.me/rating_online/8
https://t.me/s/rating_online
https://t.me/s/rating_online/3
https://t.me/Online_1_xbet/2058
https://t.me/Online_1_xbet/2073
https://t.me/Online_1_xbet/3392
https://t.me/Online_1_xbet/2200
https://t.me/Online_1_xbet/3093
https://t.me/Online_1_xbet/2618
https://t.me/Online_1_xbet/3238
https://t.me/Online_1_xbet/2725
https://t.me/Online_1_xbet/2332
https://t.me/Online_1_xbet/2801
https://t.me/Online_1_xbet/2877
https://t.me/Official_1xbet_1xbet/s/1128
https://t.me/Official_1xbet_1xbet/s/1239
https://t.me/Official_1xbet_1xbet/s/208
https://t.me/Official_1xbet_1xbet/s/212
https://t.me/Official_1xbet_1xbet/s/1070
https://t.me/Official_1xbet_1xbet/s/450
https://t.me/Official_1xbet_1xbet/s/727
https://t.me/Official_1xbet_1xbet/s/712
https://t.me/Official_1xbet_1xbet/s/138
https://t.me/Official_1xbet_1xbet/s/296
https://t.me/Official_1xbet_1xbet/s/545
https://t.me/Official_1xbet_1xbet/s/1087
https://t.me/Official_1xbet_1xbet/s/1483
https://t.me/Official_1xbet_1xbet/s/870
https://t.me/Official_1xbet_1xbet/s/413
https://t.me/Official_1xbet_1xbet/s/1071
https://t.me/Official_1xbet_1xbet/s/565
https://t.me/Official_1xbet_1xbet/s/1194
https://t.me/Official_1xbet_1xbet/s/775
https://t.me/Official_1xbet_1xbet/s/1013
https://t.me/Official_1xbet_1xbet/s/730
https://t.me/Official_1xbet_1xbet/s/506
https://t.me/Official_1xbet_1xbet/s/888
https://t.me/Official_1xbet_1xbet/s/1497
https://t.me/Official_1xbet_1xbet/s/559
https://t.me/Official_1xbet_1xbet/s/587
https://t.me/Official_1xbet_1xbet/s/74
https://t.me/Official_1xbet_1xbet/s/806
https://t.me/Official_1xbet_1xbet/s/1114
https://t.me/Official_1xbet_1xbet/s/1192
https://t.me/Official_1xbet_1xbet/s/1329
https://t.me/Official_1xbet_1xbet/s/521
https://t.me/Official_1xbet_1xbet/s/1043
https://t.me/Official_1xbet_1xbet/s/878
https://t.me/Official_1xbet_1xbet/s/714
https://t.me/Official_1xbet_1xbet/s/1511
https://t.me/Official_1xbet_1xbet/s/289
https://t.me/Official_1xbet_1xbet/s/591
https://t.me/Official_1xbet_1xbet/s/1131
https://t.me/Official_1xbet_1xbet/s/76
https://t.me/Official_1xbet_1xbet/s/1002
https://t.me/Official_1xbet_1xbet/s/780
https://t.me/Official_1xbet_1xbet/s/807
https://t.me/Official_1xbet_1xbet/s/1235
https://t.me/Official_1xbet_1xbet/s/564
https://t.me/Official_1xbet_1xbet/s/406
https://t.me/Official_1xbet_1xbet/1774
https://t.me/Official_1xbet_1xbet/1600
https://t.me/Official_1xbet_1xbet/1617
https://t.me/Official_1xbet_1xbet/1721
https://t.me/Official_1xbet_1xbet/1770
https://t.me/Official_1xbet_1xbet/1765
https://t.me/Official_1xbet_1xbet/1780
https://t.me/s/Official_1xbet_1xbet/1612
https://t.me/s/Official_1xbet_1xbet/1725
https://t.me/s/Official_1xbet_1xbet/1846
https://t.me/Official_1xbet_1xbet/1748
https://t.me/Official_1xbet_1xbet/1746
https://t.me/Official_1xbet_1xbet/1838
https://t.me/Official_1xbet_1xbet/1848
https://t.me/Official_1xbet_1xbet/1659
https://t.me/s/Official_1xbet_1xbet/1678
https://t.me/s/Official_1xbet_1xbet/1700
https://t.me/Official_1xbet_1xbet/1630
https://t.me/Official_1xbet_1xbet/1727
https://t.me/s/Official_1xbet_1xbet/1772
https://t.me/Official_1xbet_1xbet/1833
https://t.me/Official_1xbet_1xbet/1836
https://t.me/Official_1xbet_1xbet/1612
https://t.me/s/Official_1xbet_1xbet/1816
https://t.me/Official_1xbet_1xbet/1787
https://t.me/Official_1xbet_1xbet/1723
https://t.me/Official_1xbet_1xbet/1829
https://t.me/Official_1xbet_1xbet/1816
https://t.me/s/Official_1xbet_1xbet/1854
https://t.me/s/Official_1xbet_1xbet/1850
https://t.me/s/Official_1xbet_1xbet/1705
https://t.me/Official_1xbet_1xbet/1824
https://t.me/Official_1xbet_1xbet/1668
https://t.me/s/Official_1xbet_1xbet/1651
https://t.me/Official_1xbet_1xbet/1695
https://t.me/s/Official_1xbet_1xbet/1813
https://t.me/Official_1xbet_1xbet/1637
https://t.me/s/Official_1xbet_1xbet/1621
https://t.me/s/Official_1xbet_1xbet/1818
https://t.me/Official_1xbet_1xbet/1699
https://t.me/s/Official_1xbet_1xbet/1619
https://t.me/Official_1xbet_1xbet/1628
https://t.me/Official_1xbet_1xbet/1821
https://t.me/Official_1xbet_1xbet/1610
https://t.me/s/Official_1xbet_1xbet/1763
https://t.me/Official_1xbet_1xbet/1687
https://t.me/Official_1xbet_1xbet/1714
https://t.me/s/Official_1xbet_1xbet/1776
https://t.me/Official_1xbet_1xbet/1855
https://t.me/Official_1xbet_1xbet/1776
https://t.me/Official_1xbet_1xbet/1640
https://t.me/s/Official_1xbet_1xbet/1848
https://t.me/s/Official_1xbet_1xbet/1849
https://t.me/Official_1xbet_1xbet/1622
https://t.me/Official_1xbet_1xbet/1817
https://t.me/Official_1xbet_1xbet/1652
https://t.me/s/Official_1xbet_1xbet/1759
https://t.me/Official_1xbet_1xbet/1694
https://t.me/s/Official_1xbet_1xbet/1648
https://t.me/s/Official_1xbet_1xbet/1682
https://t.me/Official_1xbet_1xbet/1706
https://t.me/Official_1xbet_1xbet/1616
https://t.me/s/Official_1xbet_1xbet/1832
https://t.me/Official_1xbet_1xbet/1782
https://t.me/Official_1xbet_1xbet/1739
https://t.me/Official_1xbet_1xbet/1639
https://t.me/s/topslotov
[https://t.me/s/official_1win_aviator](https://t.me/s/official_1win_aviator)
https://t.me/s/reiting_top10_casino/3
https://t.me/reiting_top10_casino/5
https://t.me/s/reiting_top10_casino/4
https://t.me/s/reiting_top10_casino/9
https://t.me/reiting_top10_casino/2
https://t.me/reiting_top10_casino/6
https://t.me/s/reiting_top10_casino/8
https://t.me/reiting_top10_casino/4
https://t.me/s/reiting_top10_casino/10
https://t.me/reiting_top10_casino/9
https://t.me/reiting_top10_casino/10
https://t.me/s/reiting_top10_casino/7
https://t.me/s/reiting_top10_casino/2
https://t.me/s/reiting_top10_casino/6
https://t.me/reiting_top10_casino/3
https://t.me/s/reiting_top10_casino/5
https://t.me/reiting_top10_casino
https://t.me/s/reiting_top10_casino
https://t.me/reiting_top10_casino/7
https://t.me/s/Gaming_1xbet
https://t.me/s/PlayCasino_1xbet
https://t.me/s/PlayCasino_1win
https://t.me/s/PlayCasino_1win
https://t.me/s/PlayCasino_1xbet
https://t.me/s/ofitsialniy_1win/33/evith
https://t.me/s/iw_1xbet
https://t.me/s/Official_beefcasino
https://t.me/s/ofitsialniy_1win
https://t.me/bs_1xbet/30
https://t.me/bs_1xbet/22
https://t.me/s/bs_1xbet/32
https://t.me/s/bs_1xbet/17
https://t.me/bs_1xbet/18
https://t.me/bs_1xbet/25
https://t.me/s/bs_1xbet/43
https://t.me/s/bs_1xbet/40
https://t.me/bs_1xbet/32
https://t.me/s/bs_1xbet/30
https://t.me/s/bs_1xbet/36
https://t.me/bs_1xbet/23
https://t.me/s/bs_1xbet/33
https://t.me/bs_1xbet/30
https://t.me/s/bs_1xbet/17
https://t.me/s/bs_1xbet/44
https://t.me/bs_1xbet/7
https://t.me/bs_1xbet/11
https://t.me/s/bs_1xbet/27
https://t.me/s/bs_1xbet/16
https://t.me/s/bs_1xbet/30
https://t.me/s/bs_1xbet/2
https://t.me/bs_1xbet/18
https://t.me/bs_1xbet/51
https://t.me/s/bs_1xbet/40
https://t.me/s/bs_1xbet/11
https://t.me/s/bs_1xbet/31
https://t.me/s/bs_1xbet/29
https://t.me/s/bs_1xbet/36
https://t.me/s/bs_1xbet/4
https://t.me/s/bs_1xbet/7
https://t.me/bs_1xbet/46
https://t.me/bs_1xbet/36
https://t.me/bs_1xbet/45
https://t.me/s/bs_1xbet/42
https://t.me/s/bs_1xbet/11
https://t.me/bs_1xbet/13
https://t.me/s/bs_1xbet/21
https://t.me/s/bs_1xbet/3
https://t.me/bs_1xbet/39
https://t.me/s/bs_1xbet/27
https://t.me/bs_1xbet/40
https://t.me/jw_1xbet/314
https://t.me/s/jw_1xbet/891
https://t.me/s/jw_1xbet/572
https://t.me/s/jw_1xbet/18
https://t.me/jw_1xbet/65
https://t.me/jw_1xbet/924
https://t.me/bs_1Win/518
https://t.me/bs_1Win/1190
https://t.me/bs_1Win/976
https://t.me/s/bs_1Win/1240
https://t.me/bs_1Win/1251
https://t.me/bs_1Win/687
https://t.me/s/bs_1Win/823
https://t.me/bs_1Win/858
https://t.me/s/bs_1Win/596
https://t.me/s/bs_1Win/950
https://t.me/bs_1Win/859
https://t.me/s/bs_1Win/1105
https://t.me/Official_mellstroy_casino/31
https://t.me/s/Official_mellstroy_casino/16
https://t.me/Beefcasino_rus/6
https://t.me/s/Official_mellstroy_casino/57
https://t.me/s/Official_mellstroy_casino/29
https://t.me/Official_mellstroy_casino/41
https://t.me/s/Official_mellstroy_casino/56
https://t.me/s/Official_mellstroy_casino/24
https://t.me/s/Official_mellstroy_casino/26
https://t.me/Official_mellstroy_casino/21
https://t.me/Official_mellstroy_casino/10
https://t.me/Official_mellstroy_casino/17
https://t.me/Official_mellstroy_casino/40
https://t.me/Official_mellstroy_casino/6
https://t.me/s/Best_promocode_rus/1823
https://t.me/s/Best_promocode_rus/3555
https://t.me/Beefcasino_rus/57
https://t.me/ud_Martin/48
https://t.me/s/ud_Starda/63
https://t.me/ud_Irwin/60
https://t.me/ud_Irwin/64
https://t.me/ud_GGBet/49
https://t.me/ud_Monro/64
https://t.me/s/ud_Flagman/49
https://t.me/s/ud_GGBet/62
https://t.me/ud_Gizbo/50
https://t.me/ud_MrBit/50
https://t.me/ud_Booi/44
https://t.me/ud_Irwin/54
https://t.me/ud_Martin/45
https://t.me/s/ud_MrBit/52
https://t.me/ud_Leon/48
https://t.me/s/ud_Gama/62
https://t.me/s/Beefcasino_rus/59
https://t.me/s/ud_Booi/62
https://t.me/ud_Izzi/52
https://t.me/s/ud_Pokerdom/51
https://t.me/s/ud_Casino_X/48
https://t.me/s/ud_Daddy/45
https://t.me/ud_GGBet/45
https://t.me/s/ud_Stake/56
https://t.me/s/ud_Pin_Up/52
https://t.me/s/ud_Irwin/57
https://t.me/ud_Gizbo/62
https://t.me/ud_Gizbo/19
https://t.me/s/ud_Drip/26
https://t.me/ud_Jet/10
https://t.me/s/Ud_pIn_up
https://t.me/s/uD_soL
https://t.me/s/UD_LegzO
https://t.me/s/ud_voDkA
https://t.me/s/ud_poKERdoM
https://t.me/s/Ud_GiZbo
https://t.me/s/UD_ROX
https://t.me/s/UD_iRWIn
https://t.me/official_1win_aviator/38
https://t.me/s/ud_1Go
https://t.me/s/uD_stArda
https://t.me/s/official_1win_aviator/96
https://t.me/s/UD_lex
https://t.me/s/UD_VULKAN
https://t.me/s/Ud_FlagMAN
https://t.me/s/Beefcasino_rus
https://t.me/s/tf_1win
https://t.me/s/kfo_1win
https://t.me/s/Top_bk_ru
https://t.me/s/UD_VODKA
https://t.me/s/ud_FRESh
https://t.me/s/UD_DriP
https://t.me/s/ud_jeT
https://t.me/s/UD_vULKAn
https://t.me/s/ud_keNT
https://t.me/s/uD_LEgzO
https://t.me/s/uD_fLAgmAn
https://t.me/s/Ud_gAMa
https://t.me/s/ud_CAsiNo_X
https://t.me/s/ud_1xSlOtS
https://t.me/s/ke_CatCasino
https://t.me/s/ke_Daddy
https://t.me/s/ke_Riobet
https://t.me/official_1win_aviator/231
https://t.me/s/ke_1xSlots
https://t.me/s/kef_beef
https://t.me/s/ke_Legzo
https://t.me/s/ke_Fresh
https://t.me/s/ke_kent
https://t.me/s/ke_Vulkan
https://t.me/s/ke_Gama
https://t.me/s/kef_Lex
https://t.me/s/ke_Flagman
https://t.me/s/ke_MostBet
https://t.me/s/ke_Starda
https://t.me/s/ke_1xbet
https://t.me/s/ke_Vodka
https://t.me/s/ke_Jet
https://t.me/s/ke_Pin_Up
https://t.me/s/ke_Gizbo
https://t.me/s/kef_Rox
https://t.me/s/ke_Pinco
https://t.me/s/kef_R7
https://t.me/s/ke_Izzi
https://t.me/s/ke_PlayFortuna
https://t.me/s/ke_DragonMoney
https://t.me/s/ke_Stake
https://t.me/s/ke_Sol
https://t.me/s/ke_JoyCasino
https://t.me/official_1win_aviator/294
https://t.me/s/ke_Booi
https://t.me/s/ke_1Go
https://t.me/s/ke_Martin
https://t.me/s/ke_Irwin
https://t.me/s/ke_Kometa
https://t.me/s/ke_GGBet
https://t.me/s/ke_Leon
https://t.me/s/ke_Pokerdom
https://t.me/s/top_kazino_z
https://t.me/s/topcasino_v_rossii
https://t.me/a_Top_onlinecasino/16
https://t.me/s/a_Top_onlinecasino/7
https://t.me/s/a_Top_onlinecasino/9
https://t.me/a_Top_onlinecasino/19
https://t.me/s/a_Top_onlinecasino/16
https://t.me/s/a_Top_onlinecasino/18
https://t.me/s/a_Top_onlinecasino/19
https://t.me/s/a_Top_onlinecasino/17
https://t.me/a_Top_onlinecasino/4
https://t.me/a_Top_onlinecasino/2
https://t.me/s/a_Top_onlinecasino/14
https://t.me/topcasino_rus/
https://t.me/s/official_Irwin_es
https://t.me/s/official_Kent_es
https://t.me/s/official_Sol_es
https://t.me/s/official_Lex_es
https://t.me/s/official_Fresh_es
https://t.me/s/official_JoyCasino_ed
https://t.me/s/official_Martin_ed
https://t.me/s/official_Kometa_ed
https://t.me/s/official_JoyCasino_es
https://t.me/s/official_Gizbo_es
https://t.me/s/official_Martin_es
https://t.me/s/official_1xbet_ed
https://t.me/s/official_Sol_ed
https://t.me/s/official_Starda_es
https://t.me/s/official_R7_es
https://t.me/s/official_Kent_ed
https://t.me/s/official_Jet_es
https://t.me/s/official_PinUp_es
https://t.me/s/official_Starda_ed
https://t.me/s/official_GGBet_ed
https://t.me/s/official_Monro_ed
https://t.me/s/official_Monro_es
https://t.me/s/official_Vodka_es
https://t.me/s/official_MostBet_ed
https://t.me/s/official_Izzi_es
https://t.me/GGBet_egs/22
https://t.me/s/iGaming_live/4633
https://t.me/s/Flagman_egs/15
https://t.me/s/Rox_egs/7
https://t.me/s/Izzi_egs/3
https://t.me/Starda_egs/8
https://t.me/s/MrBit_egs/19
https://t.me/s/Stake_egs/3
https://t.me/Leon_egs/21
https://t.me/s/Pokerdom_egs/18
https://t.me/Stake_egs/4
https://t.me/s/Booi_egs/10
https://t.me/s/Stake_egs/12
https://t.me/s/Rox_egs/11
https://t.me/Izzi_egs/20
https://t.me/CatCasino_egs/12
https://t.me/Riobet_egs/5
https://t.me/Vulkan_egs/6
https://t.me/s/GGBet_egs/14
https://t.me/s/Vodka_egs/3
https://t.me/GGBet_egs/6
https://t.me/CatCasino_egs/18
https://t.me/s/Gama_egs/16
https://t.me/Martin_egs/17
https://t.me/Vulkan_egs/22
https://t.me/s/va_1xbet/20
https://t.me/s/iGaming_live/4591
https://t.me/va_1xbet/14
https://t.me/s/va_1xbet/24
https://t.me/s/va_1xbet/21
https://t.me/va_1xbet/13
https://t.me/va_1xbet/5
https://t.me/va_1xbet/24
https://t.me/va_1xbet/4
https://t.me/s/va_1xbet/18
https://t.me/s/va_1xbet/6
https://t.me/s/va_1xbet/3
https://t.me/va_1xbet/18
https://t.me/va_1xbet/21
https://t.me/va_1xbet/9
https://t.me/s/surgut_narashchivaniye_nogtey/14
https://t.me/surgut_narashchivaniye_nogtey/13
https://t.me/surgut_narashchivaniye_nogtey/5
https://t.me/s/ah_1xbet/9
https://t.me/ah_1xbet/19
https://t.me/ah_1xbet/12
https://t.me/s/ah_1xbet/11
https://t.me/ah_1xbet/15
https://t.me/s/ah_1xbet/7
https://t.me/s/rating_online
https://t.me/ah_1xbet/13
https://t.me/ah_1xbet/3
https://t.me/ah_1xbet/2
https://t.me/ah_1xbet/17
https://t.me/ah_1xbet/10
https://t.me/s/Best_rating_casino
https://t.me/s/reyting_topcazino/19
https://t.me/topcasino_rus/
https://t.me/top_ratingcasino/6
https://t.me/a_Topcasino/5
https://t.me/a_Topcasino/6
https://t.me/top_ratingcasino/2
https://t.me/top_ratingcasino/4
https://t.me/top_ratingcasino/7
https://t.me/top_ratingcasino/5
https://telegra.ph/Top-kazino-11-14-2
https://t.me/kazino_bez_filtrov
https://t.me/s/kazino_bez_filtrov
https://t.me/da_1xbet/7
https://t.me/da_1xbet/3
https://t.me/da_1xbet/10
https://t.me/da_1xbet/12
https://t.me/da_1xbet/8
https://t.me/da_1xbet/5
https://t.me/da_1xbet/11
https://t.me/da_1xbet/2
https://t.me/da_1xbet/13
https://t.me/da_1xbet/9
https://t.me/da_1xbet/6
https://t.me/rq_1xbet/1237
https://t.me/rq_1xbet/1215
https://t.me/rq_1xbet/1546
https://t.me/s/rq_1xbet/1389
https://t.me/s/rq_1xbet/638
https://t.me/s/rq_1xbet/1322
https://t.me/s/rq_1xbet/1097
https://t.me/s/rq_1xbet/1258
https://t.me/s/Official_1xbet1/280
https://t.me/s/Official_1xbet1/564
https://t.me/s/Official_1xbet1/488
https://t.me/s/Official_1xbet1/551
https://t.me/Official_1xbet1/251
https://t.me/s/Official_1xbet1/1228
https://t.me/s/Official_1xbet1/1363
https://t.me/Official_1xbet1/1081