

There’s a certain quiet confidence that comes with knowing how to fix a flat tire—a skill both practical and empowering. Whether you’re stranded on a lonely road or simply tackling an unexpected inconvenience in your driveway, understanding the steps to get your tire back in shape can turn a frustrating moment into a manageable task. In this article, we’ll walk you through the essential tools, techniques, and tips to help you handle a flat tire with calm and efficiency, ensuring you’re ready to get back on the road in no time.
Table of Contents
- Gathering Essential Tools for a Smooth Tire Repair
- Safely Preparing Your Vehicle to Change the Tire
- Step-by-Step Guide to Removing the Flat Tire
- Choosing the Right Patch or Plug for the Job
- Properly Reinstalling the Tire and Securing Lug Nuts
- Final Checks to Ensure Your Tire is Roadworthy
- Q&A
- In Conclusion

Gathering Essential Tools for a Smooth Tire Repair
Before diving into the repair process, having the right equipment on hand ensures a swift and hassle-free fix. Begin by gathering the basic essentials: a reliable jack, a lug wrench that fits your vehicle’s lug nuts, and a portable air pump. These fundamental tools will empower you to safely lift the car, remove the damaged tire, and inflate the replacement with ease. It’s also wise to keep a pair of sturdy gloves and reflective safety gear within reach for protection and visibility, especially if you’re working roadside.
Beyond the basics, certain accessories make the job smoother and more efficient. A tire plug kit or a can of sealant can be a real lifesaver for patching small punctures quickly, while a tire pressure gauge helps ensure your repaired tire is inflated to the correct psi. Organizing these items in a compact, weather-resistant case will maximize convenience and readiness for unexpected flats. Here’s a quick reference table to keep your tire repair kit complete:
| Tool | Purpose | Notes |
|---|---|---|
| Jack | Lift the vehicle | Check weight rating |
| Lug Wrench | Remove/attach lug nuts | Right size crucial |
| Tire Plug Kit | Patch punctures | Quick temporary fix |
| Air Pump | Reinflate tire | Portable preferred |
| Pressure Gauge | Measure tire pressure | Ensures safe inflation |
- Tip: Regularly inspect your kit and replace any expired or worn-out components to stay prepared.
Safely Preparing Your Vehicle to Change the Tire
Before you even think about jacking up your car, it’s crucial to ensure your surroundings and vehicle are secure. Start by pulling over to a flat, stable area away from traffic. Switch on your hazard lights to alert other drivers, and apply the parking brake to keep the vehicle steady. If you’re on a road with multiple lanes, position yourself away from the flow of traffic to maximize safety.
Next, gather all the essential tools: your jack, lug wrench, and spare tire. Keep these items organized and within easy reach. To prevent the car from rolling, place wheel wedges against the tires opposite to the flat one. Finally, consult your vehicle’s manual for specific instructions and torque recommendations, as this can vary between models. Always wear reflective clothing if available, especially at night, to increase your visibility.
- Pull over to a safe, flat spot
- Turn on hazard lights
- Apply parking brake
- Gather tools and spare tire
- Use wheel wedges
- Wear reflective gear
| Step | Action | Purpose |
|---|---|---|
| 1 | Park on flat ground | Stability and safety |
| 2 | Engage parking brake | Prevent rolling |
| 3 | Place wheel wedges | Extra security |
| 4 | Gather jack and tools | Efficiency during change |

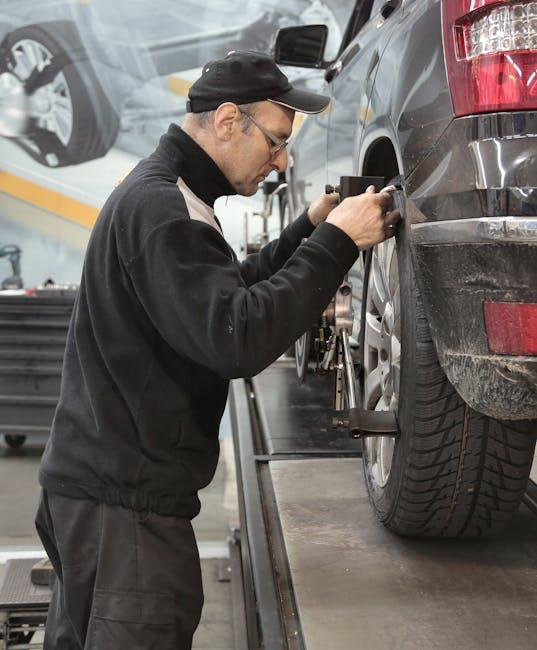
Step-by-Step Guide to Removing the Flat Tire
Begin by parking your vehicle on a flat, stable surface and engage the parking brake. Locate your spare tire, jack, and lug wrench, usually found in the trunk or under the floor panel. Before lifting the car, slightly loosen the lug nuts on the flat wheel by turning them counterclockwise with the wrench—this prevents the wheel from spinning when elevated. Next, consult your owner’s manual for the recommended jacking points to avoid damaging your vehicle’s frame. Carefully position the jack and raise the car until the flat tire is a few inches off the ground.
With the tire suspended, fully remove the loosened lug nuts and gently pull the tire straight off the hub. Place the flat tire aside and quickly inspect the hub for any debris or damage. When reinstalling the spare, align the lug nut holes and hand-tighten the nuts to keep the wheel in place. Lower the vehicle slowly, then use the wrench to firmly tighten the lug nuts in a crisscross pattern to ensure even pressure. Use the table below as a quick reference for torque settings based on tire size to avoid overtightening:
| Tire Size | Recommended Torque (ft-lbs) |
|---|---|
| Small (13-15″) | 80-100 |
| Medium (16-18″) | 100-120 |
| Large (19-22″) | 120-140 |

Choosing the Right Patch or Plug for the Job
Selecting the proper patch or plug is crucial for a durable flat tire repair. When deciding, consider the size and type of puncture first. For small punctures caused by nails or screws, a plug can be a practical and quick solution, sliding into the hole to seal it from within. However, for larger or irregularly shaped damages, a patch applied inside the tire ensures a more secure and lasting fix by covering a broader area around the puncture.
It’s also important to examine the tire material and location of the damage. For instance, sidewall repairs often require specialized patches or sometimes even replacement, as this area undergoes more flexing and stress. To help guide your choice, here’s a quick reference chart:
| Damage Type | Recommended Repair | Longevity |
|---|---|---|
| Small puncture (nail, screw) | Plug | Short to medium term |
| Larger or irregular puncture | Patch | Long term |
| Sidewall damage | Replacement / Specialized patch | Depends on severity |
- Plugs are easy to install and can be a great quick fix for holes under 1/4 inch.
- Patches provide a better seal and are ideal when structural integrity is key.
- Always check manufacturer guidelines to ensure your repair choice is vehicle compliant.
Properly Reinstalling the Tire and Securing Lug Nuts
After patching or replacing your tire, it’s essential to carefully place it back onto the wheel hub. Start by aligning the tire’s holes with the wheel studs and gently push the tire in place. Don’t rush this part — proper alignment avoids damaging the studs or the wheel itself. Once the tire is seated correctly, finger-tighten the lug nuts to hold it in place without fully securing them yet. This initial snug fit ensures the wheel can still be slightly adjusted to achieve even tightening later.
Next, secure the lug nuts using a cross or star pattern to evenly distribute pressure and prevent the wheel from wobbling. Using a lug wrench or torque wrench, tighten each nut gradually in small increments, moving in the sequence below:
| Step | Lug Nut Position | Action |
|---|---|---|
| 1 | Top | Hand tighten, then wrench |
| 2 | Bottom opposite | Wrench tighten |
| 3 | Right | Wrench tighten |
| 4 | Left opposite | Wrench tighten |
| 5 | Repeat top | Final torque |
- Use a torque wrench to ensure lug nuts are tightened to your vehicle manufacturer’s specifications.
- Do not overtighten, which can strip threads or warp the brake rotor.
- Re-check the lug nuts after driving a few miles to maintain safety.
Final Checks to Ensure Your Tire is Roadworthy
Before hitting the road, take a moment to verify your tire’s condition meticulously. Start by checking the tire pressure—use a reliable gauge to ensure it matches the manufacturer’s recommended PSI. Underinflated or overinflated tires can affect your handling and fuel efficiency. Next, inspect the tire tread depth by using the penny test or a tread depth gauge. Treads should be at least 2/32 of an inch deep to provide adequate grip, especially in wet conditions.
Additionally, look for any signs of damage such as cuts, bulges, or embedded objects. These can compromise your tire’s integrity and safety. Finally, spin the tire to ensure it is balanced and seated properly on the rim. If any abnormalities such as vibrations or uneven wear patterns appear, it’s best to consult a professional before driving further.
- Check tire pressure: Use a gauge, adjust to recommended PSI.
- Inspect tread depth: Minimum safe depth is 2/32 inch.
- Look for damage: Cuts, cracks, bulges or nails embedded.
- Confirm tire balance: Ensure smooth rotation without vibration.
| Check | Action | Result |
|---|---|---|
| Pressure | Inflate/deflate as needed | Improved safety and fuel economy |
| Tread Depth | Measure minimum 2/32 inch | Better traction and wet performance |
| Damage | Remove hazards or replace tire | Prevent blowouts or punctures |
| Balance | Adjust or re-seat if necessary | Smooth ride and even wear |
Q&A
Q&A: How to Fix a Flat Tire
Q1: What’s the very first thing I should do when I realize I have a flat tire?
A1: Safety comes first! Pull over to a flat, stable spot away from traffic. Turn on your hazard lights, engage the parking brake, and if you have them, place reflective triangles or cones to alert other drivers.
Q2: What tools do I need to fix a flat tire by myself?
A2: The essentials include your spare tire, a jack, a lug wrench, and ideally, a wheel chock or something to block the wheels. Some helpful extras: gloves, a flashlight if it’s dark, and perhaps a tire pressure gauge.
Q3: How do I safely lift the car to change the tire?
A3: Locate the vehicle’s designated jack points (check your manual), position the jack firmly, and lift the car until the flat tire is off the ground. Always avoid putting any part of your body under the vehicle while it’s supported only by the jack.
Q4: What’s the correct way to remove the flat tire?
A4: Use the lug wrench to loosen the lug nuts by turning them counterclockwise. Don’t remove them completely before lifting the car. Once lifted, remove the lug nuts fully and pull the tire straight off.
Q5: How do I put the spare tire on?
A5: Align the spare with the lug bolts, slide it onto the hub, then hand-tighten the lug nuts. Lower the car carefully and then tighten the lug nuts firmly in a crisscross pattern for even pressure.
Q6: How can I be sure the spare tire is safe to drive on?
A6: If it’s a “donut” spare, remember it’s a temporary fix designed for limited speed (usually no more than 50 mph) and distance (around 70 miles). Check tire pressure once installed and replace or repair your regular tire promptly.
Q7: What if I don’t feel comfortable changing the tire myself?
A7: No problem! Many roadside assistance services can help. Keep their contact info handy or use a smartphone app for quick access. Sometimes, the safest choice is calling for professional help.
Q8: Can I prevent flats altogether?
A8: While no tire is immune, you can reduce risk by regularly checking tire pressure, rotating your tires, avoiding road hazards, and replacing tires that are worn out or damaged.
Changing a flat tire might seem daunting at first, but with the right know-how and preparation, you’ll be back on the road in no time!
In Conclusion
Fixing a flat tire doesn’t have to be a journey into the unknown. With a bit of preparation, patience, and the right know-how, you can turn a roadside mishap into a simple, even empowering, routine. Whether it’s your first time or your fiftieth, each twist of the wrench and pump of the tire is a small victory—proof that sometimes the roadblocks we face are just detours waiting to be conquered. So next time your tire goes flat, don’t dread the challenge; embrace the opportunity to keep moving forward, one repair at a time.