

In today’s world, personalizing your vehicle goes beyond just choosing the perfect paint color or upgrading the wheels. Installing car electrical accessories, whether it’s a new stereo system, ambient lighting, or advanced security features, can dramatically enhance both functionality and driving experience. Yet, for many, the idea of working with their car’s electrical system can feel intimidating and complex. This guide aims to demystify the process, offering clear, step-by-step instructions to help you confidently add those modern touches to your ride. Whether you’re a seasoned DIYer or a curious beginner, learning how to install car electrical accessories is not only rewarding but also an empowering way to connect with your vehicle on a deeper level.
Table of Contents
- Choosing the Right Accessories for Your Vehicle Model
- Essential Tools and Safety Precautions Before Installation
- Step-by-Step Guide to Wiring and Connections
- Optimizing Power Supply and Preventing Electrical Overload
- Testing Your Accessories for Proper Functionality
- Maintenance Tips to Keep Your Car’s Electrical System Running Smoothly
- Q&A
- In Summary

Choosing the Right Accessories for Your Vehicle Model
When selecting accessories for your car’s electrical system, compatibility is key. Each vehicle model has unique wiring, voltage requirements, and connector types, so choosing accessories specifically designed or certified for your model ensures a smoother installation process and better performance. Consider consulting your vehicle’s manual or manufacturer’s website to verify compatibility, and don’t overlook the importance of quality brands that provide detailed specifications and customer support. Avoid generic parts when possible, as they might cause shorts, poor connections, or void your warranty.
Keep your car’s electrical architecture in mind by planning your accessory choices carefully. For instance, features like smart lighting, upgraded audio systems, or additional USB charging ports might require different amounts of power or special harnesses. Here’s a quick guide to help you evaluate your options:
| Accessory Type | Power Requirement | Connection Type | Notes |
|---|---|---|---|
| LED Lighting | Low (5-12W) | Plug & Play | Easy install, check polarity |
| Car Audio Amplifier | High (50-200W) | Direct Wiring | Use fused power lines |
| USB Charging Ports | Medium (10-20W) | Fuse Tap or Cigarette Lighter | Choose USB-C for fast charging |
- Double-check power ratings against your vehicle’s electrical load capacity.
- Look for plug-and-play setups to minimize cutting or splicing wires.
- Verify the equipment’s certification to meet automotive standards.
- Consider weatherproofing if accessories will be exposed to harsh conditions.
Essential Tools and Safety Precautions Before Installation
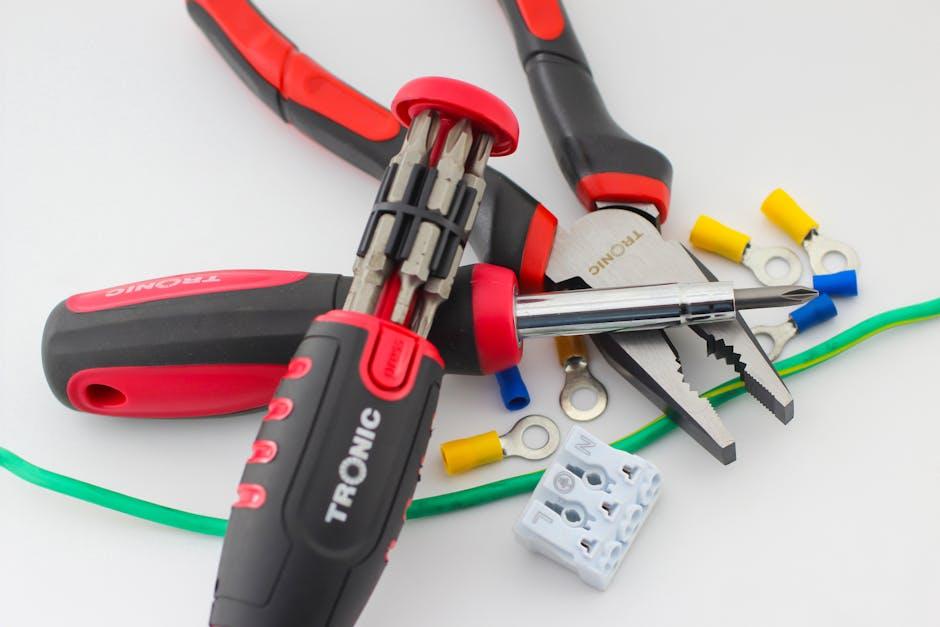
Before embarking on installing any car electrical accessories, gathering the right tools is crucial to ensure a smooth and efficient process. Essential items include a multimeter for diagnosing voltage and continuity, wire strippers for clean connections, and crimping tools to secure terminals firmly. Don’t forget electrical tape or heat shrink tubing to insulate wires, and a set of screwdrivers and pliers tailored for automotive use. Having zip ties handy will help you keep wiring orderly and reduce the risk of accidental disconnections.
Equally important is prioritizing safety to prevent damage to your vehicle or injury to yourself. Always disconnect the car battery before starting any electrical work to avoid short circuits and sparks. Work in a well-lit, dry environment and wear protective gloves to handle sharp wires or connectors. Here’s a quick checklist to keep safety top of mind:
- Disconnect battery terminals to prevent electrical shocks.
- Use insulated tools to minimize the risk of accidental shorts.
- Avoid working near fuel lines or flammable materials.
- Double-check wiring schematics before connecting any terminals.
- Keep a fire extinguisher rated for electrical fires nearby.
| Tool | Purpose |
|---|---|
| Multimeter | Check voltage and continuity |
| Wire Strippers | Remove insulation cleanly |
| Crimping Tool | Secure wire terminals |
| Insulation Tape | Protect and insulate connections |
| Screwdrivers & Pliers | Assembly and adjustments |
Step-by-Step Guide to Wiring and Connections
Begin by identifying the wiring harness and the specific accessory’s wiring colors to avoid confusion during installation. Use a multimeter to trace the power source and ensure a stable connection point, preferably fused to prevent electrical faults. Before connecting, strip the wire ends neatly and use quality connectors like butt connectors or soldering to secure the joints. Always follow the vehicle’s wiring diagram and make sure the ground wires are firmly attached to the chassis for optimal performance and safety.
To organize your connections efficiently, create a checklist of essential tasks:
- Label each wire for easy identification.
- Route wires away from heat sources and moving parts.
- Use wire loom or split tubing for protection.
- Check voltage after connections with a tester.
- Secure all wiring with zip ties to prevent rattling.
| Wire Color | Function | Recommended Connector |
|---|---|---|
| Red | Positive Power | Butt Connector |
| Black | Ground | Ring Terminal |
| Yellow | Ignition Signal | Quick Splice |

Optimizing Power Supply and Preventing Electrical Overload
Ensuring your car’s electrical system can handle new accessories starts with a careful assessment of the power demand. Begin by consulting your vehicle’s manual to identify the maximum current your battery and alternator can safely provide. Avoid the common pitfall of daisy-chaining multiple accessories on a single circuit; instead, distribute the load across multiple circuits or use dedicated fuses for each device. This strategic allocation minimizes the risk of voltage drops and prevents nasty surprises like dimming lights or blown fuses during high-demand periods.
To maintain optimal power flow and protect your vehicle’s electrical health, always incorporate a fuse or circuit breaker tailored to each accessory’s amperage requirements. Regularly inspect wiring for signs of wear or corrosion, and replace any suspect cables with high-quality, appropriately gauged wire. Here is a quick reference for selecting fuse ratings based on accessory amperage:
| Accessory Type | Typical Current Draw | Recommended Fuse Rating |
|---|---|---|
| LED Light Bar | 10-15A | 20A |
| Car Stereo | 5-10A | 15A |
| GPS Navigator | 1-2A | 5A |
| Dash Cam | 2-3A | 5A |
- Use inline fuse holders close to the battery terminal for added protection.
- Secure all wiring to avoid vibrations that may cause shorts over time.
- Test connections with a multimeter before finalizing installation.
Testing Your Accessories for Proper Functionality
After completing the installation of your car electrical accessories, it’s essential to verify their functionality before hitting the road. Begin by turning on the vehicle’s ignition without starting the engine to ensure all connected components receive power. Utilize a multimeter to check voltage levels at key connection points. This not only confirms that your wiring is correct but also helps detect any shorts or open circuits that could compromise performance or safety. Inspect connectors and wiring insulation for any visible damage or loose contacts, as these are common culprits behind intermittent issues.
- Activate each accessory individually to observe operational behavior
- Check for any unusual sounds, flickering, or erratic movements
- Confirm the appropriate functionality via dashboard indicators when applicable
- Test all switches and remote controls multiple times to ensure consistent responsiveness
| Accessory | Key Function Check | Common Issues |
|---|---|---|
| LED lights | Brightness & consistency | Flickering, loose wiring |
| Car stereo | Sound clarity & power | No sound, static interference |
| Backup camera | Visual feed clarity | Blurry image, lag |
Maintenance Tips to Keep Your Car’s Electrical System Running Smoothly
Regular checks and timely care can significantly extend the life of your vehicle’s electrical components. Start by inspecting all wiring connections for corrosion or loose terminals, as these are common culprits behind electrical failures. Using dielectric grease on connectors helps prevent moisture buildup, ensuring a consistent flow of electricity. Keep your battery terminals clean and tight, and don’t forget to test the battery voltage monthly—most issues stem from weak power sources rather than complex wiring faults.
In addition, adopting a few routine habits will safeguard your electrical system against damage. Consider the following:
- Turn off all accessories before shutting off the engine to avoid sudden power surges.
- Use fuses and circuit breakers appropriately to protect delicate circuits from overload.
- Avoid DIY modifications that bypass factory wiring unless you have proper knowledge and tools.
- Schedule professional diagnostics annually to detect hidden faults early on.
| Maintenance Task | Frequency | Key Benefit |
|---|---|---|
| Battery Terminal Cleaning | Monthly | Prevents corrosion buildup |
| Voltage Testing | Every 3 months | Ensures optimal power supply |
| Wiring Inspection | Every 6 months | Detects loose or damaged connections |
| Professional Diagnostic | Annually | Identifies hidden electrical faults |
Q&A
Q: What are car electrical accessories, and why should I install them?
A: Car electrical accessories include items like dash cams, LED lights, stereo systems, and charging ports that enhance your vehicle’s functionality and comfort. Installing them can improve safety, convenience, and entertainment during your drives.
Q: Do I need special tools to install car electrical accessories?
A: Yes, having the right tools makes installation easier and safer. Common tools include wire strippers, crimping tools, a multimeter for testing connections, electrical tape, and screwdrivers. Some accessories may require specific tools listed in their manuals.
Q: How do I safely disconnect the car battery before installation?
A: To avoid electrical shocks or short circuits, always disconnect the negative (-) terminal of the car battery first. Use a wrench to loosen the bolt, remove the cable, and then do the same for the positive (+) terminal if needed. Wait a few minutes before starting work.
Q: What’s the best way to route wiring without causing damage?
A: Route wires along existing wiring harnesses or under trim panels to keep them secure and hidden. Avoid sharp edges and moving parts. Use zip ties or cable clips to keep wires tidy and prevent wear over time.
Q: Can I install multiple accessories at once?
A: While possible, installing accessories one at a time is recommended for troubleshooting ease. Ensure your vehicle’s electrical system can handle the additional load to avoid blown fuses or drained batteries.
Q: How do I check if my installation was successful?
A: Reconnect the battery and test each accessory individually. Verify that all functions work smoothly without flickering lights or blown fuses. Use a multimeter to confirm proper voltage levels if necessary.
Q: When should I consider professional installation?
A: If the accessory installation involves complex wiring, integration with the car’s computer system, or requires advanced knowledge—like installing an alarm system or navigation setup—it’s safer to consult a professional.
Q: Are there any legal considerations when installing electrical accessories?
A: Yes, some modifications, such as colored lights or loud audio systems, may be regulated by local laws. Always check your regional regulations to ensure your accessories comply and won’t cause legal issues.
Q: How can I maintain my installed electrical accessories for longevity?
A: Regularly check connections for corrosion or looseness, keep components clean, and inspect wiring for wear or damage. Avoid exposing accessories to extreme moisture or heat to ensure they perform well over time.
In Summary
Installing car electrical accessories can transform your driving experience, adding both comfort and functionality to your vehicle. While the process may seem daunting at first, a careful approach combined with the right tools and knowledge makes it entirely achievable. Remember to prioritize safety, follow instructions meticulously, and don’t hesitate to seek professional help when needed. With patience and attention to detail, your car will soon be equipped with the custom enhancements you desire—bringing a new spark to every journey on the road.