

Imagine the sudden jolt of realizing your car won’t start just as you’re about to head out the door. The culprit? A dead battery. While this common automotive hiccup can feel like the start of a stressful day, jump-starting your car safely is simpler than it seems. With the right know-how and precautions, you can breathe life back into your vehicle and get back on the road without a hitch. In this article, we’ll guide you through the essential steps to jump-start your car safely, helping you turn a frustrating moment into a smooth ride ahead.
Table of Contents
- Preparing Your Vehicle and Equipment for a Safe Jump-Start
- Understanding the Role of Battery Terminals and Connections
- Step-by-Step Guide to Connecting Jumper Cables Correctly
- Common Mistakes to Avoid When Jump-Starting Your Car
- Safety Precautions to Protect Yourself During the Process
- What to Do After Your Car Starts to Ensure a Healthy Battery
- Q&A
- Future Outlook

Preparing Your Vehicle and Equipment for a Safe Jump-Start
Before attempting to jump-start your car, it’s essential to ensure both vehicles and all equipment are in tip-top condition. Begin by positioning the cars so their batteries are close but not touching, ideally in a safe, flat area away from traffic. Inspect the jumper cables carefully; look for any frays, corrosion, or broken clamps that could disrupt the electrical flow or risk a spark. Remember, safety gloves and eye protection aren’t just recommended—they’re a smart precaution to shield yourself from potential battery acid or unexpected sparks. Finally, turn off both vehicles and unplug all electronic devices to prevent damage during the jump-start process.
Gathering the right tools and checking their functionality can smooth your jump-start experience significantly. A quick checklist helps prevent overlooking essentials:
- Heavy-duty jumper cables with insulated clamps
- Portable battery booster (if available)
- Owner’s manuals for both cars—valuable for specific instructions
- Flashlight or hazard lights if it’s dark or visibility is poor
Taking a moment to prep this way not only safeguards your vehicle’s electronics but also boosts your confidence and efficiency once you start the jump-start process.
Understanding the Role of Battery Terminals and Connections
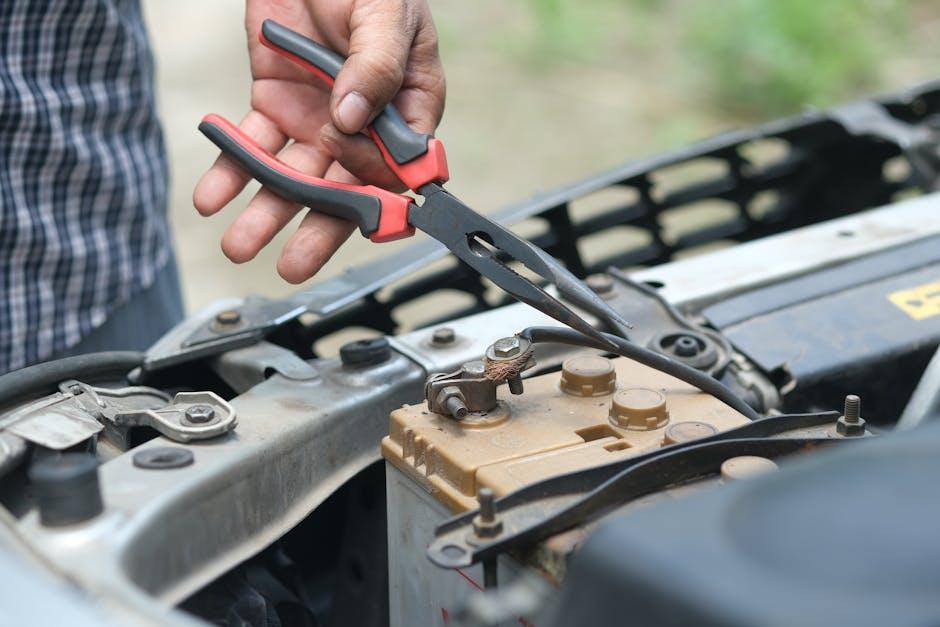
Battery terminals serve as the vital link between your car’s power source and its electrical system. Understanding the condition and function of these terminals is crucial before attempting a jump-start. Clean, secure connections ensure efficient energy transfer, preventing sparks and potential damage. Corroded or loose terminals can create resistance, reducing the jump-start’s effectiveness and potentially causing harm to both vehicles involved.
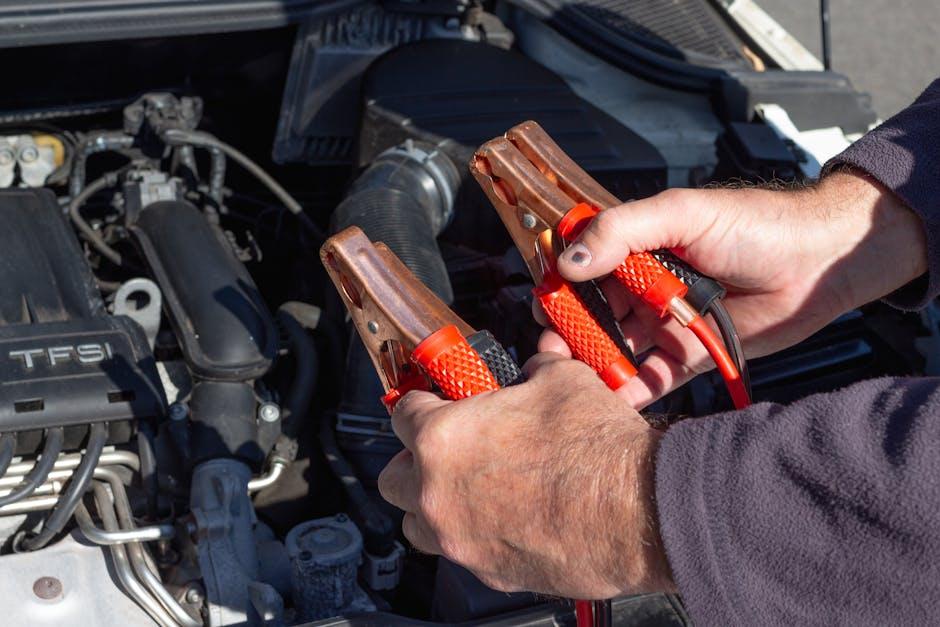
When connecting jumper cables, always identify the positive (+) and negative (−) terminals clearly. The positive terminal is usually marked with a red cover or a plus sign, while the negative terminal is marked with black or a minus sign. Ensuring the right connections can be summarized as:
- Attach the red clamp to the positive terminal of the dead battery
- Attach the other red clamp to the positive terminal of the donor battery
- Attach the black clamp to the negative terminal of the donor battery
- Attach the last black clamp to an unpainted metal surface on the dead car, away from the battery
Step-by-Step Guide to Connecting Jumper Cables Correctly
Before starting, make sure both vehicles are turned off, and the jumper cables are untangled and ready. Begin by connecting the red (positive) clamp to the positive terminal of the dead battery. Then, attach the other red clamp to the positive terminal of the charged battery. Next, connect the black (negative) clamp to the negative terminal on the working vehicle’s battery. Finally, attach the last black clamp to a grounded, unpainted metal surface on the car with the dead battery — such as a bolt on the engine block — to prevent sparking near the battery itself.
Always follow this order to minimize risk. Once connected, start the engine of the working vehicle and let it run for a few minutes to transfer power. Then, try starting the dead car. If it fires up, carefully remove the cables in the reverse order, starting with the black clamp on the grounded metal, then the black clamp on the good battery, followed by the red clamp on the good battery, and finally the red clamp on the dead battery. Keeping this sequence ensures safety and proper current flow.

Common Mistakes to Avoid When Jump-Starting Your Car
One of the most frequent errors is connecting the jumper cables incorrectly. It’s crucial to attach the positive (red) clamp to the positive terminals of both batteries and the negative (black) clamp to a grounded, unpainted metal surface on the dead car, rather than directly to the battery’s negative terminal. This prevents sparks and potential battery damage. Another common slip-up is overlooking the battery condition; attempting a jump-start with a cracked or leaking battery can be dangerous and ineffective.
Many also succumb to impatience, removing the cables too quickly after the engine turns over. Always wait a few minutes to let the dead battery gain enough charge. Avoid revving the donor car’s engine excessively — a steady RPM is safer for both vehicles. Lastly, neglecting to check the vehicle’s manual for specific jump-start instructions can lead to avoidable problems, as some modern cars require unique procedures or even specialized equipment.
- Reversing cable connections
- Ignoring battery damage
- Removing cables too early
- Revving the engine excessively
- Skipping vehicle-specific guidelines
Safety Precautions to Protect Yourself During the Process
When preparing to jump-start a vehicle, it’s crucial to prioritize your safety to avoid accidents or injuries. Always wear protective gloves and eye protection to shield yourself from sparks or battery acid leaks. Before connecting the jumper cables, ensure both cars are turned off and the keys are removed from the ignition. Avoid touching the metal clamps of the jumper cables together, as this can cause dangerous sparks. Position the vehicles so their batteries are within reach but without the cars touching each other, allowing enough space to move safely around the engines. Lastly, check battery terminals for corrosion – cleaning them can prevent poor connections and ensure a smoother jump-start.
Note the following safety reminders:
- Do not lean over the battery during connection to minimize the risk of injury from potential explosions.
- Keep the jumper cables organized to prevent them from getting tangled or caught in moving engine parts.
- Never smoke or have open flames near the battery as it may emit flammable gases.
- Double-check cable polarity – red to positive (+), black to negative (-) – to avoid damaging electrical systems.
| Potential Hazard | Safety Tip |
|---|---|
| Sparks | Connect cables carefully away from battery vents |
| Battery Acid | Wear protective gloves and glasses |
| Incorrect Polarity | Match red cables to positive terminals only |
What to Do After Your Car Starts to Ensure a Healthy Battery
Once your engine roars back to life, don’t rush to disconnect the jumper cables just yet. Keep your car running for at least 15 to 20 minutes; this gives the alternator enough time to recharge the battery fully. Driving around during this period is even better, as the increased engine speed boosts the charging process. Be mindful to avoid flicking electrical accessories on and off, such as headlights or the radio, which can unnecessarily drain the recovering battery during this time.
After your battery has had some time to regain power, it’s wise to take a few precautionary steps to maintain its health:
- Turn off all accessories before shutting down the engine to minimize power draw during the next start-up.
- Inspect the battery terminals to ensure they’re clean, tight, and free of corrosion. This prevents poor connections that could cause future starting issues.
- Schedule a professional battery test if your battery frequently needs a jump, ensuring you don’t get stranded unexpectedly.
Q&A
Q&A: How to Jump-Start a Car Safely
Q1: Why does a car need jump-starting?
A1: When a car’s battery is dead or too weak to crank the engine, jump-starting provides a temporary boost of electrical power from another vehicle’s battery, enabling the car to start and recharge its battery.
Q2: What essential tools do I need to jump-start a car?
A2: You’ll need a set of jumper cables, a working vehicle with a fully charged battery, and optionally, safety gloves and goggles for extra protection.
Q3: How do I ensure safety before jump-starting?
A3: Park both cars close enough to reach with jumper cables but avoid letting them touch. Turn off both engines, engage parking brakes, and remove metal jewelry. Double-check the cables are intact and properly insulated.
Q4: What is the correct order for connecting jumper cables?
A4: Follow this sequence carefully:
- Attach one red clamp to the positive (+) terminal of the dead battery.
- Connect the other red clamp to the positive (+) terminal of the good battery.
- Attach one black clamp to the negative (–) terminal of the good battery.
- Connect the last black clamp to an unpainted, metal part of the dead car’s engine block or chassis, away from the battery.
Q5: Why do I connect the negative clamp to the car’s frame instead of the dead battery?
A5: This ground connection helps prevent sparks near the battery, reducing the risk of igniting explosive gases.
Q6: How do I start the cars after the cables are connected?
A6: Start the engine of the vehicle with the good battery first, letting it run for a few minutes. Then try to start the car with the dead battery. If it doesn’t start, wait a few more minutes and try again.
Q7: What should I do after the dead car starts?
A7: Carefully remove the jumper cables in the reverse order of connection, avoiding any cable ends touching each other or the vehicles. Keep the jumped car running for at least 15-20 minutes to allow the battery to recharge.
Q8: Are there any mistakes to avoid during jump-starting?
A8: Yes: Don’t switch the cable clamps’ polarities, don’t let the clamps touch each other once connected, and never attempt to jump-start a frozen or cracked battery.
Q9: Can I jump-start a car with a different voltage battery?
A9: No. Jump-starting requires batteries with the same voltage, typically 12 volts for most cars. Mixing voltages can damage electrical systems.
Q10: What if the car still won’t start after jump-starting?
A10: The issue could be more serious than a dead battery—like a faulty starter, alternator, or other electrical problems. It’s best to consult a professional mechanic if multiple attempts fail.
Jump-starting can be straightforward and safe when done carefully—think of it as giving your car a quick caffeine boost to get it going again!
Future Outlook
Jump-starting a car can feel like a small act of mechanical magic—a quick spark that brings your vehicle back to life. With the right precautions and a calm approach, you transform what might seem like a daunting task into a straightforward solution. Remember, safety isn’t just a step; it’s the foundation of every jump-start. Armed with patience and care, you’re ready to tackle those unexpected moments on the road with confidence, knowing you can revitalize your ride and keep your journey moving forward.
1 Comment
zx405r