Beneath the hood of every vehicle lies a complex symphony of moving parts, working in harmony to deliver the power and performance drivers rely on daily. Like any finely tuned instrument, an engine requires regular care and attention to maintain its rhythm. Performing a basic engine tune-up is a practical and rewarding way to keep your car running smoothly, enhance fuel efficiency, and extend its lifespan. Whether you’re a seasoned DIY enthusiast or a curious beginner, understanding the fundamental steps of an engine tune-up can empower you to take control of your vehicle’s health and performance. In this article, we will guide you through the essential procedures to bring your engine back into peak condition, one spark at a time.
Table of Contents
- Preparing Your Workspace and Gathering Essential Tools
- Inspecting and Replacing Spark Plugs for Optimal Performance
- Cleaning and Replacing the Air Filter for Better Efficiency
- Checking and Adjusting the Fuel System Components
- Examining the Ignition System and Timing Settings
- Final Checks and Test Drive to Ensure Smooth Operation
- Q&A
- In Conclusion

Preparing Your Workspace and Gathering Essential Tools
Creating a comfortable and organized workspace is vital before diving into any engine tune-up. Start by selecting a well-ventilated area with plenty of natural light to help you clearly see what you’re working on. Ensure your work surface is flat, stable, and large enough to hold tools without clutter. Lay down a protective mat or old newspaper to catch any drips and protect your floor. Don’t forget safety essentials like gloves, safety glasses, and a fire extinguisher nearby — working with engine components demands caution.
Gather all the necessary tools beforehand to avoid interruptions during your tune-up. Having everything within arm’s reach will keep the process smooth and efficient. Key items to have on hand include:
- Screwdrivers (flathead & Phillips)
- Socket wrench set for removing bolts
- Feeler gauge to check spark plug gaps
- Spark plug socket for quick removal and installation
- Distributor cap and rotor if replacement is necessary
- Vacuum gauge to test fuel system pressure
- Clean rags to wipe away grime and oil
| Tool | Purpose |
|---|---|
| Feeler Gauge | Measure spark plug and valve gaps |
| Socket Wrench Set | Loosen and tighten various engine bolts |
| Vacuum Gauge | Check fuel system and intake manifold pressure |

Inspecting and Replacing Spark Plugs for Optimal Performance
Spark plugs are the unsung heroes of your engine’s combustion process, igniting the fuel-air mixture and keeping everything running smoothly. Over time, these small components can wear down, causing misfires, rough idling, or reduced fuel efficiency. To check their condition, remove each plug and look for signs of carbon deposits, worn electrodes, or cracks. If the plugs appear dirty or damaged, replacement is essential to restore engine performance. Remember to use a feeler gauge to measure the electrode gap, ensuring it matches the manufacturer’s specifications for optimal spark delivery.
When installing new spark plugs, take extra care to avoid overtightening which can damage the cylinder head. Below is a quick reference table to help you understand recommended torques and gap settings for common spark plug types:
| Plug Type | Gap (mm) | Torque (Nm) |
|---|---|---|
| Copper | 0.6 – 0.8 | 15 – 20 |
| Platinum | 0.7 – 0.9 | 20 – 25 |
| Iridium | 0.6 – 0.7 | 18 – 22 |
Consistently maintaining spark plugs not only preserves engine efficiency but also prevents premature wear on ignition components. Incorporate this simple check into your tune-up routine to enjoy smoother starts, improved acceleration, and better fuel economy.

Cleaning and Replacing the Air Filter for Better Efficiency
Maintaining a clean air filter is crucial for allowing your engine to breathe and perform at its best. Over time, dirt, dust, and debris accumulate in the filter, choking the airflow and causing your engine to work harder than necessary. Not only can this reduce fuel efficiency, but it may also cause rough idling or even long-term engine damage. When inspecting your air filter, look for visible signs of dirt or a darkened color—these are clear indications that cleaning or replacing the filter is needed. For fabric or foam filters, gentle cleaning with compressed air or a mild detergent can bring them back to life, but pleated paper filters should generally be replaced to ensure optimal filtration.
Here’s a quick checklist to guide you through the process:
- Locate the air filter housing: Usually a black plastic casing near the engine.
- Remove the filter: Open the housing and carefully take out the filter.
- Inspect and clean: Use compressed air or a vacuum to remove dust if washable; otherwise, replace.
- Reinstall or replace: Place the cleaned or new filter back and secure the housing.
| Type of Filter | Cleaning Method | Replacement Frequency |
|---|---|---|
| Paper | None (Replace Only) | Every 12,000-15,000 miles |
| Foam | Wash with Mild Soap & Water | Every 20,000 miles |
| Cotton/Gauze | Use Special Cleaning Kit | Every 25,000-30,000 miles |
Checking and Adjusting the Fuel System Components
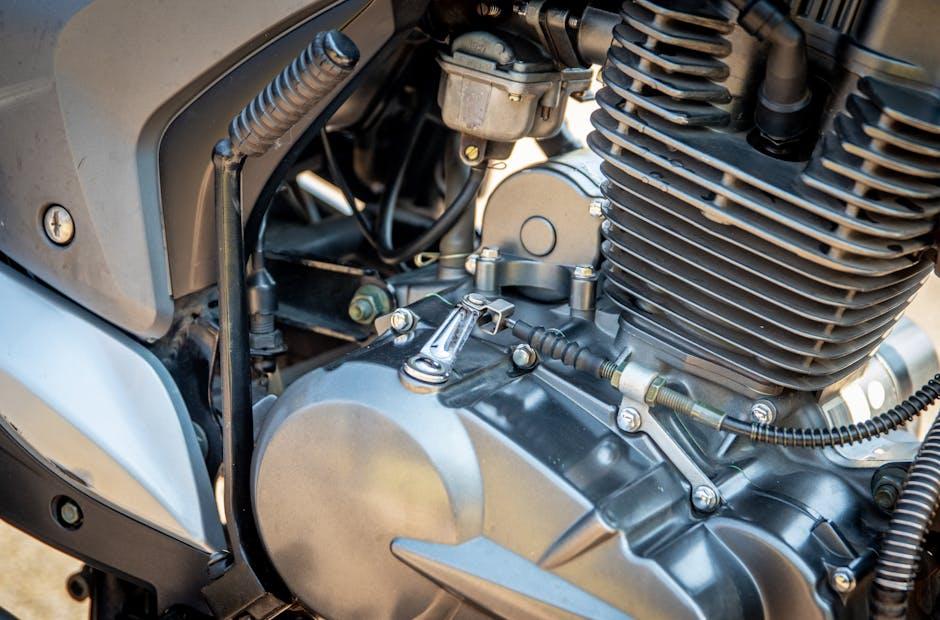
Start by inspecting the fuel filter for any signs of clogging or dirt buildup, which can restrict fuel flow and reduce engine performance. Replacing a dirty filter is an easy way to ensure optimal fuel delivery. Next, check the fuel lines for cracks, leaks, or brittleness, and tighten or replace fittings as needed. Don’t forget to examine the fuel pump’s pressure and functionality; a malfunctioning pump can lead to poor combustion and stalling issues. Use a fuel pressure gauge to verify that the pump maintains the manufacturer’s specified pressure range.
Once the components are visually inspected and replaced if necessary, adjustments may be required to fine-tune the system. Adjust the fuel injectors or carburetor settings to achieve the perfect air-fuel mixture, which will improve both power and fuel efficiency. Below is a simple guideline for fuel system adjustment parameters:
| Component | Adjustment Parameter | Recommended Range |
|---|---|---|
| Fuel Pressure | PSI | 40 – 60 |
| Carburetor Mixture Screw | Turns In/Out | 1.5 – 2.5 |
| Fuel Injector Pulse Width | Milliseconds | 2.0 – 3.0 |
- Tip: Always refer to your vehicle’s manual for specific fuel system specifications.
- Safety Note: Work in a well-ventilated area and avoid open flames when checking fuel components.
Examining the Ignition System and Timing Settings
Ensuring your ignition system is in top shape is a crucial step in achieving optimal engine performance. Begin by inspecting spark plugs for wear or deposits, as these affect the spark’s intensity and timing. Replace any plugs that appear cracked, fouled, or eroded. Next, check the ignition wires and coils for cracks or corrosion; faulty connections can lead to misfires and reduced fuel efficiency. Keep in mind that clean components and proper spark timing are essential for smooth acceleration and reduced emissions.
The timing settings also demand close attention. Using a timing light, verify that the ignition timing aligns with the manufacturer’s specifications. Incorrect timing can cause knocking or pinging, potentially harming the engine over time. Adjust the distributor or electronic timing controls carefully, watching for smooth idle and consistent RPM. Below is a quick reference table to guide your timing adjustments based on engine RPM:
| Engine RPM | Ignition Timing (Degrees BTDC) |
|---|---|
| 600 (Idle) | 8° – 12° |
| 1500 | 15° – 20° |
| 3000 | 25° – 30° |
Final Checks and Test Drive to Ensure Smooth Operation
Before calling your engine tune-up complete, it’s essential to methodically verify that all components are securely reassembled and functioning correctly. Start by double-checking connections such as spark plugs, ignition wires, and belts for tightness and proper placement. Inspect fluid levels—oil, coolant, and brake fluid—and top them off if needed. Use a flashlight to ensure no tools or parts were left behind under the hood. This pre-drive checklist not only prevents potential engine hiccups but also guarantees safety and reliability on the road.
With everything in place, it’s time to take the engine for a test drive. Begin with gentle acceleration and listen for unusual noises or vibrations, observing how smoothly the engine responds. Pay attention to idle steadiness and responsiveness during gear changes. If you notice any hesitation or mechanical oddities, stop immediately to reassess your work. Below is a quick troubleshooting reference that can help identify common issues discovered during this phase:
| Symptom | Possible Cause | Suggested Action |
|---|---|---|
| Rough Idle | Dirty Spark Plugs | Clean or replace plugs |
| Engine Hesitation | Fuel Filter Blockage | Check and replace filter |
| Excessive Vibrations | Loose Belt | Tighten or replace belt |
Q&A
Q&A: How to Perform a Basic Engine Tune-Up
Q1: What exactly is an engine tune-up, and why is it important?
A1: Think of an engine tune-up as a wellness check for your car’s heart—the engine. It involves inspecting, cleaning, and replacing key components to ensure your engine runs smoothly, efficiently, and reliably. Without regular tune-ups, your car might experience rough idling, reduced fuel economy, or even unexpected breakdowns.
Q2: How often should I perform a tune-up on my vehicle?
A2: While the interval varies by vehicle make and model, a good rule of thumb is every 30,000 to 60,000 miles. Check your owner’s manual for specific recommendations. Regular tune-ups help catch minor issues before they become major repairs.
Q3: What are the basic steps involved in a typical engine tune-up?
A3: A basic tune-up generally includes:
- Replacing spark plugs and spark plug wires to ensure proper ignition.
- Changing the engine air filter to keep airflow clean and efficient.
- Inspecting and possibly replacing the fuel filter.
- Checking and adjusting the ignition timing and idle speed.
- Inspecting belts and hoses for wear or damage.
- Examining fluid levels and topping off or replacing as needed.
Q4: Do I need special tools or skills to perform a tune-up myself?
A4: Basic tune-ups require some mechanical know-how and common tools like a socket set, spark plug socket, and screwdrivers. If you’re comfortable under the hood and enjoy hands-on work, it’s a rewarding task. However, if you’re unsure or the vehicle has complex electronics, consulting a professional mechanic is wise.
Q5: Can performing regular tune-ups save me money in the long run?
A5: Absolutely. Routine tune-ups optimize engine performance, improving fuel efficiency and preventing costly breakdowns. They extend your engine’s lifespan and help maintain your vehicle’s resale value.
Q6: Are there any signs that my engine is due for a tune-up?
A6: Watch out for symptoms like engine misfires, rough idling, reduced power, poor fuel economy, or warning lights on your dashboard. These clues often signal that it’s time to check under the hood.
Q7: What should I avoid during a tune-up?
A7: Avoid skipping diagnostic checks or ignoring worn parts. Don’t overtighten components, which can cause damage. Also, steer clear of low-quality replacement parts; investing in reputable components ensures better performance and reliability.
Q8: Can a tune-up improve my car’s environmental impact?
A8: Yes! A well-tuned engine burns fuel more efficiently, reducing harmful emissions. Keeping your engine in top shape contributes to cleaner air and a smaller carbon footprint.
Performing a basic engine tune-up is like giving your car a breath of fresh air—keeping it running smoothly and ready for the road ahead. Whether you choose to DIY or visit a mechanic, regular tune-ups are key to automotive longevity.
In Conclusion
Performing a basic engine tune-up may seem like a straightforward task, but it’s truly an art that keeps your vehicle humming smoothly and efficiently. By taking the time to check and replace vital components, you not only extend your engine’s lifespan but also ensure each journey is as reliable as the last. Remember, the heart of your car deserves attention and care—so embrace the process, stay curious, and drive on with confidence knowing you’ve given your engine the tune-up it deserves.


2 Comments
khq5jn
khq5jn