

A car’s air conditioning system is more than just a luxury; it’s a sanctuary from sweltering heat and stale air. At the heart of this comfort lies a small but mighty component—the AC filter. Over time, this filter collects dust, pollen, and other airborne particles, quietly working to keep the air inside your vehicle clean and fresh. But like all filters, it needs regular attention. Replacing your car’s AC filter might seem like a mundane task, but it’s one that can dramatically improve air quality and system efficiency. In this guide, we’ll walk you through the simple steps to swap out your old, clogged filter for a new one—helping you breathe easier on every drive.
Table of Contents
- Introduction to Car AC Filters and Their Importance
- Identifying When Your Car AC Filter Needs Replacement
- Gathering the Right Tools and Choosing the Best Replacement Filter
- Step-by-Step Guide to Removing the Old AC Filter Safely
- Installing the New AC Filter Correctly for Optimal Performance
- Post-Replacement Tips to Maintain Your Car’s Air Quality
- Q&A
- In Summary
Introduction to Car AC Filters and Their Importance
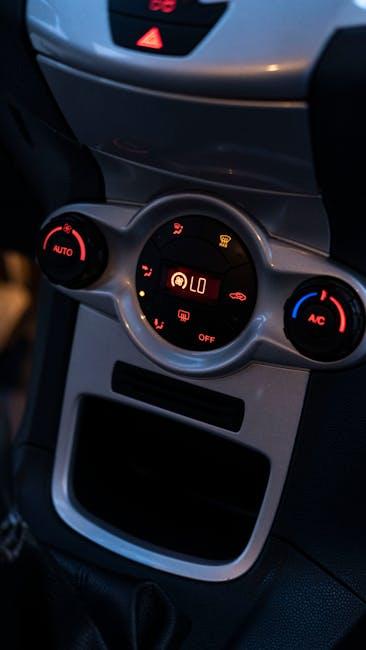
Every time you switch on your car’s air conditioning, the small yet powerful AC filter goes to work filtering out dust, pollen, and other airborne particles before they reach the cabin. This tiny component plays a major role in ensuring the air inside your car remains fresh and breathable. Without it, contaminants could circulate freely, potentially affecting your comfort and health during drives. Over time, however, these filters trap more and more debris, which can reduce their effectiveness and consequently impact the AC’s performance.
Replacing the AC filter isn’t just about maintaining air quality; it also helps protect the AC system itself from unnecessary strain. A clogged filter forces the system to work harder to push air, which can lead to increased fuel consumption and even costly repairs. Keeping a regular replacement schedule means better airflow, lower energy use, and a cleaner environment inside the vehicle.
Identifying When Your Car AC Filter Needs Replacement
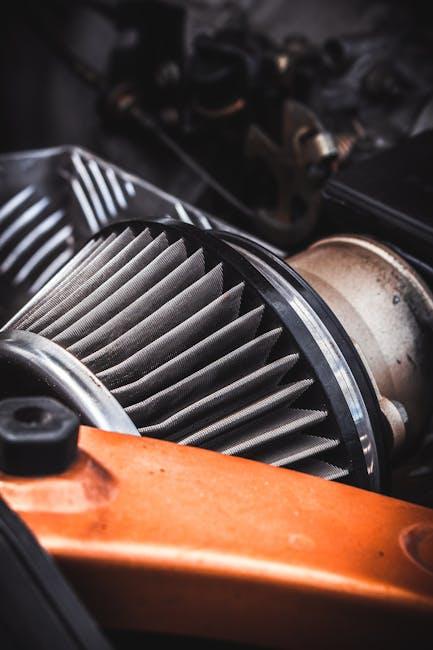
Over time, your car’s AC filter can become clogged with dust, pollen, and other airborne particles, compromising the air quality inside your vehicle. One easy way to identify when it’s time for a replacement is by paying attention to unusual symptoms such as reduced airflow or a musty odor emanating from the vents. Additionally, if you notice fogging on the interior windows even when the AC is running, it could be a sign that your filter is no longer effectively removing moisture or contaminants.
Keep an eye out for these key indicators, which can be subtle but telling:
- Decreased cooling efficiency – the air may feel less cold or unevenly distributed.
- Increased cabin dust – more dust accumulation on the dashboard or seats.
- Allergy symptoms intensifying – sneezing or irritation while driving.
- Visible dirt on the filter – a simple visual check can reveal if the filter is clogged.
| Symptom | Possible Cause | Recommended Action |
|---|---|---|
| Weak airflow | Blocked AC filter | Replace filter |
| Unpleasant odor | Accumulated mold or debris | Clean vents & replace filter |
| Cabin dust buildup | Filter no longer trapping particles | Install new filter |
| Increased allergy symptoms | Ineffective filtration | Change filter & check AC system |

Gathering the Right Tools and Choosing the Best Replacement Filter
Before diving into the replacement process, it’s essential to assemble all the necessary tools to make the job smooth and efficient. At a minimum, you’ll need a flathead screwdriver or a socket wrench, depending on your vehicle’s make and model, for removing panels or covers. Having a flashlight on hand is tremendously helpful to illuminate the often dim and cramped spaces where the filter resides. A pair of gloves can also protect your hands from dirt and sharp edges, ensuring safety as you work.
Choosing the right replacement filter requires attention to detail. Always refer to your vehicle’s manual to identify the correct filter size and type. Filters generally vary in material—ranging from basic paper to high-efficiency carbon or HEPA variants. To assist your decision, here’s a quick comparison:
| Filter Type | Advantages | Ideal For |
|---|---|---|
| Paper | Cost-effective, easy to replace | Standard daily driving |
| Carbon | Traps odors and pollutants | Urban areas with heavy traffic |
| HEPA | High filtration efficiency | Allergy-sensitive users |
Selecting a high-quality filter tailored to your driving conditions and needs ensures clean airflow and optimal AC performance, keeping your cabin fresh and comfortable all year round.
Step-by-Step Guide to Removing the Old AC Filter Safely
Begin by locating the AC filter compartment, which is typically found behind the glove box or under the dashboard. Before you start, make sure your car is turned off and the keys are removed to avoid any electrical mishaps. Carefully open the compartment by hand or with a small screwdriver, taking care not to damage any clips or surrounding parts. Once accessible, gently pull out the old filter. If it’s particularly dusty, consider wrapping it in a plastic bag to contain the debris and prevent particles from spreading inside your vehicle.
Handling the old filter with care is crucial. Avoid shaking or tapping it too vigorously to minimize dust dispersion. If you notice stubborn clips or screws holding the filter in place, use the appropriate tools to ease them off softly, ensuring you don’t strip any fasteners. After removal, inspect the compartment for accumulated dirt or leaves and wipe it clean with a soft cloth. Here’s a quick checklist to help you during this step:
- Turn off ignition and remove keys
- Locate and open filter compartment carefully
- Remove the old filter gently without shaking
- Clean out any debris inside the compartment
| Step | Tip |
|---|---|
| Compartment Access | Use a flashlight for better visibility |
| Filter Removal | Wear gloves to avoid skin irritation |
| Cleaning | Use a damp cloth to wipe the area |

Installing the New AC Filter Correctly for Optimal Performance
Begin by carefully aligning the new filter with the airflow arrows printed on its frame. Installing the filter in the correct direction ensures that the cabin air is purified efficiently, preventing dust and allergens from entering your vehicle’s interior. Avoid forcing the filter into place; it should slide in smoothly within the compartment. Improper placement can cause gaps that let unfiltered air bypass the system, reducing overall filtration effectiveness.
After fitting the filter, secure the cover or panel firmly to avoid any vibrations or noise while driving. To help you keep track, here is a quick checklist for the installation process:
- Confirm filter orientation using airflow arrows
- Slide filter gently into the compartment
- Ensure a snug fit without gaps
- Replace and lock the cover or panel securely
- Test the AC system for normal operation
| Common Issues | Quick Fix |
|---|---|
| Filter inserted backward | Reinstall with arrows pointing toward airflow |
| Filter loose or rattling | Check cover seal and secure firmly |
Post-Replacement Tips to Maintain Your Car’s Air Quality
Maintaining fresher, cleaner air inside your vehicle goes beyond simply replacing the AC filter. To truly uphold optimal air quality, it’s essential to regularly inspect your air vents and keep them free from dust and debris. Using a soft brush or compressed air can help dislodge hidden particles, ensuring air flows smoothly. Additionally, consider parking your car in shaded or covered areas to prevent excessive dust accumulation, which can quickly degrade the filter’s effectiveness.
Another key practice is to minimize interior pollutants by avoiding smoking inside the vehicle and promptly cleaning any spills that could cause odors or mold growth. Staying vigilant about your car’s overall cleanliness contributes to a healthier cabin environment. For reference, the table below offers a quick overview of recommended filter replacement intervals based on driving conditions:
| Driving Condition | Recommended Filter Replacement |
|---|---|
| Urban (Heavy Traffic & Pollution) | Every 6 months |
| Rural (Dusty Roads) | Every 4 months |
| Highway (Clean Air) | Every 12 months |
Q&A
Q&A: How to Replace a Car AC Filter
Q1: Why is it important to replace the car’s AC filter?
A1: The AC filter, often called the cabin air filter, helps purify the air inside your vehicle by trapping dust, pollen, and other pollutants. Over time, it becomes clogged, reducing airflow and the efficiency of your AC system, and can even cause unpleasant odors. Replacing it regularly keeps your cabin air fresh and your AC system running smoothly.
Q2: How can I tell if my car’s AC filter needs replacing?
A2: Common signs include reduced airflow from vents, unusual smells when the AC is on, and increased dust inside the car. Some filters look visibly dirty or clogged when inspected. Checking your owner’s manual for recommended intervals is a good baseline, but these signs hint it’s time sooner.
Q3: What tools or materials will I need to replace the AC filter?
A3: Usually, you only need a new cabin air filter and perhaps a screwdriver or a small socket set, depending on your car’s design. Some vehicles have easy clips, while others require removing protective panels. Always check your specific model’s instructions before starting.
Q4: Where is the AC filter located in most cars?
A4: Typically, the AC filter is behind the glove compartment or under the dashboard. Some models hide it under the hood near the windshield. The best way to find it is to consult your car’s owner manual or search for “cabin air filter location” for your make and model.
Q5: What are the steps to replace the car’s AC filter?
A5:
- Locate the filter housing—usually behind the glove box.
- Remove the glove compartment or cover panel if necessary.
- Open the filter compartment, often held by clips or screws.
- Pull out the old filter, noting the airflow direction indicated by arrows.
- Insert the new filter, ensuring the airflow arrow matches the original orientation.
- Close and fasten the filter compartment.
- Reassemble the glove box or panel.
Q6: Can I clean and reuse my AC filter instead of replacing it?
A6: Some filters are washable and reusable, but most cabin air filters are disposable. Cleaning might not fully restore their filtering capabilities and can sometimes damage the filter media. For optimum air quality, replacement is usually recommended.
Q7: How often should the car AC filter be replaced?
A7: Generally, every 12,000 to 15,000 miles or once a year, but it depends on your driving conditions. Dusty environments or heavy city traffic might require more frequent changes. Checking your vehicle’s manual provides the best guidance.
Q8: Will replacing the AC filter improve the performance of my car’s air conditioning?
A8: Yes. A clean filter allows better airflow, which helps your AC system cool the cabin more effectively and reduces strain on the blower motor. This can improve comfort and may even extend your AC system’s lifespan.
Q9: Is it difficult for a beginner to replace the car AC filter?
A9: Not at all! Most filters are designed for easy access and replacement by vehicle owners. With simple tools, a bit of patience, and a tutorial or two, even beginners can tackle this task in 15–30 minutes.
Q10: Where can I buy the right replacement filter for my car?
A10: Auto parts stores, authorized dealerships, and online retailers offer filters compatible with your make and model. Always verify the part number or filter specifications to ensure proper fit and function.
Replacing your car’s AC filter is a small job with a big impact—breathing cleaner air and enjoying better cooling all around!
In Summary
Replacing your car’s AC filter might seem like a small task, but it plays a big role in keeping your drive fresh and comfortable. With just a bit of care and attention, you can easily breathe new life into your vehicle’s air quality and enjoy every journey a little more. So next time the air starts to feel less crisp, remember: a clean filter is just a few simple steps away from cooling you down again. Safe travels and happy filtering!
1 Comment
2ag2y1