

In the intricate dance of your car’s electrical system, the alternator plays the starring role—quietly converting mechanical energy into the electric power that keeps your battery charged and your vehicle humming smoothly. When this vital component falters, the consequences ripple through your dashboard lights, your radio, and ultimately, your ability to drive. Replacing a car alternator might sound daunting, but with the right guidance, it becomes a manageable task that can save you time and money. In this article, we’ll take a methodical approach to demystify the process, equipping you with the knowledge to confidently tackle this essential repair yourself.
Table of Contents
- Understanding the Role of Your Car Alternator in Vehicle Performance
- Identifying Signs That Your Alternator Needs Replacement
- Essential Tools and Safety Precautions for Alternator Replacement
- Step-by-Step Guide to Removing the Old Alternator
- Installing the New Alternator with Precision and Care
- Testing and Troubleshooting After Alternator Replacement
- Q&A
- Concluding Remarks
Understanding the Role of Your Car Alternator in Vehicle Performance
The alternator is the unsung hero that keeps your vehicle’s electrical system humming smoothly. By converting mechanical energy from the engine into electrical power, it charges the battery and supplies consistent electricity to essential components such as headlights, the ignition system, and infotainment devices. When functioning correctly, it ensures your car’s reliable start and stable performance during operation. However, a failing alternator can manifest as dim lights, strange noises, or even a completely dead battery, highlighting its pivotal role in maintaining your vehicle’s overall health.
Key functions of the alternator include:
- Generating electricity to recharge the battery
- Powering electrical accessories while driving
- Regulating voltage to protect sensitive electronic systems
Understanding these roles helps illustrate why replacing a faulty alternator timely is essential—not just for your car’s functionality but to prevent further damage and costly repairs. Keeping a close eye on symptoms and routine electrical system checks can save you from unexpected breakdowns and ensure your vehicle performs at its best.
| Alternator Symptom | Impact on Vehicle | Recommended Action |
|---|---|---|
| Dim or flickering lights | Reduced visibility and electrical inconsistencies | Inspect alternator and battery condition |
| Battery warning light on dash | Possible alternator malfunction | Test alternator output |
| Strange grinding noises | Worn bearings or internal damage | Replace alternator promptly |
Identifying Signs That Your Alternator Needs Replacement
When your car’s electrical system begins to falter, it’s often a clear indication that the alternator is struggling to keep up. A dimming dashboard light or headlights that fluctuate in brightness can signal an inconsistent power supply. You might also notice that your battery warning light flickers on the control panel, urging you to check under the hood. Additionally, sluggish or unresponsive electrical accessories — such as power windows or the stereo system — suggest the alternator isn’t delivering adequate voltage to keep everything running smoothly.
Other subtle yet telling signs include unusual noises like a grinding or whining hum emanating from the engine bay, caused by worn-out bearings or a failing alternator pulley. In some cases, your vehicle might even stall suddenly or have difficulty starting due to insufficient electrical charge. It’s wise to watch for:
- Battery issues— frequent jump starts or rapidly draining batteries
- Electrical component malfunctions— flickering gauges or erratic warning lights
- Strange noises near the engine, noticeable during acceleration
- Burning smell— often caused by overheated wires or slipping belts
| Symptom | Potential Cause | Action Needed |
|---|---|---|
| Dimming headlights | Low alternator output | Test alternator voltage |
| Battery warning light | Charging system error | Inspect alternator belt and connections |
| Engine stalling | Insufficient power supply | Replace alternator if faulty |

Essential Tools and Safety Precautions for Alternator Replacement
Before diving into the task, ensure you have the right set of tools at hand to make the alternator replacement efficient and safe. Essential tools include a socket wrench set, a serpentine belt tool or breaker bar, and screwdrivers, as well as a voltmeter to test the new alternator’s functionality. Proper lighting and protective gloves will also enhance precision and safeguard your hands from sharp edges. Organizing your workspace with a magnetic tray for bolts and fasteners can save time and prevent frustrating losses.
Safety should never be compromised during this mechanical endeavor. Always start by disconnecting the car battery’s negative terminal to avoid electric shocks or short circuits. Work in a well-ventilated area, especially if your car has been running recently, to avoid inhaling fumes. Wearing safety goggles protects your eyes from debris, while long sleeves can guard your arms against accidental scrapes. Here’s a quick checklist to keep you covered:
- Disconnect battery before starting
- Wear safety goggles and gloves
- Use insulated tools for electrical work
- Have a fire extinguisher nearby
- Keep the workspace well-lit and clutter-free

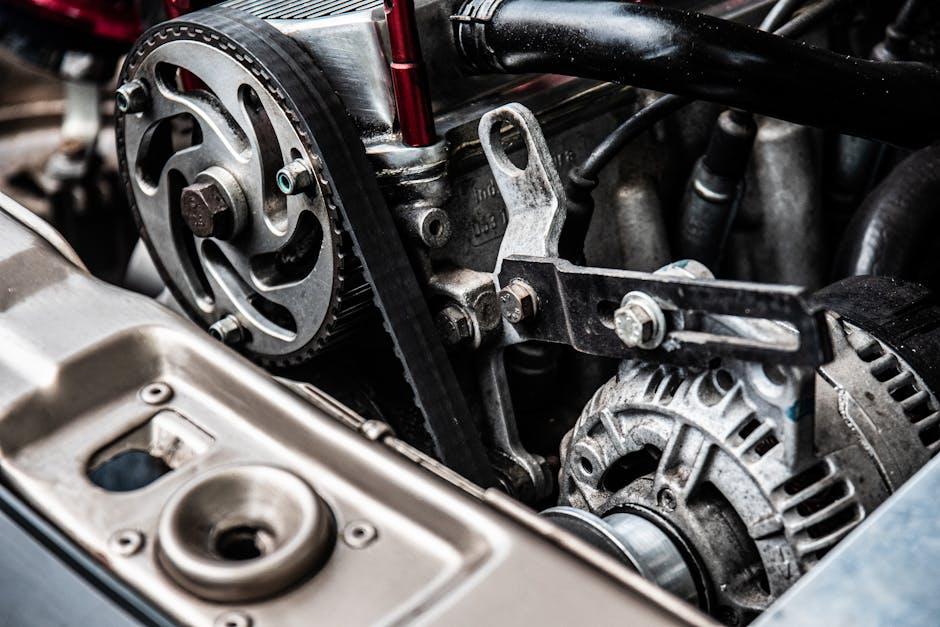
Step-by-Step Guide to Removing the Old Alternator
Begin by ensuring your vehicle is securely parked with the engine off, and disconnect the negative battery terminal to avoid any electrical hazards. Locate the alternator in your engine bay; it’s usually mounted near the front of the engine and recognizable by its pulley and cooling vents. Before touching the alternator, take a moment to photograph or sketch the belt routing—this small step saves you from confusion during reassembly. Next, use a wrench or ratchet to loosen the tensioner pulley, allowing the serpentine belt to slip free from the alternator’s pulley.
With the belt removed, identify all mounting bolts holding the alternator in place, typically one or two on the bracket. Use the proper size socket to carefully loosen and remove these bolts. Before fully pulling out the alternator, disconnect the electrical connectors, which usually include a plug and a bolt-on wire terminal; be gentle to avoid damaging the connectors or wiring. Once everything is detached, gently wiggle the alternator free from its bracket and remove it from the engine bay—your old alternator is now ready to be swapped with a new one.
- Safety first: Always disconnect the battery before working on electrical components.
- Keep track: Label wires and take pictures to ease the reconnection process.
- Check tools: Use appropriate sockets and wrenches to avoid rounding bolts.

Installing the New Alternator with Precision and Care
After carefully removing the old alternator, it’s essential to mount the new one securely to ensure optimal performance and longevity. Begin by aligning the new alternator’s mounting holes with the bracket and inserting the bolts snugly. Avoid overtightening at this stage to allow slight adjustments for belt alignment. Next, reconnect the electrical plugs and the battery cable, verifying each connection is clean and free of corrosion. This step is crucial, as even a small lapse in connectivity can lead to charging issues later on.
With the alternator partially secured, turn your attention to the serpentine or drive belt. Use a wrench or belt tensioner tool to adjust the belt’s tension, aiming for a firm yet flexible fit. Here’s a quick checklist for this phase:
- Confirm bolt tightness: Ensure all mounting bolts are tightened to the manufacturer’s torque specifications.
- Inspect belt alignment: Make sure the belt sits evenly on all pulleys without twisting or slipping.
- Reconnect electrical components carefully: Prevent accidental shorts by handling connectors gently.
| Task | Tip | Tools Needed |
|---|---|---|
| Mount alternator | Hand-tighten bolts first | Socket wrench |
| Reconnect cables | Clean terminals beforehand | Wire brush |
| Adjust belt tension | Check manufacturer specs | Belt tensioner tool |

Testing and Troubleshooting After Alternator Replacement
Once your new alternator is installed, it’s essential to verify its performance before hitting the road. Start by reconnecting the battery and turning the ignition to the “on” position without starting the engine. Use a multimeter to measure the voltage across the battery terminals; a healthy alternator should produce between 13.8 to 14.8 volts. If the readings fall outside this range, double-check your connections and mounting. Next, start the engine and observe the dashboard warning lights—particularly the battery light. If this icon remains illuminated, it might indicate further electrical issues or an improperly installed alternator.
Should you encounter any problems, systematically troubleshoot using the following checklist:
- Inspect all wiring connections and ensure they are secure and free from corrosion
- Verify that the alternator belt is properly tensioned and not slipping
- Test the voltage regulator, as a faulty one can cause irregular charging
- Listen for abnormal noises indicating bearing or pulley issues
| Symptom | Possible Cause | Solution |
|---|---|---|
| Battery Light On | Loose connection or faulty wiring | Recheck electrical connections |
| Low Voltage Output | Defective alternator or regulator | Replace or test alternator components |
| Strange Noise | Worn bearings or misaligned pulley | Inspect and replace parts as needed |
Q&A
Q&A: How to Replace a Car Alternator
Q1: What is a car alternator, and why is it important?
A: An alternator is like your car’s electrical powerhouse. It converts mechanical energy into electrical energy, charging your battery and powering the vehicle’s electrical systems while the engine runs. Without it, your car would quickly run out of battery juice, leaving you stranded.
Q2: How do I know if my alternator needs replacing?
A: Common signs include dimming headlights, a dead battery after driving, strange whining noises, or the battery warning light illuminating on your dashboard. If your car is having trouble starting or electrical accessories act erratically, the alternator might be the culprit.
Q3: What tools and materials will I need to replace an alternator?
A: Typically, you’ll need a set of wrenches and sockets, a ratchet, screwdrivers, and possibly a serpentine belt tool or breaker bar. Don’t forget safety gloves and eye protection, plus a new alternator that matches your car’s make and model.
Q4: What’s the basic process for removing the old alternator?
A: Begin by disconnecting the battery to avoid electrical shocks. Next, loosen and remove the serpentine belt, unplug the electrical connectors from the alternator, and unbolt the alternator from its mounting bracket. Carefully take it out, noting the belt routing and connections for reassembly.
Q5: How do I install the new alternator?
A: Position the new alternator in place and bolt it securely. Reconnect all electrical plugs and reinstall the serpentine belt, making sure it’s properly aligned on all pulleys. Finally, reconnect the battery, start the car, and check that the alternator is charging the battery correctly.
Q6: Are there any safety tips to keep in mind?
A: Always disconnect the battery before starting to avoid electrical shocks. Work in a well-ventilated area and keep the engine cool before you begin. Use proper tools and follow your vehicle’s service manual instructions. If you feel unsure at any step, consulting a professional mechanic is wise.
Q7: Can I replace an alternator myself if I’m a beginner?
A: While replacing an alternator is a moderately challenging DIY task, it’s doable with patience and the right tools. If you enjoy hands-on projects and follow the steps carefully, you can save money and learn a lot. However, complex engine layouts or tight spaces might require professional help.
Q8: How much time should I expect to spend on this job?
A: For an average car, expect about 1 to 2 hours if you have all the tools ready and a new alternator on hand. Models with easily accessible alternators will be quicker, while some vehicles with cramped engine bays might take longer.
Replacing a car alternator might seem daunting at first, but with a little preparation and patience, you can breathe new life into your vehicle’s electrical system. Keep these tips in mind, take your time, and let the sparks of DIY confidence flow!
Concluding Remarks
Replacing a car alternator may seem daunting at first, but with the right tools and a bit of patience, it becomes a manageable task that empowers you to take control of your vehicle’s health. By following the steps carefully and double-checking your work, you’ll not only save on repair costs but also gain a deeper understanding of that vital electrical component keeping your car running. So, roll up your sleeves, embrace the process, and turn a challenging repair into a rewarding success. Your car—and your confidence—will thank you.