

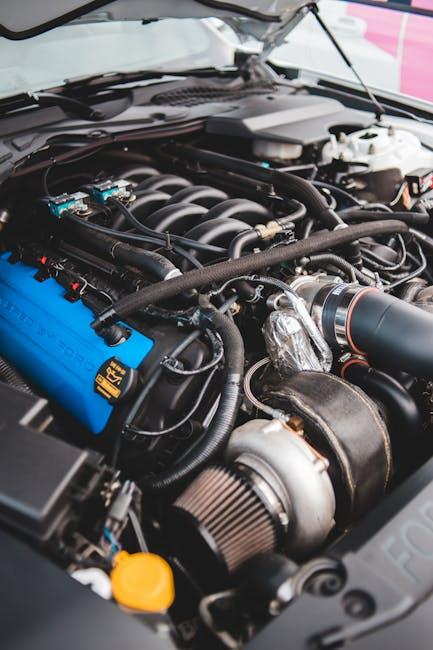
Beneath the hood of your vehicle lies a vital component working tirelessly to keep your engine breathing clean and running smoothly: the air filter. Over time, this unsung hero can become clogged with dirt, dust, and debris, hindering performance and fuel efficiency. Replacing the engine air filter is a simple yet essential maintenance task that can save you money and extend your engine’s life. In this article, we’ll guide you step-by-step through the process, empowering you to give your engine the fresh breath it deserves. Whether you’re a seasoned DIYer or a curious beginner, this straightforward guide will make changing your air filter a breeze.
Table of Contents
- Choosing the Right Replacement Air Filter for Your Engine
- Gathering Essential Tools and Preparing Your Workspace
- Locating the Air Filter Housing and Understanding Its Components
- Step-by-Step Guide to Removing the Old Air Filter Safely
- Installing the New Air Filter with Precision and Care
- Performing a Final Inspection and Testing Engine Performance
- Q&A
- In Retrospect
Choosing the Right Replacement Air Filter for Your Engine
Selecting the perfect replacement air filter is crucial to maintaining your engine’s performance and longevity. Start by consulting your vehicle’s owner manual to identify the recommended filter type and size. Air filters vary widely—from standard paper filters, known for their cost-effectiveness and decent filtration, to high-performance foam or cotton filters that offer enhanced airflow and durability. Remember, the goal is to strike a balance between filtration efficiency and airflow to avoid compromising your engine’s health.
Consider these factors when making your choice:
- Material quality: Opt for filters made with high-quality materials for better filtration and longer life.
- Filter lifespan: Some filters last longer before needing replacement; this impacts maintenance schedules.
- Compatibility: Ensure the filter matches your engine model to avoid installation issues.
- Driving conditions: Dusty or off-road environments require filters with enhanced dust-trapping capabilities.
| Filter Type | Pros | Cons |
|---|---|---|
| Paper | Affordable, widely available | Shorter lifespan, less airflow |
| Foam | Durable, good airflow | Requires regular cleaning |
| Cotton Gauze | Excellent airflow, reusable | Higher initial cost |

Gathering Essential Tools and Preparing Your Workspace
Before diving into replacing your engine air filter, it’s crucial to assemble all the necessary tools to streamline the process. Having everything at hand prevents interruptions and ensures a smooth workflow. Typically, you’ll need a flathead screwdriver or a socket wrench, depending on your vehicle’s air filter housing. Additionally, keep a clean cloth or rag ready to wipe away dust and debris that may accumulate around the airbox during the replacement. Don’t forget to wear gloves to protect your hands and a flashlight if you’re working in low-light conditions.
Setting up your workspace is just as important. Choose a well-ventilated area with ample lighting to avoid any strain or mistakes. A flat surface such as a garage floor or a sturdy workbench is ideal for laying out tools and parts. Use an old towel or tray to keep screws and small components from rolling away. Here’s a quick checklist to help organize your workspace efficiently:
- Tools: Screwdriver, socket wrench, flashlight, gloves
- Cleaning materials: Cloth, canned air (optional)
- Workspace essentials: Flat surface, good lighting, towel/tray
| Item | Purpose | Tips |
|---|---|---|
| Flathead Screwdriver | Opening clips or screws | Check size before starting |
| Socket Wrench | Removing bolts | Use correct socket size |
| Cloth | Cleaning airbox area | Use lint-free materials |
Locating the Air Filter Housing and Understanding Its Components
To begin your air filter replacement journey, you first need to find the air filter housing — a crucial component often tucked neatly under the hood. Typically, the housing is a black plastic or metal box connected to the engine with a large hose. It’s usually positioned near the front or side of the engine bay to allow fresh air intake. Sometimes, the housing features clips, screws, or bolts that secure its lid, making access straightforward once located.
Inside this casing, you’ll find several key components working harmoniously to ensure your engine breathes clean air:
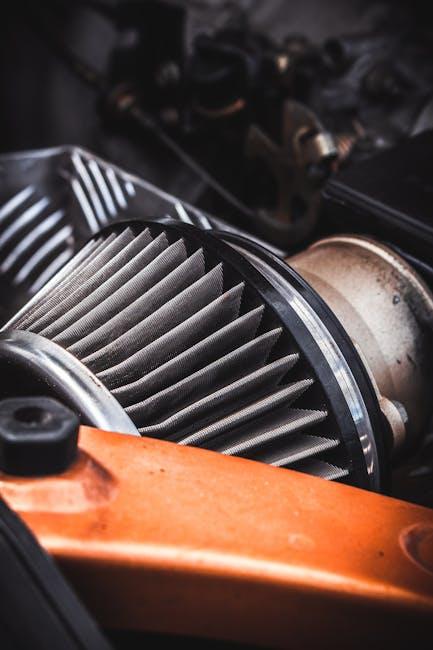
- Air Filter Element: The replaceable, pleated component that traps dust and debris.
- Housing Lid: The cover that protects and seals the filter in place.
- Sealing Gasket: A rubber or foam lining ensuring no unfiltered air bypasses the filter element.
- Air Intake Hose: Connects the air filter housing to the throttle body or intake manifold, channeling clean air into the engine.
| Component | Function |
|---|---|
| Air Filter | Filters out dirt and debris |
| Housing Lid | Secures and protects the filter |
| Sealing Gasket | Prevents air leaks |
| Air Intake Hose | Channels clean air to engine |

Step-by-Step Guide to Removing the Old Air Filter Safely
Before diving in, ensure your engine is completely cool to avoid burns or injuries. Locate the air filter housing, typically a black plastic box near the engine with clips or screws holding the lid in place. Gently unfasten these, maintaining a careful grip to prevent parts from flying off or getting lost. As you open the cover, prepare to find the old filter nestled inside, often coated with a layer of dust or debris. Handle it with care to keep dirt from dispersing into your work area.
Once exposed, pull the filter straight out without twisting—it’ll keep its shape intact and prevent any buildup from breaking apart. Check the inside of the housing; if you spot any dust or leaves, wipe them clean with a damp cloth or use a handheld vacuum for a more thorough job. Here’s a quick checklist to remember during removal:
- Wear gloves to avoid grease or grime on your hands.
- Inspect the filter for any tears or excessive dirt.
- Keep track of screws or clips in a small container.
- Clean the housing to prepare for the new filter.
Installing the New Air Filter with Precision and Care
Begin by carefully aligning the new air filter within the housing, ensuring that it sits flush against the seal. Precision here is crucial; an improper fit can allow contaminants to bypass the filter, impacting your engine’s performance. Take a moment to inspect the edges of the filter and the housing for any debris or damage that might compromise the seal. If you notice anything unusual, clean the area gently with a soft cloth before proceeding.
Once the filter is perfectly seated, follow these simple steps to secure it correctly:
- Close the housing carefully, avoiding any pinching or bending of the filter material.
- Fasten all clips or screws firmly but do not overtighten to prevent damage to the housing or filter.
- Double-check the filter placement by opening the housing quickly to ensure it hasn’t shifted during assembly.
| Step | Key Focus | Tip |
|---|---|---|
| Alignment | Filter sits flush | Use gentle pressure to avoid damage |
| Securing | Fasten clips/screws | Firm but not too tight |
| Verification | Check filter position | Open housing cautiously for confirmation |

Performing a Final Inspection and Testing Engine Performance
Once the new air filter is securely installed, it’s essential to carry out a thorough inspection to ensure everything is properly reassembled. Begin by double-checking the housing cover and clamps to confirm they are tight and sealed. Any gaps, no matter how small, can allow unfiltered air to enter the engine, defeating the purpose of the replacement. While inspecting, look for any loose wires or hoses that may have been disturbed during the process.
After the visual inspection, it’s time to test the engine’s performance. Start the engine and let it idle for a few minutes, paying close attention to the sound and smoothness. Then, take your vehicle for a short drive, monitoring response and acceleration. Signs of an effectively replaced air filter usually include:
- Smoother engine idle
- Improved throttle response
- Better fuel efficiency
- Clean and steady acceleration
| Check | Expected Result |
|---|---|
| Housing Seal | No gaps or loose parts |
| Engine Idle | Steady and smooth |
| Acceleration | Responsive without hesitation |
Q&A
Q&A: How to Replace Engine Air Filter
Q1: Why is it important to replace the engine air filter?
A1: The engine air filter keeps dust, dirt, and debris from entering your engine. A clean filter ensures your engine breathes easy, improving fuel efficiency, performance, and longevity. Neglecting it can lead to clogged filters, reduced airflow, and potential engine damage.
Q2: How often should I replace the engine air filter?
A2: Most manufacturers recommend changing the air filter every 12,000 to 15,000 miles, but this varies depending on driving conditions. If you frequently drive in dusty or urban environments, check and replace it more often.
Q3: What tools do I need to replace the air filter?
A3: Usually, a screwdriver or a socket wrench is enough to open the air filter housing. Some vehicles have clips that can be undone by hand. It’s best to consult your owner’s manual for specifics.
Q4: How do I know which replacement air filter to buy?
A4: Look for an air filter designed specifically for your make and model of car. This ensures proper fit and filtration performance. You can find this info in your owner’s manual or by checking online parts retailers using your vehicle’s details.
Q5: What are the basic steps to replace the air filter?
A5:
- Locate the air filter housing, typically near the engine and secured with clips or screws.
- Open the housing carefully to avoid damaging any components.
- Remove the old, dirty air filter and take note of how it sits inside the housing.
- Insert the new air filter the same way the old one was positioned.
- Close the housing and secure it with screws or clips.
- Double-check everything is snug and sealed.
Q6: Can I clean and reuse an air filter instead of replacing it?
A6: Some air filters, like reusable cotton or foam filters, can be cleaned and re-oiled according to manufacturer instructions. However, standard paper filters are designed to be replaced, not cleaned, as rinsing or blowing them out can damage the filter media.
Q7: What signs indicate it’s time to replace the air filter?
A7: Symptoms of a dirty air filter include reduced fuel efficiency, sluggish engine performance, rough idling, or unusual engine sounds. Visual inspection revealing heavy dirt and debris is the clearest indicator.
Q8: Is replacing the engine air filter a difficult DIY job?
A8: Generally, no. It’s one of the simplest maintenance tasks that most car owners can handle with basic tools and minimal time, often under 15 minutes. However, if you’re unsure, consult a professional mechanic.
Q9: Will replacing the air filter improve my car’s performance immediately?
A9: You might notice smoother acceleration and better fuel economy shortly after replacing a clogged filter, especially if the old one was very dirty. It helps your engine run more efficiently by improving airflow.
Q10: Any tips for maintaining engine air filters longer?
A10: Keep your engine bay clean, avoid driving on extremely dusty roads whenever possible, and inspect the air filter regularly. Timely replacements and quality filters go a long way in protecting your engine’s health.
In Retrospect
Replacing your engine air filter may seem like a small task, but it plays a vital role in keeping your vehicle’s engine breathing easy and performing at its best. With a bit of patience and the right steps, you’ve now added a valuable skill to your maintenance toolkit—one that can save you time, money, and unnecessary trips to the mechanic. So next time your car’s airflow feels a little off, remember: a fresh air filter is often just a few simple moves away from restoring that smooth drive. Keep your engine—and your journeys—running clean and clear.
2 Comments
rapjer
rapjer