

There’s a unique kind of frustration that comes with turning the key and hearing nothing but silence — your car won’t start. Whether it’s a dead battery on a chilly morning or an unexpected drain after leaving the lights on, a jump start is often the quickest way to get back on the road. But with great power comes great responsibility: knowing how to safely jump start your car is essential to avoid damage to your vehicle or harm to yourself. In this guide, we’ll walk you through each step carefully, ensuring that you can revive your engine with confidence and caution.
Table of Contents
- Understanding the Basics of Jump Starting Your Vehicle
- Gathering the Essential Tools and Safety Gear
- Preparing Your Car and Battery for a Jump Start
- Step by Step Guide to Connecting Jumper Cables Correctly
- Common Mistakes to Avoid During the Jump Start Process
- Post-Jump Start Tips for Ensuring Your Car Runs Smoothly
- Q&A
- Closing Remarks

Understanding the Basics of Jump Starting Your Vehicle
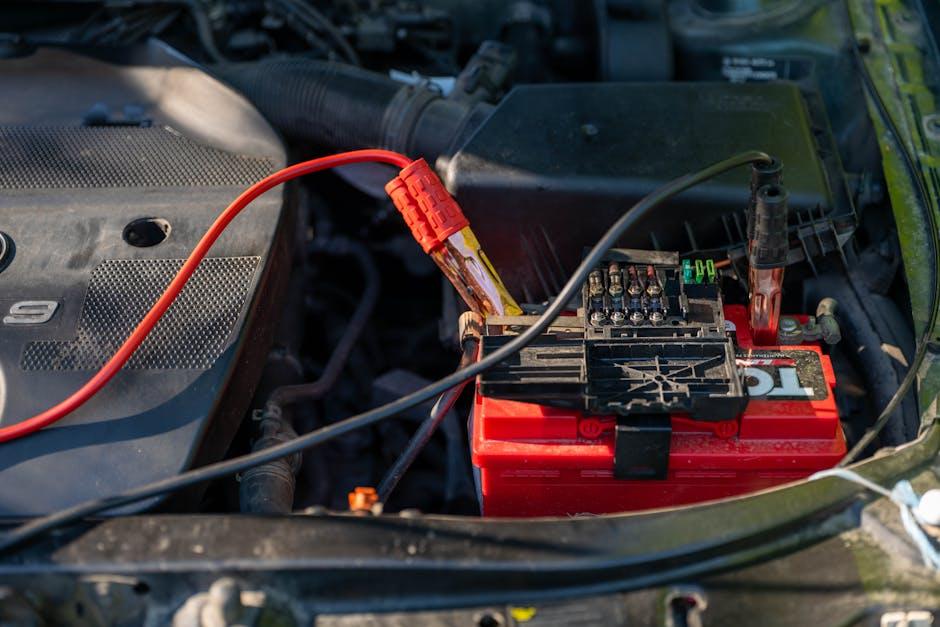
Jump starting a vehicle is a straightforward task, but it requires careful attention to detail to ensure safety and effectiveness. Begin by locating the car battery and identifying the positive (+) and negative (-) terminals. Always use a set of reliable jumper cables, ensuring they are free of corrosion or damage. Connect the positive cable (usually red) to the dead battery’s positive terminal first, then attach the other end to the positive terminal of the charged battery. Next, connect the negative cable (usually black) to the charged battery’s negative terminal. For the final connection, attach the other end of the negative cable to an unpainted metal part of the dead car’s engine block or chassis, away from the battery, to prevent sparks near the battery.
Following the correct order of connections minimizes the risk of electrical shorts and sparks. After all cables are securely attached, start the engine of the donor vehicle and let it run for a few minutes. Then, attempt to start the vehicle with the dead battery. Once started, remove the cables in the reverse order of connection, taking care not to let the clamps touch each other or the car simultaneously. The table below summarizes the key do’s and don’ts during the jump-starting process, helping you remember the essential safety practices:
| Do’s | Don’ts |
|---|---|
| Wear protective gloves and glasses | Do not connect clamps in reverse polarity |
| Use quality, insulated jumper cables | Avoid touching cables/clamps during the process |
| Attach negative clamp to metal part, not battery | Never attempt jump starting if battery is cracked or leaking |
| Ensure engines are off before connecting cables | Do not smoke or use open flames nearby |
Gathering the Essential Tools and Safety Gear
Before attempting to jump start your vehicle, it’s crucial to have the right equipment on hand to ensure both effectiveness and safety. Begin with a reliable set of jumper cables featuring thick, insulated clamps designed to handle high current flow without overheating. Alongside the cables, a pair of safety gloves will protect your hands from sparks and accidental contact with battery acid. Additionally, wearing safety goggles is highly recommended to shield your eyes from any unexpected battery explosions or acid spills during the process.
Beyond personal protective gear, having a fully charged portable jump starter or an external battery pack can be a convenient alternative to relying on another vehicle. Keep a flashlight nearby for low-light conditions, and it’s wise to have a simple, printed guide or checklist at hand, especially if you’re new to jump starting cars. Regularly check that your jumper cables and safety gear are in good condition and free from damage to prevent mishaps.
| Essential Tools | Safety Gear |
|---|---|
| Jumper cables Portable jump starter Flashlight |
Safety gloves Safety goggles Reflective vest |
Preparing Your Car and Battery for a Jump Start
Before initiating the jump start process, ensure both vehicles are parked close enough without touching each other, ideally on a flat, stable surface. Engage the parking brakes on both cars to prevent any movement, and make sure the ignitions are turned off. Locate the batteries and identify the positive (+) and negative (−) terminals; cleaning any corrosion or dirt with a wire brush or cloth can improve the connection. Also, check that both batteries have similar voltage ratings to avoid damaging your electrical system during the jump.
Safety is paramount, so take a moment to remove any metal jewelry and wear protective gloves if available. Avoid touching the clamp ends of the jumper cables simultaneously, and keep the cables clear from moving engine parts like belts and fans once connected. Here’s a quick reference table for the safest initial steps:
| Step | Action |
|---|---|
| 1 | Park vehicles close and set parking brakes |
| 2 | Turn off ignitions and accessories |
| 3 | Clean battery terminals if needed |
| 4 | Remove metal jewelry & wear gloves |
| 5 | Keep cables away from engine parts |
Step by Step Guide to Connecting Jumper Cables Correctly
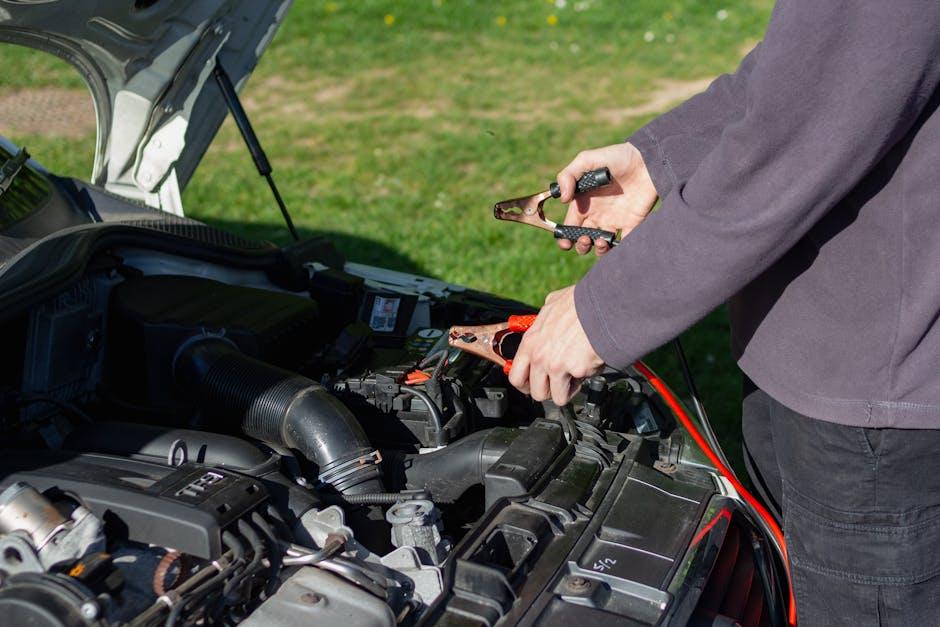
Begin by parking the working vehicle close enough to the dead vehicle so that the jumper cables can comfortably reach both batteries without stretching. Make sure both vehicles are turned off and the parking brakes are engaged to avoid any accidental movement. Locate the positive (+) and negative (-) terminals on each car battery—usually marked with red (positive) and black (negative) covers or symbols. Before connecting the cables, double-check the cables for any damage, and untangle them to avoid confusion during the process.
Now, it’s time to carefully connect the jumper cables in the correct order to ensure safety and effectiveness. Start by attaching one end of the red (positive) cable to the positive terminal on the dead battery. Then, connect the other end of the red cable to the positive terminal of the good battery. Next, attach one end of the black (negative) cable to the negative terminal on the good battery. Finally, connect the other end of the black cable to an unpainted metal surface on the engine block or chassis of the dead vehicle, away from the battery, to prevent sparks. Use the following reference for the connection sequence:
| Step | Cable Color | Connection Point |
|---|---|---|
| 1 | Red | Dead Battery Positive (+) |
| 2 | Red | Good Battery Positive (+) |
| 3 | Black | Good Battery Negative (-) |
| 4 | Black | Dead Vehicle Chassis (Ground) |

Common Mistakes to Avoid During the Jump Start Process
One of the most critical errors during the jump start process is connecting the cables to the wrong terminals. Attaching the red (positive) cable to the negative terminal or vice versa can cause sparks, damage to your vehicle’s electrical system, and even battery explosions. Always double-check the polarity symbols on both batteries before connecting the clamps. Another frequent mistake is attempting to jump start a frozen or damaged battery, which not only reduces the chances of success but can also be dangerous. If you see cracking, leaking, or excessive corrosion, it’s best to replace the battery instead of risking a jump start.
Many drivers also overlook the importance of proper cable placement and avoiding cable contact. Ensure that the cables are securely connected and remain separated from any moving parts like fans or belts within the engine bay. Additionally, jumping vehicles with different voltage systems (such as a 12V and 24V battery) can cause electrical failure, so be sure both batteries match in voltage. Here’s a quick reminder table to highlight key points to remember:
| Mistake | Potential Consequence |
|---|---|
| Swapping positive/negative connections | Sparks, battery damage, explosion risk |
| Jump starting a damaged battery | Reduced start success, safety hazard |
| Cable clamps touching during use | Short circuits, electrical damage |
| Mismatched battery voltage | System failure, possible electronics damage |
- Always confirm cable polarity before connecting.
- Inspect batteries visually for any damage.
- Keep cables clear of moving engine parts.
- Use vehicles with the same voltage system.

Post-Jump Start Tips for Ensuring Your Car Runs Smoothly
After successfully jump-starting your vehicle, it’s crucial to maintain proper care to keep your car running smoothly. Allow the engine to idle for at least 20 minutes or drive at a moderate speed to enable the alternator to recharge the battery thoroughly. Avoid turning off the engine immediately, as this could cause the battery to die again if it hasn’t regained enough charge.
Keep an eye on the following signs to ensure your car stays in good condition:
- Dim headlights or electrical issues, signaling a weak battery.
- Slow engine crank when starting, possibly indicating battery or starter motor troubles.
- Dashboard warning lights such as the battery or alternator icon lighting up.
- Unusual noises coming from the engine or electrical components.
| Tip | Why It Matters |
|---|---|
| Keep battery terminals clean | Prevents corrosion, ensuring solid connections |
| Check battery health regularly | Helps avoid unexpected breakdowns |
| Drive at steady speeds post-jump | Allows effective battery recharge |
Q&A
Q: What tools do I need to safely jump start my car?
A: You’ll need a set of jumper cables and a functioning vehicle with a fully charged battery. It’s also smart to have gloves and eye protection just in case sparks fly.
Q: Where should I position the cars before jump starting?
A: Park the working vehicle close enough for the jumper cables to reach both batteries, but ensure the cars aren’t touching. Turn off both engines and engage the parking brakes for safety.
Q: How do I connect the jumper cables correctly?
A: Start by attaching one red clamp to the dead battery’s positive terminal (+), then connect the other red clamp to the good battery’s positive terminal. Next, clip one black clamp to the good battery’s negative terminal (–). Finally, attach the last black clamp to an unpainted metal part of the dead car’s engine block or frame, away from the battery.
Q: Why shouldn’t I connect the negative cable directly to the dead battery?
A: Connecting the negative clamp to the dead battery’s negative terminal can cause sparks, potentially igniting flammable gases emitted by the battery. Connecting to the engine block grounds the circuit safely.
Q: What precautions should I take before turning on the car?
A: Double-check all connections for security and correct placement. Make sure no cables are near moving engine parts. Wear protective gear and keep bystanders at a safe distance.
Q: How do I start the cars after connecting the cables?
A: First, start the functioning vehicle and let it run for a few minutes to charge the dead battery. Then try to start the dead car. If it doesn’t start after a few attempts, wait a little longer or seek professional help.
Q: What do I do after successfully jump starting the car?
A: Once your car starts, carefully remove the cables in the reverse order you connected them: negative clamp from the grounded metal, negative from the good battery, positive from the good battery, and finally positive from the dead battery. Keep your engine running for at least 20 minutes to recharge the battery.
Q: How can I ensure my battery doesn’t die again soon?
A: Regularly check for loose connections or corrosion on battery terminals, avoid leaving lights on overnight, and have your battery tested if it’s over three years old. If issues persist, consider a professional battery inspection.
Q: Can jump starting damage my car?
A: If done incorrectly, yes—there’s risk of electrical surges or battery damage. Follow safety steps carefully to minimize risk. If unsure, it’s best to call roadside assistance.
Q: What if my car still doesn’t start after a jump start?
A: The battery might be completely dead or other components (starter, alternator) may be faulty. Consult a mechanic for a thorough diagnosis.
Closing Remarks
Mastering the art of safely jump-starting your car is like having a trusty backup plan in your driving toolkit—ready to bring your vehicle back to life when you least expect it. With the right precautions, a calm approach, and a step-by-step process, you can turn what might feel like a roadside emergency into a simple, confidence-boosting task. So, next time your battery gives you trouble, remember these guidelines, take a deep breath, and jump-start your way back on the road with ease and safety. Happy driving!
5 Comments
b8tvyc
b8tvyc
u47cuy
u47cuy
Your point of view caught my eye and was very interesting. Thanks. I have a question for you.