

Imagine stepping into your car on a sweltering summer day, only to be greeted by a disappointingly warm breeze instead of the crisp, cool air you expect. A malfunctioning air conditioning system can turn any drive into an uncomfortable experience, and often the culprit is a hidden leak. Detecting these leaks early is crucial—not only to restore your comfort but also to prevent costly repairs down the road. In this article, we’ll guide you through the essential steps to spot leaks in your car’s AC system, empowering you to keep your ride refreshingly cool all season long.
Table of Contents
- Understanding the Role of Your Car’s AC System in Leak Detection
- Common Signs That Point to AC Leaks in Your Vehicle
- Essential Tools and Techniques for Identifying AC Refrigerant Loss
- Step-by-Step Guide to Performing a Visual Inspection for AC Leaks
- Using UV Dye and Leak Detectors for Accurate Leak Localization
- Preventive Measures and Maintenance Tips to Keep Your AC Leak-Free
- Q&A
- Closing Remarks

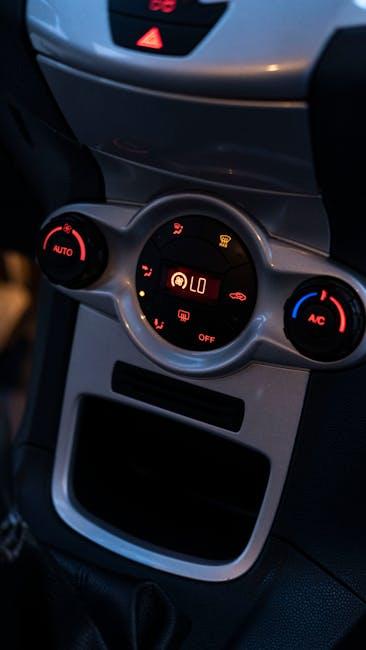
Understanding the Role of Your Car’s AC System in Leak Detection
At the heart of your vehicle’s climate control, the AC system works relentlessly to maintain that perfect, cool environment you rely on, especially during sweltering summer days. When it comes to leak detection, understanding the system’s components and their functions is crucial. Your car’s AC system primarily depends on refrigerant, a substance that cycles through various parts including the compressor, condenser, evaporator, and expansion valve, to absorb and release heat effectively. Leaks disrupt this cycle, leading to decreased cooling performance or complete failure. Recognizing the stages where leaks commonly occur helps in pinpointing issues early, preventing costly repairs down the road.
Becoming familiar with how the system operates also means knowing the common signs of leakage: unexpected drops in cooling efficiency, oily residue around AC fittings, or hissing sounds signaling escaping gas pressure. Regular maintenance checks should include visual inspections of hose connections and seals, where the majority of leaks are found. Below is a quick guide to the typical leak points within your car’s AC system:
| Component | Leak Symptoms | Maintenance Tip |
|---|---|---|
| Compressor | Noise, reduced pressure | Check belt tension & seals |
| Condenser | Oily patches, cooling loss | Inspect for debris and damage |
| Evaporator | Moisture buildup, faint odors | Look for damp spots under dashboard |
| Hoses & Connections | Visible oil, hissing sounds | Regularly tighten clamps and replace worn hoses |
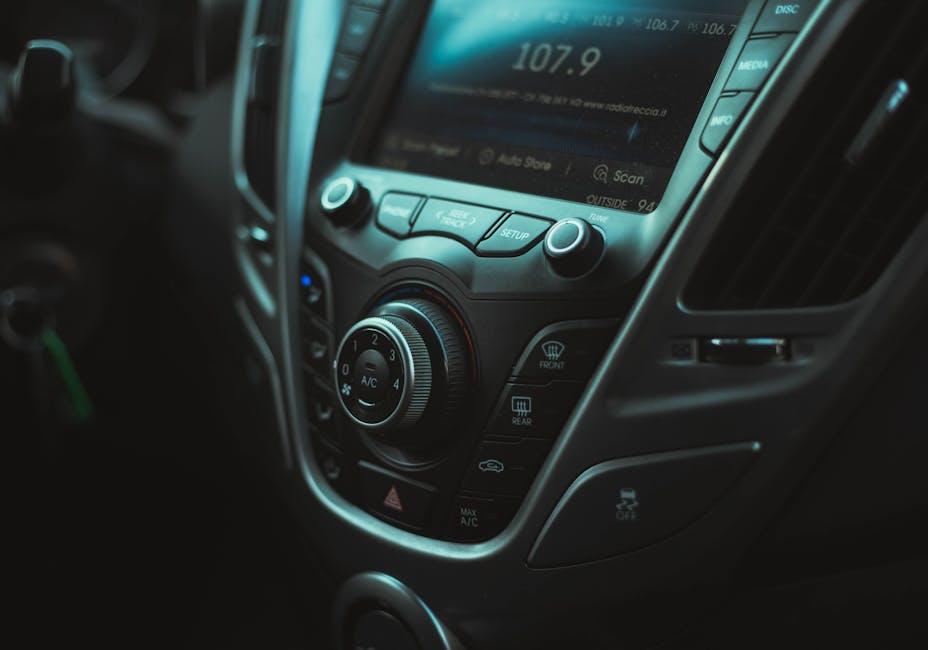
Common Signs That Point to AC Leaks in Your Vehicle
When your car’s air conditioning starts losing its chill, the culprit might be a pesky leak. One of the most noticeable clues is a reduction in cooling efficiency. If the AC blows warm or lukewarm air, especially on higher settings, it’s often a sign that refrigerant is escaping. Pay attention to any hissing noises under the hood or around AC components, as these can indicate pressure leaks. Additionally, a greasy or oily residue on AC fittings and hoses is a visual giveaway since refrigerant leaks often carry lubricating oil along with them. Don’t ignore an unusual, musty or sweet smell when the AC is running—this can also be a hint that refrigerant is escaping.
Other subtle signals to watch out for include increased cabin humidity and longer time required to cool the vehicle interior. Sometimes, the AC compressor engages and disengages irregularly, or you might experience unusual vibrations or noises from the compressor clutch. To help you quickly identify symptoms, here’s a quick reference:
| Symptom | Likely AC Leak Indicator |
|---|---|
| Warm Air from Vents | Low Refrigerant Level |
| Hissing Sound | Gas Escaping from Leak |
| Oily Residue on Components | Refrigerant Mixed with Oil |
| Unusual Odors | Refrigerant Leak Presence |
| Compressor Cycling Frequently | Pressure Drop from Leak |
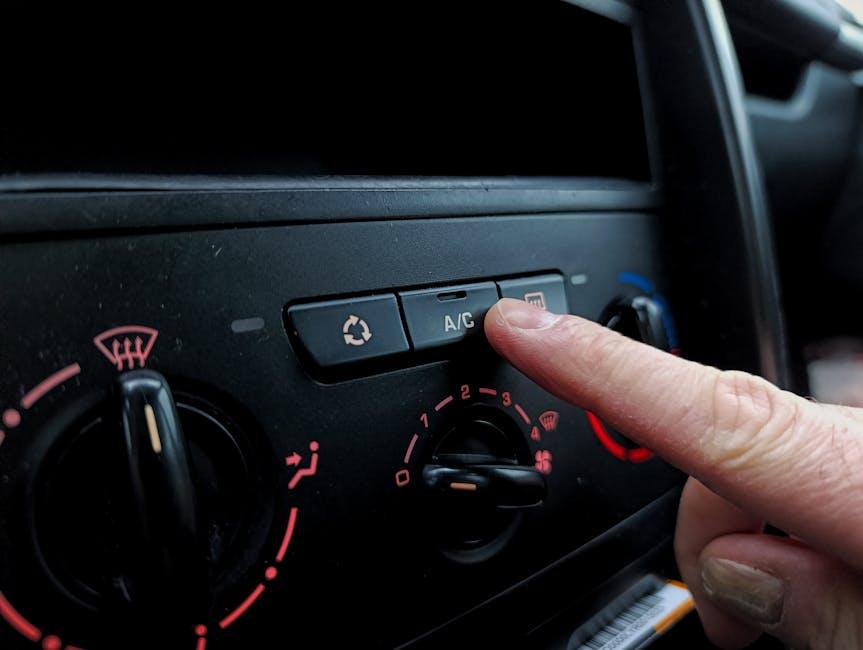
Essential Tools and Techniques for Identifying AC Refrigerant Loss
Detecting refrigerant loss starts with having the right diagnostic tools at your disposal. Pressure gauges are among the most basic but effective instruments, allowing you to measure the system’s pressure and identify abnormal dips that suggest leaks. However, for pinpoint accuracy, electronic leak detectors, which sense escaping refrigerant molecules in the air, offer enhanced sensitivity and quicker results. Additionally, UV dye kits are popular for a visual method: by injecting a fluorescent dye into the AC system and using a UV light, any escaping refrigerant mixed with dye will glow, clearly marking leak points.
Beyond tools, mastering certain techniques greatly improves your success in locating leaks. The soap bubble test is a tried-and-true method where a solution is brushed on suspected areas; bubbling indicates gas escape. Meanwhile, listening carefully for hissing sounds in a quiet environment can reveal tiny leaks that might otherwise go unnoticed. Employing a combination of these techniques, along with thorough inspections around hoses, connections, and compressor seals, ensures a comprehensive approach to safeguarding your car’s cooling performance.
Step-by-Step Guide to Performing a Visual Inspection for AC Leaks
Begin your inspection by carefully examining all visible components of your car’s AC system. Focus on the compressor, hoses, connections, and condenser. Look for oily residue or stains, which are a common visual cue of refrigerant leaks. Pay particular attention to areas where metal meets rubber, as these joints often develop cracks or loose fittings. Don’t forget to check under the vehicle and near the firewall—sometimes leaks drip and pool in unexpected spots, making them easier to detect from below.
Next, use a flashlight to illuminate tight spots and dark corners around the AC components. It’s helpful to clean the areas first with a damp cloth, as dirt can mask leaks. If you spot any suspicious wetness or crusty residue, gently press around the seal or hose for cracks or brittleness. For a more systematic approach, refer to the table below that outlines common leak points and what to look for:
| Component | Leak Indicators | Inspection Tip |
|---|---|---|
| Compressor | Oil stains, loud noises | Check seals and mounts |
| Hoses | Cracks, brittleness | Feel for flexibility, inspect joints |
| Condenser | Dents, dirty spots with residue | Look behind grille and radiator area |
| Fittings & O-Rings | Wetness, worn out seals | Check tightness, replace worn seals |

Using UV Dye and Leak Detectors for Accurate Leak Localization
To pinpoint leaks that are often invisible to the naked eye, UV dye combined with a leak detector offers an unbeatable advantage. This method involves introducing a specially formulated fluorescent dye into the AC system’s refrigerant. Once the system runs, the dye circulates and escapes through any existing leaks. Using a UV light, these escaping dyes glow vibrantly, which makes locating even the smallest breach effortless. Home mechanics and professionals alike rely on this technique as it unveils hidden problems that traditional methods can easily overlook.
Using this approach requires minimal equipment yet provides maximum insight. You’ll typically need:
- UV dye kit: A combination of dye and applicator.
- UV flashlight: To illuminate the leak points.
- Leak detection glasses: They enhance the fluorescence.
| Step | Action | Tip |
|---|---|---|
| 1 | Add dye to AC refrigerant | Use the proper amount based on system size |
| 2 | Run car AC for 10-15 minutes | Ensure dye circulates fully |
| 3 | Inspect all AC components with UV light | Wear leak detection glasses for clarity |
This combination of tools and method makes it easy to catch leaks early, helping maintain optimal performance and avoiding costly repairs down the line. With clear visual confirmation, you can confidently address leaks before they impact your comfort or damage the AC system.
Preventive Measures and Maintenance Tips to Keep Your AC Leak-Free
Regular care is the cornerstone of a well-functioning car AC system and a major defense against leaks. Start by inspecting hoses and connections frequently for signs of wear, cracks, or oily residue, which often indicate refrigerant leakage. Keeping the system clean is equally vital; dirt and debris can clog components and create pressure inconsistencies that lead to cracks. Incorporate these simple habits into your routine:
- Check refrigerant levels at least twice a year.
- Clean condenser fins gently using a soft brush or low-pressure water.
- Run the AC regularly, even in winter, to circulate oil and maintain seals.
- Replace worn-out belts and gaskets promptly to prevent stress on the system.
Professional maintenance plays a critical role in preventing leaks before they become costly repairs. Use expert diagnostic equipment to detect hard-to-find leaks, such as dye tests or electronic leak detectors. Consider this comparison of maintenance tasks for better planning:
| Maintenance Task | Frequency | Purpose |
|---|---|---|
| Refrigerant Level Check | Every 6 months | Prevent undercooling and leaks |
| System Cleaning | Annually | Remove dirt to avoid pressure build-up |
| Seal and Hose Inspection | Every oil change | Detect early signs of degradation |
Following these guidelines will help preserve efficiency, extend your car’s AC lifespan, and keep every journey refreshingly leak-free.
Q&A
Q&A: How to Spot Leaks in Your Car’s AC System
Q1: Why is it important to detect leaks in my car’s AC system early?
A1: Catching leaks early can save you from costly repairs down the road. A leaking AC system loses refrigerant, which reduces cooling efficiency and can damage the compressor. Plus, it’s better for the environment to prevent harmful refrigerant from escaping into the atmosphere.
Q2: What are the common signs that indicate a leak in the AC system?
A2: Some telltale signs include weak or warm airflow from the vents, an unpleasant smell when the AC is running, visible oily stains or residue around AC components, and hissing or bubbling noises when the system is off or running.
Q3: Can I visually inspect the AC system for leaks myself?
A3: Yes, to an extent. Look around the hoses, connections, compressor, condenser, and evaporator for oily spots or discoloration. Refrigerant leaks often carry oil with them, which leaves a telltale greasy mark. However, many leaks are too small or hidden for a simple visual check.
Q4: What tools or methods can help me spot leaks more effectively?
A4: Using a UV dye with a blacklight is one of the most popular DIY methods. The dye circulates with the refrigerant, and any leaks glow under UV light. Professional mechanics may also use electronic leak detectors or inspect the system with nitrogen pressure testing to find subtle leaks.
Q5: Are all leaks dangerous, or can some be ignored?
A5: Any leak is a problem because a loss of refrigerant affects performance and can lead to system damage. Even small leaks should be addressed promptly to maintain your AC’s efficiency and avoid bigger repair bills.
Q6: How often should I have my car’s AC system checked for leaks?
A6: It’s wise to have a thorough AC inspection annually, especially before summer. If you notice symptoms like reduced cooling or strange noises, don’t wait—get it checked immediately.
Q7: What can cause leaks in the first place?
A7: Wear and tear, corrosion, physical damage from road debris, faulty seals, or improper installation are common culprits. Sometimes, the system’s age alone makes joints and hoses susceptible to leaks.
Q8: Can I refill refrigerant if I find a leak?
A8: Recharging the system without fixing the leak is only a temporary fix and wastes money. The refrigerant will escape again, and your AC won’t cool properly. Always repair leaks before refilling.
Q9: When should I seek professional help?
A9: If your initial visual inspection and basic tests don’t pinpoint the leak or if you’re uncomfortable working with refrigerants, it’s best to let a certified technician handle the diagnosis and repair. Refrigerants require special handling and equipment.
Q10: Any tips for preventing leaks in the future?
A10: Regular maintenance is key. Keep the system clean, avoid physical shocks to the AC components, and schedule periodic inspections to catch small issues before they become big leaks. Proper use and gentle handling help prolong your AC’s life.
Closing Remarks
Detecting leaks in your car’s AC system may seem like a daunting task, but with a keen eye and a little know-how, it becomes a manageable and even satisfying challenge. By learning to spot the subtle signs and knowing where to look, you can nip small problems in the bud before they grow into costly repairs. Remember, a well-functioning AC system is not just about comfort—it’s about ensuring your vehicle operates efficiently and reliably. So, stay vigilant, trust your instincts, and keep your cool on every drive.
1 Comment
**herpafend official**
Herpafend is a natural wellness formula developed for individuals experiencing symptoms related to the herpes simplex virus. It is designed to help reduce the intensity and frequency of flare-ups while supporting the bodys immune defenses.