

Imagine having a tool in your glove compartment that can unlock the hidden language of your car’s electrical system—a device that lets you diagnose problems with precision and confidence before you even call a mechanic. That tool is the multimeter, a small yet powerful instrument that can measure voltage, current, and resistance with ease. Whether you’re a seasoned DIYer or a curious beginner, learning how to use a multimeter on your car can save you time, money, and frustration. In this article, we’ll guide you step-by-step through the essential techniques to harness this versatile gadget, helping you better understand your vehicle and keep it running smoothly.
Table of Contents
- Choosing the Right Multimeter for Automotive Use
- Preparing Your Car and Multimeter for Accurate Testing
- Measuring Battery Voltage and Assessing Health Status
- Testing Alternator Output to Ensure Proper Charging
- Checking Continuity and Resistance in Wiring and Fuses
- Diagnosing Sensor Functionality with Voltage and Current Tests
- Q&A
- To Wrap It Up

Choosing the Right Multimeter for Automotive Use
When selecting a multimeter for automotive use, accuracy and durability should top your list. Automotive environments can be tough on tools—heat, moisture, and vibration are common—so choosing a multimeter designed to withstand these conditions is essential. Look for models with a robust casing and a clear, backlit display to ensure visibility even in poorly lit engine compartments. Features like auto-ranging simplify measurements by automatically selecting the correct range, making it faster and preventing user error. Additionally, consider multimeters with special automotive modes, such as RPM or duty cycle measurements, tailored to the needs of vehicle diagnostics.
Before making a purchase, evaluate the key specifications and features in relation to your typical car maintenance tasks. Here’s a quick comparison to help guide your decision:
| Feature | Basic Multimeter | Automotive Multimeter |
|---|---|---|
| Durability | Standard plastic casing | Shock-resistant, rubberized housing |
| Voltage Range | Up to 600V | Wider range, often 1,000V+ |
| Specialized Functions | Basic measurements only | RPM, duty cycle, temperature sensor support |
| Display | Basic LCD | Backlit, large digits for easy reading |
Keep these considerations in mind, and you’ll be better equipped to choose a multimeter that not only meets your needs but also endures the rigors of automotive diagnostics with ease.

Preparing Your Car and Multimeter for Accurate Testing
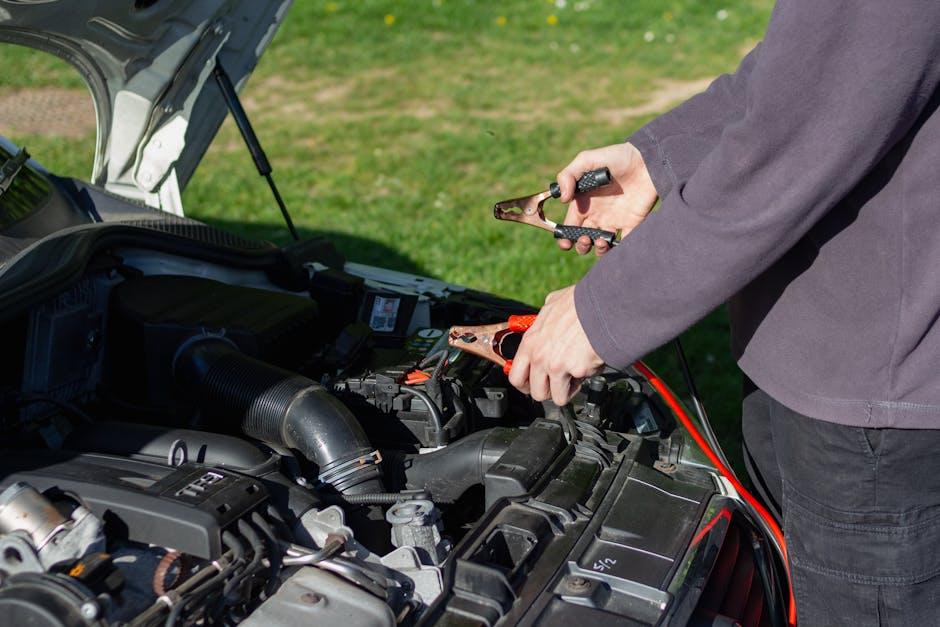
Before diving into measurements, it’s essential to set the stage for precision. Start by ensuring your car’s engine is off and the keys are removed from the ignition—this prevents any accidental starts or electrical surges. Open the hood and clean away any dirt or grime around the battery terminals and fuse box with a dry cloth or a gentle brush; grime can interfere with probe contact and skew readings. Additionally, make sure your multimeter’s probes are intact, with no frayed wires or damaged tips, as this directly impacts the quality of your diagnostics.
Next, calibrate your multimeter to the correct settings based on the test you plan to perform. For voltage checks, set it to DC voltage, and for resistance or continuity, adjust accordingly. It’s good practice to test your multimeter on a known source, like a fresh 9V battery, just to confirm accurate readings. Keep a checklist handy for essentials that optimize measurement quality, such as:
- Battery terminals: Clean and corrosion-free
- Multimeter probes: Intact and properly connected
- Correct multimeter mode: Voltage, resistance, or continuity
- Car battery: Fully charged for reliable voltage output
| Test Type | Multimeter Setting | Typical Range |
|---|---|---|
| Battery Voltage | DC Voltage (20V) | 12-14V |
| Fuse Continuity | Continuity/Resistance | Near 0 Ω |
| Sensor Resistance | Resistance (Ω) | Varies by sensor |
Measuring Battery Voltage and Assessing Health Status
Start by setting your multimeter to the DC voltage setting, typically marked with a “V” and a straight line. Connect the red probe to the battery’s positive terminal and the black probe to the negative terminal. A healthy, fully charged car battery should read between 12.6 to 12.8 volts when the engine is off. Readings below 12.4 volts may indicate a partially discharged battery, while anything under 12 volts suggests the battery needs charging or replacement.
To gain a clearer picture of your battery’s health, consider the voltage values during engine start-up and while running. Use this table to quickly assess the status:
| Measurement Condition | Voltage Range | Battery Status |
|---|---|---|
| Engine Off | 12.6 – 12.8 V | Fully Charged |
| Engine Off | 12.4 – 12.6 V | Partially Charged |
| Engine Off | < 12.4 V | Discharged / Weak |
| Engine Running | 13.7 – 14.7 V | Charging Normally |
| Engine Running | < 13.7 V or > 14.7 V | Alternator / Charging Issue |
- Warning: Never touch both terminals simultaneously with your probes to avoid sparks or damage.
- Tip: Test with the engine off for static battery voltage and with it running to evaluate the alternator’s performance.

Testing Alternator Output to Ensure Proper Charging
To determine whether your alternator is effectively charging the car’s battery, start by setting your multimeter to the DC voltage mode, typically denoted with a “V” and a straight line. With the engine off, connect the multimeter probes to the battery terminals—red on positive and black on negative. An initial reading around 12.6 volts indicates a fully charged battery. Next, start the engine and let it idle. Recheck the voltage across the battery terminals; a properly functioning alternator should raise this reading to between 13.8 and 14.8 volts. This increase confirms that the alternator is supplying power and charging the battery efficiently.
For further diagnostics, observe the following during your test to ensure accurate results:
- Engine Speed: Maintain a consistent idle speed during measurement.
- Multimeter Accuracy: Use a reliable meter with fresh batteries.
- Connection Quality: Ensure probes have firm contact with terminals.
| Reading Condition | Expected Voltage |
|---|---|
| Engine Off | 12.4–12.6 V |
| Engine Idle | 13.8–14.8 V |
| High Engine RPM | ≈14.5 V |
Checking Continuity and Resistance in Wiring and Fuses
Before diving into more complex diagnostics, ensure your wiring and fuses are intact by testing for continuity and resistance. This process helps detect breaks, shorts, or high resistance that could interrupt electrical flow and cause malfunctions. Begin by setting your multimeter to the continuity or resistance (ohms) mode. When testing continuity, a beep or zero reading confirms a complete path, indicating the wire or fuse is unbroken. No beep or a high resistance reading suggests a break or corrosion, which requires replacement or repair.
Here’s a quick checklist to streamline your continuity and resistance checks:
- Disconnect power: Always turn off the vehicle and disconnect the battery to avoid short circuits.
- Identify test points: Use wiring diagrams to locate the components and fuses you need to test.
- Inspect visually first: Look for burnt or damaged areas before relying on the multimeter.
- Probe carefully: Avoid damaging connectors by holding probes steadily and avoiding excessive force.
| Test Type | Multimeter Setting | Expected Reading | Meaning |
|---|---|---|---|
| Continuity | Continuity Mode | Beep/0 Ω | Wire or fuse OK |
| Resistance | Ohm (Ω) Mode | Low resistance (< 1 Ω) | Good connection |
| Resistance | Ohm (Ω) Mode | High or infinite resistance | Broken or faulty wire/fuse |

Diagnosing Sensor Functionality with Voltage and Current Tests
When assessing sensor functionality, a multimeter becomes an indispensable tool that provides vital clues about the electrical health of automotive components. Start by setting your multimeter to measure voltage and connect the leads to the sensor’s power supply and ground terminals. A proper sensor should receive a steady voltage within the manufacturer-specified range. Any deviation—such as a drop or fluctuation—can signal wiring issues, poor connections, or a failing sensor.
Next, switch to the current measurement setting to gauge the sensor’s operating current. Many sensors have typical current draw values which can be found in service manuals or datasheets. Testing under load conditions will reveal if the sensor is drawing excess current, which might indicate internal shorts, or if the current is too low, potentially pointing to a broken element inside. Use the quick reference below for common sensor behaviors during these checks, helping you to identify anomalies faster:
| Sensor Type | Expected Voltage | Typical Current | Common Issue Indicators |
|---|---|---|---|
| Oxygen Sensor | 0.1 – 0.9 V | Less than 20 mA | Voltage stuck, low current |
| Throttle Position Sensor | 4.5 – 5 V | 5 – 10 mA | Voltage drop, no response on throttle |
| Mass Air Flow Sensor | 12 V supply | 12 – 30 mA | High current draw, voltage spikes |
Q&A
Q&A: How to Use a Multimeter on Your Car
Q1: What is a multimeter, and why would I need one for my car?
A1: A multimeter is a handheld device that measures electrical properties such as voltage, current, and resistance. For your car, it’s an indispensable tool to diagnose battery health, check fuses, test sensors, and troubleshoot wiring problems—helping you avoid costly trips to the mechanic and understand your car’s electrical system better.
Q2: What types of multimeters are suitable for automotive use?
A2: Both analog and digital multimeters can work, but digital multimeters (DMMs) are preferred because they are more precise, easier to read, and often include automotive-specific features like automotive amps measurement and diode testing. Look for one with a voltage range up to at least 20V DC and a current range safe for automotive circuits.
Q3: How do I test my car battery’s voltage with a multimeter?
A3: Set your multimeter to measure DC voltage (usually noted as V––). Connect the red lead to the battery’s positive terminal, and the black lead to the negative terminal. A fully charged battery should read about 12.6 volts when the engine is off. If it’s significantly below 12.4 volts, your battery may be undercharged or failing.
Q4: How can I check a blown fuse using a multimeter?
A4: Remove the fuse from the fuse box and set your multimeter to continuity mode or the lowest resistance setting. Touch the probes to each side of the fuse. If the meter beeps or shows near-zero resistance, the fuse is good. No beep or infinite resistance means the fuse is blown and needs replacement.
Q5: Can I use a multimeter to test sensors in my car?
A5: Yes! Many sensors can be diagnosed by checking their voltage output or resistance. For example, oxygen sensors, temperature sensors, and throttle position sensors have specific voltage or resistance ranges that indicate normal operation. Consult your car’s manual for the sensor’s specifications and measure accordingly.
Q6: What safety precautions should I keep in mind while using a multimeter on my car?
A6: Always start with the multimeter set to the highest range to avoid damage and reduce it as needed. Disconnect the battery when measuring resistance or continuity to avoid false readings or shorts. Wear gloves and eye protection, and avoid touching metal parts when testing live circuits.
Q7: How can a multimeter save me money on automotive repairs?
A7: By accurately diagnosing issues like a weak battery, faulty alternator, broken wires, or bad sensors, a multimeter helps you pinpoint problems quickly. This means you can fix simple issues yourself or provide mechanics with precise information, preventing unnecessary part replacements and labor costs.
Q8: I’m new to using a multimeter—any beginner tips?
A8: Start by familiarizing yourself with your multimeter’s functions and symbols. Practice measuring household batteries or car fuses before jumping into more complex tasks. Always keep the user manual handy, and when unsure, seek guidance from trustworthy tutorials or professionals.
Using a multimeter on your car can be the window into its electrical soul, empowering you to maintain and repair with confidence. With practice and care, it transforms from a mysterious gadget into your dashboard detective’s trusty sidekick.
To Wrap It Up
Mastering the multimeter transforms a once-daunting dashboard of wires and signals into a map of clear, measurable insights. Whether you’re tracking down a stubborn battery drain or confirming the health of a sensor, this handy tool empowers you to take the driver’s seat in your car’s electrical diagnostics. With patience, practice, and the steps outlined here, the multimeter becomes not just an instrument, but your trusted co-pilot on the road to automotive confidence. So next time your car sends a puzzling signal, remember: with a multimeter in hand, you’re ready to decode the story beneath the hood.
2 Comments
851jdj
851jdj