

Picture this: you’re on a long road trip, the sun is shining, and your playlist is just right. Suddenly, that faint but unmistakable thump-thump under your car warns you of a low tire. Before anxiety sets in, imagine having a simple, portable tool at your fingertips that can quickly bring your tire back to life. Enter the tire inflator—a modern driver’s unsung hero. Whether you’re a seasoned road warrior or a casual commuter, knowing how to use a tire inflator can save you time, money, and a whole lot of stress. In this guide, we’ll walk you through the steps to make inflation quick and foolproof, so you can keep your journey rolling smoothly.
Table of Contents
- Choosing the Right Tire Inflator for Your Needs
- Preparing Your Vehicle and Inflator for Safe Use
- Step-by-Step Guide to Connecting and Operating the Inflator
- Understanding Pressure Readings and Optimal Tire Inflation
- Maintenance Tips to Keep Your Tire Inflator in Top Condition
- Troubleshooting Common Issues During Inflation
- Q&A
- Concluding Remarks

Choosing the Right Tire Inflator for Your Needs
When selecting a tire inflator, it’s essential to consider the type of tires you usually deal with—whether for cars, bicycles, motorcycles, or larger vehicles like trucks and SUVs. Portable inflators offer convenience for quick roadside fixes, while stationary models provide more power and durability for garage use. Look for inflators with adjustable pressure settings and an easy-to-read digital gauge to ensure precise inflation every time. Features such as built-in LED lights, automatic shutoff, and multiple nozzle adapters add versatility and ease to your tire maintenance routine.
Additionally, understand the power source that best suits your lifestyle. Corded models plug directly into a wall outlet for consistent power, whereas cordless, rechargeable inflators provide unmatched portability and freedom. Consider the inflator’s inflation speed, noise levels, and weight to match your usage preferences. Below is a quick reference table to help gauge which inflator might fit your needs:
| Feature | Best For | Key Benefit |
|---|---|---|
| Portable Cordless | Travel & Outdoors | Lightweight & Rechargeable |
| Plug-in Corded | Home Garage | Continuous Power & Speed |
| Heavy-Duty Compressor | Large Vehicles & Fleet | High Pressure & Durability |

Preparing Your Vehicle and Inflator for Safe Use
Before you begin inflating your tires, it’s crucial to ensure that both your vehicle and the inflator are properly prepared to guarantee a safe and efficient process. Start by parking your car on a flat, stable surface and engaging the parking brake; this minimizes any risk of movement. Next, double-check the tire’s recommended pressure, which is typically found on a sticker inside the driver’s door or in the owner’s manual. This step is essential to avoid overinflation or underinflation. Always inspect the tire for any visible damage or embedded objects that might interfere with inflation or indicate a need for repair.
Preparing the inflator involves its own set of precautions. Make sure the device is compatible with your tire valve and that all connectors are clean and in good condition. If your inflator is powered by your vehicle’s battery or lighter socket, confirm your engine is running to prevent any significant battery drain. Keep the inflator on a stable surface nearby and ready for use. The following checklist can help you keep track:
- Vehicle parked on level ground
- Parking brake engaged
- Recommended tire pressure verified
- Tire inspected for damage
- Inflator checked for valve compatibility
- Connections clean and secure
- Vehicle engine running if using electric inflator
Step-by-Step Guide to Connecting and Operating the Inflator
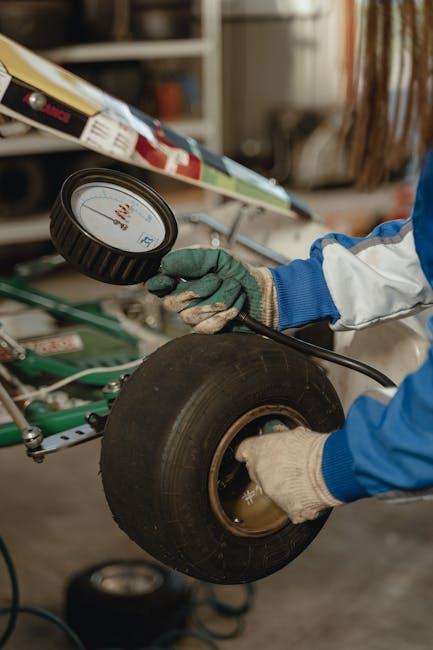
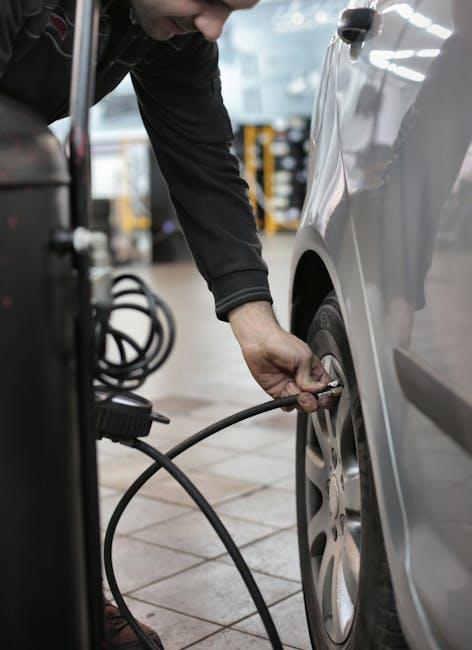
Begin by ensuring the inflator is compatible with your tire’s valve type. Locate the valve stem on your tire and carefully remove the cap. Connect the inflator’s nozzle securely to the valve, making sure there are no gaps to prevent air leakage. If your model includes a locking lever, engage it to hold the nozzle firmly in place. Before plugging in the inflator, check the pressure setting on the built-in gauge or digital display to match your tire’s recommended PSI, often found on the tire sidewall or vehicle door sticker.
Once everything is properly connected and set, switch on the inflator. Keep an eye on the pressure reading as the tire fills; many models will automatically shut off when the desired pressure is reached, but if not, closely monitor and manually switch off to avoid over-inflation. After inflating, carefully release the locking lever (if applicable) and disconnect the nozzle from the tire valve. Finally, replace the valve cap to keep the valve clean and sealed. Always store the inflator in a dry, cool place for longevity and quick access during emergencies.

Understanding Pressure Readings and Optimal Tire Inflation
When checking your tire pressure, accuracy is key. Most inflators come with built-in gauges, but it’s important to understand how to read them correctly. Pressure gauges can show readings in PSI (pounds per square inch), kPa (kilopascals), or BAR, so be sure to use the measurement unit that aligns with your vehicle’s specifications. A fluctuating or unclear reading might indicate a faulty gauge or a loose connection, so always double-check to avoid over or under inflation. Remember, tire pressure should be measured when tires are cold, as heat from driving temporarily increases pressure levels.
Optimal tire inflation not only improves vehicle handling but also extends tire life and boosts fuel efficiency. Here’s a quick guide to help you maintain proper pressure:
- Find the recommended PSI: This can usually be found on the driver’s door frame or in the owner’s manual.
- Measure and inflate when cold: Tires heat up during driving, which skews readings.
- Adjust in small increments: Inflate or deflate in 1-2 PSI steps and recheck the gauge.
- Don’t forget the spare tire: It’s easy to overlook but critical in emergencies.
| Vehicle Type | Recommended Tire Pressure (PSI) |
|---|---|
| Compact Cars | 30 – 35 |
| Sedan | 32 – 38 |
| SUV | 35 – 42 |
| Light Truck | 40 – 50 |
Maintenance Tips to Keep Your Tire Inflator in Top Condition
Keeping your tire inflator in peak condition ensures reliable performance every time you need it. Start by regularly cleaning the device, especially the air intake and hose connections, to prevent dust and debris buildup. Store your inflator in a cool, dry place to avoid moisture damage, which can degrade its components over time. Don’t forget to check the power cords and hose for any cracks or wear; replacing them promptly can prevent sudden malfunctions.
Periodic maintenance extends the life of your inflator and safeguards its accuracy. Here’s a quick checklist to keep handy:
- Inspect the pressure gauge for cracks or fogging that can affect readings.
- Lubricate the moving parts, if applicable, with manufacturer-recommended oils.
- Test the unit monthly using a known good tire to verify pressure accuracy.
- Replace filters or seals as per the user manual to maintain airflow efficiency.
| Maintenance Task | Frequency | Reason |
|---|---|---|
| Clean air intake and hose | Monthly | Prevent clogging and maintain airflow |
| Check power cord & hose | Every 3 months | Avoid equipment failure |
| Test pressure gauge accuracy | Monthly | Ensure accurate tire inflation |
| Lubricate moving parts | Every 6 months | Reduce wear and friction |

Troubleshooting Common Issues During Inflation
When your tire inflator refuses to start or maintains a weak airflow, start by checking the power source. Ensure the device is properly plugged in or the battery is fully charged. Sometimes, a loose connection or dirty terminals can cause power disruptions; a quick wipe with a dry cloth might do the trick. Additionally, inspect the air hose for any kinks, cracks, or clogs that can restrict airflow. A smooth, unobstructed hose ensures optimal performance.
If you find the pressure gauge reading inconsistently, it might be time to recalibrate or replace it. Some models include a reset function—refer to the instruction manual for exact steps. Below is a quick reference to common troubleshooting signs and fixes:
| Issue | Possible Cause | Quick Fix |
|---|---|---|
| Inflator won’t start | Battery low or power loose | Charge battery or check plug |
| Weak airflow | Hose kinked or clogged | Straighten and clean hose |
| Gauge fluctuates | Faulty sensor or debris | Clean or recalibrate sensor |
- Tip: Always keep a small brush and cloth handy for quick maintenance during use.
- Note: Avoid overinflating by cross-checking with a reliable tire pressure gauge.
Q&A
Q&A: How to Use a Tire Inflator
Q1: What exactly is a tire inflator?
A tire inflator is a handy portable device designed to pump air into your vehicle’s tires, ensuring they maintain the right pressure for safe driving and optimal performance.
Q2: When should I use a tire inflator?
Use a tire inflator anytime your tire pressure is low or when you notice your ride feels less stable. It’s especially useful during unexpected flats or before long trips to keep your tires properly inflated.
Q3: How do I check if my tire needs more air?
The easiest way is using a tire pressure gauge. Compare the reading to your vehicle’s recommended tire pressure, usually listed on a sticker inside the driver’s door or in the owner’s manual.
Q4: What are the basic steps to use a tire inflator?
- Prepare: Park your car on a flat surface and turn off the engine.
- Remove valve cap: Unscrew the cap from the tire’s valve stem.
- Attach the inflator: Securely connect the inflator nozzle to the valve stem.
- Set pressure (if applicable): If your inflator has a preset option, dial in the desired PSI.
- Power on: Turn the inflator on and let it pump air.
- Monitor pressure: Check periodically with a gauge until the recommended pressure is reached.
- Finish up: Turn off the inflator, remove the nozzle, and replace the valve cap.
Q5: Are there any precautions I should take?
Yes! Avoid over-inflating the tire, which can cause uneven wear or blowouts. Also, don’t use the inflator on a hot tire immediately after driving; let it cool to get an accurate pressure reading.
Q6: Can a tire inflator be used on all types of tires?
Most inflators work on standard car tires, motorcycles, bikes, and sometimes even sports balls and inflatable toys, depending on the included nozzles.
Q7: How do I maintain my tire inflator for long-lasting use?
Regularly check the power source or battery level, clean the nozzle and air filter, and store it in a dry, cool place away from dust and damage.
Q8: What if my tire has a slow leak after inflating?
A tire inflator is a temporary fix. For leaks, consult a professional for repair or replacement because inflators don’t seal punctures.
Armed with these tips, you can confidently handle low tire pressure situations and keep your rides smooth and safe!
Concluding Remarks
Mastering the use of a tire inflator is more than just a practical skill—it’s a small step toward greater confidence on the road. With a few simple techniques and a little attention to detail, you can ensure your tires are always at their best, ready to carry you safely wherever the journey leads. So next time you face a low tire, remember: the power to inflate is in your hands, and with it, a smoother, safer ride awaits.